

Hello!! I’m here with a tutorial today that I’m really excited about! 3 years ago, I made a Totoro costume for Yuki and it was a huge hit with Totoro fans around the world. Since then I’ve been getting regular emails about custom orders for costumes or selling the pattern for it, but I don’t do either. I figured the least I can do is a tutorial for the costume so people can try their hand at making one themselves!


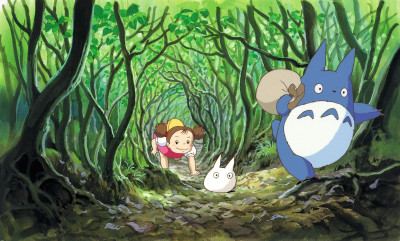
If you’re not familiar, Totoro is a character from the Studio Ghibli movie, My Neighbor Totoro. It’s an awesome movie about 2 young girls who move into an old house in the country with their dad to be closer to their mother who is the hospital. The girls discover magical creatures in the nearby forest and together they embark on an adventure.
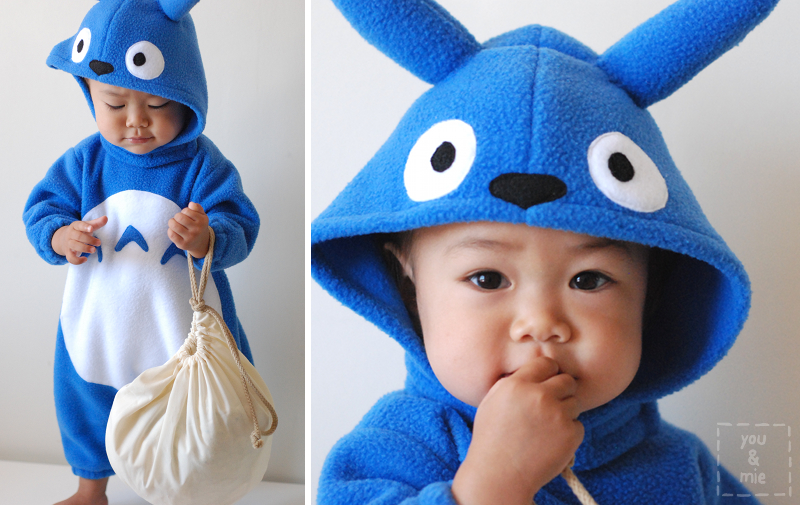
There are three Totoros in the movie – the main one is the huge gray Totoro, but there is also a chu-Totoro (medium) that is blue and a chibi-Totoro (small) that is white. I decided to do the blue Totoro this time around just to do something a little different. It looks similar to the big gray Totoro, but has less details (no whiskers, less arrows on the chest, etc.)

The costume is very similar to the original, but I’ve made some adjustments. I tried to make this tutorial as simple as I could to make it possible for beginners or even adventurous first timers to give it a go. I walk you through drafting your own pattern and all the steps to put the costume together. The tutorial is LONG, but there are a ton of pictures to help. There is a zipper, but that is the trickiest part of the sewing and I have a suggestion for an alternative if you’re REALLY opposed to installing a zipper.
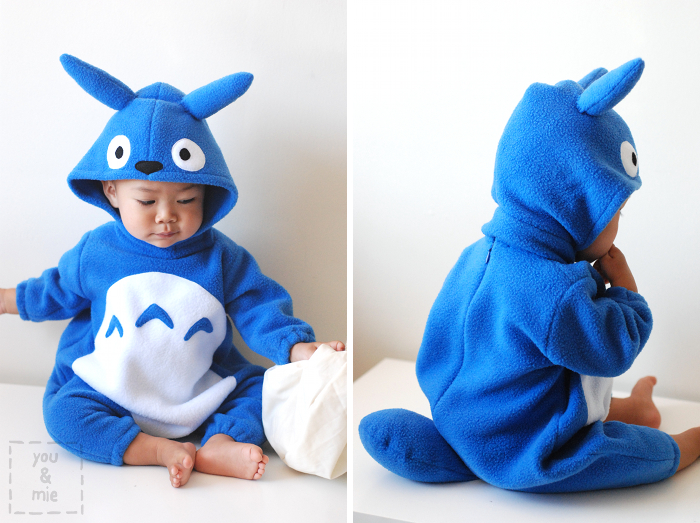
The costume is two pieces, the body suit and a separate hood. The original costume had snaps along the inside leg for easy diaper changes, but I omitted that this time around because it just didn’t seem necessary for a costume (and I was lazy).
Ok, should we get started??
What you’ll need:
- Knit fabric for the bodysuit and hood (more information below)
- Scraps of fabric for eyes, nose, etc.
- Fiberfill or stuffing for the ears and tail (if you don’t want to buy something special for this you can use anything soft to stuff them – scraps of fabric, cotton balls, stuffing from an old pillow, etc)
- 1/4 inch wide elastic
- Safety pin
- Velcro
- 12″ invisible zipper
- Thread in the color of the main fabric, white and black
- Tracing paper (the larger the better!)
- A one piece pajama and a hooded jacket to use for making the pattern
- Hand sewing needle
Fabric: I used fleece for both costumes and it is very comfy and very warm. It’s got a little stretch and I think it’s great for this costume if you live in an area that is chilly around October. Other options are sweatshirt knit and french terry.
Seam allowance: Since you’re making your own pattern, you can make and use whatever seam allowance you are comfortable with. I used a 1cm (3/8″) seam allowance throughout, except for the back center seam and anywhere else I specify something different.
And though I will not mention it after each step, press every seam after sewing with a warm iron.
Let’s get started!
BODYSUIT:
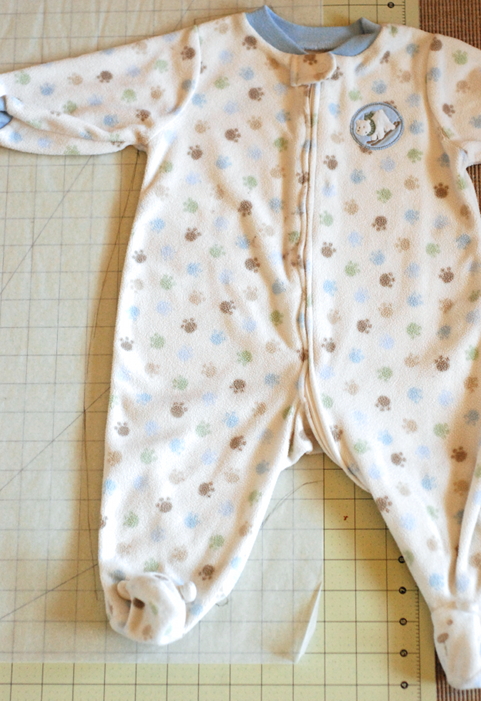
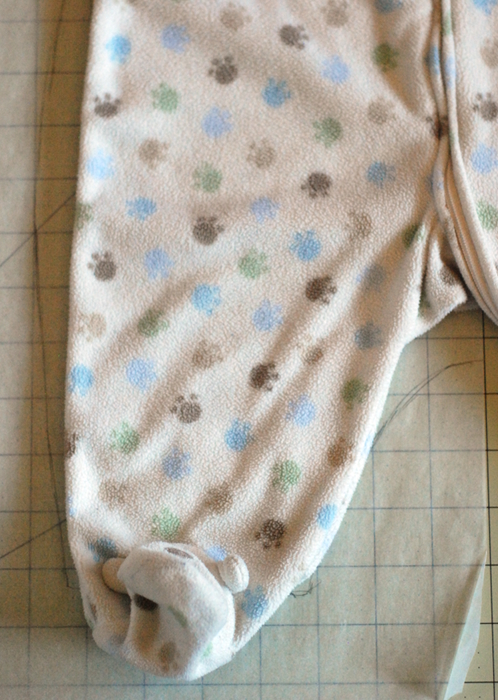
Find a pair of one piece pajamas and lay it on top of your tracing paper so that the center of the pajamas is lined up with the edge of the paper. Use pajamas that are well fitting or a little baggy, or you can add extra width to your pattern to make it a little baggier. If you don’t have pajamas, you can really use any type of clothing, just be sure to add width if you want your bodysuit to be loose as opposed to tight fitting.
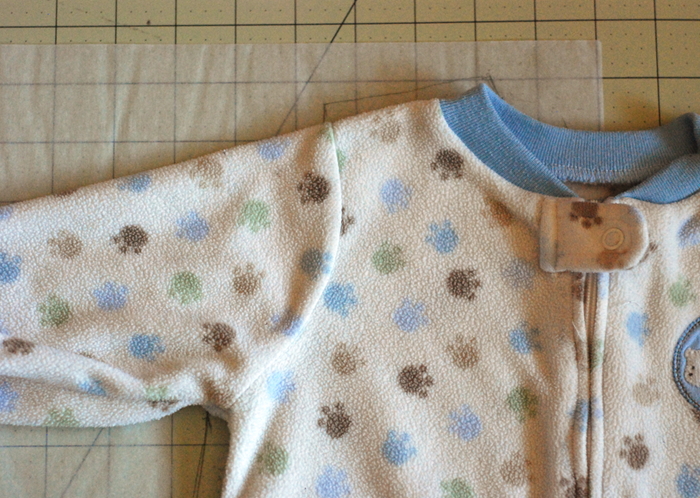
Adding seam allowance (I used a 1cm seam allowance), trace around the shoulder, side seam and inseam. You’ll have to move the pajamas and do a little freehand drawing to get the armhole and neckline. I made my neckline pretty high in the front so that there wouldn’t be gap between the hood and the bodysuit. It can easily be lowered later if you think it’s too high during a fitting. No need to add seam allowance to the neckline.
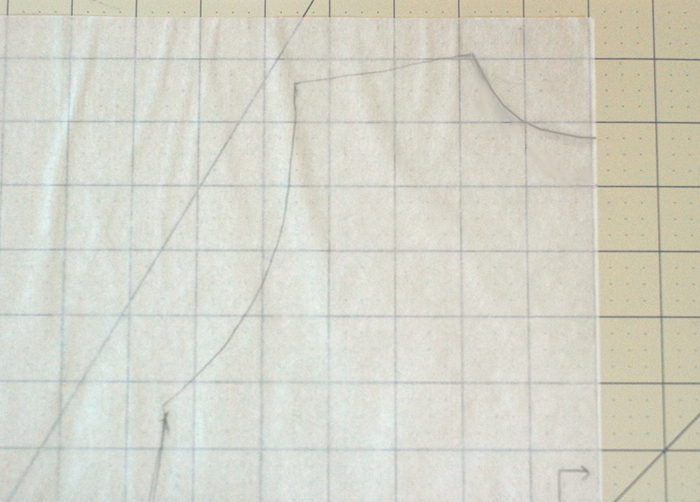
I rounded out the shape of my pattern a little around the hips and thighs to try and get a more round shape. Add 3/4″ to the bottom of the leg for hemming (I didn’t give mine enough length and the legs ended up too short on Kaya)!
This is the front of your body suit and will be cut on the fold along the straight edge.
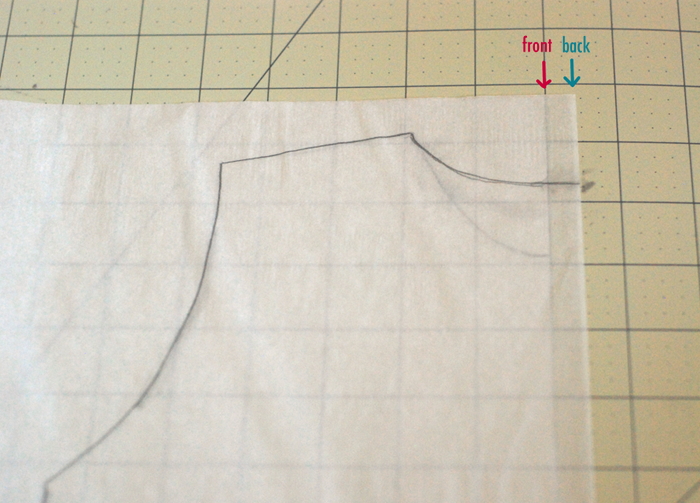
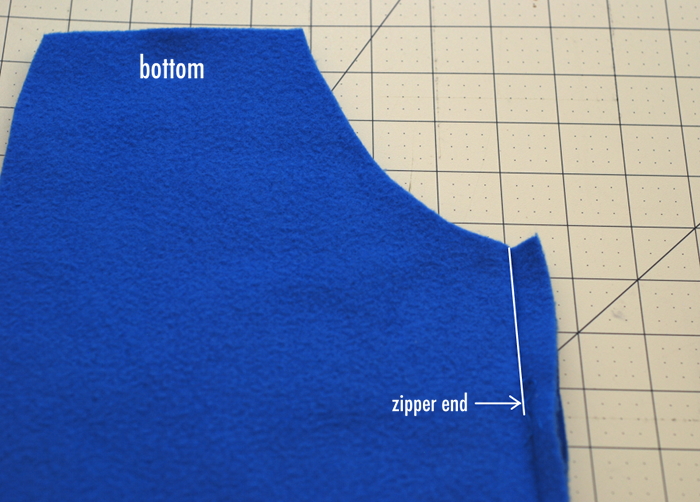
Now we’ll make the pattern for the back piece. Place another sheet of tracing paper on top of your front piece, but have the edge extend a 1/2 inch past the edge of the front pattern piece.
Trace the front pattern piece, but raise the neckline in the back to match the sample pajamas. This is the back of the bodysuit and you’ll cut two of these. The extra 1/2 inch of fabric that you added to the center seam will be used to install the zipper.
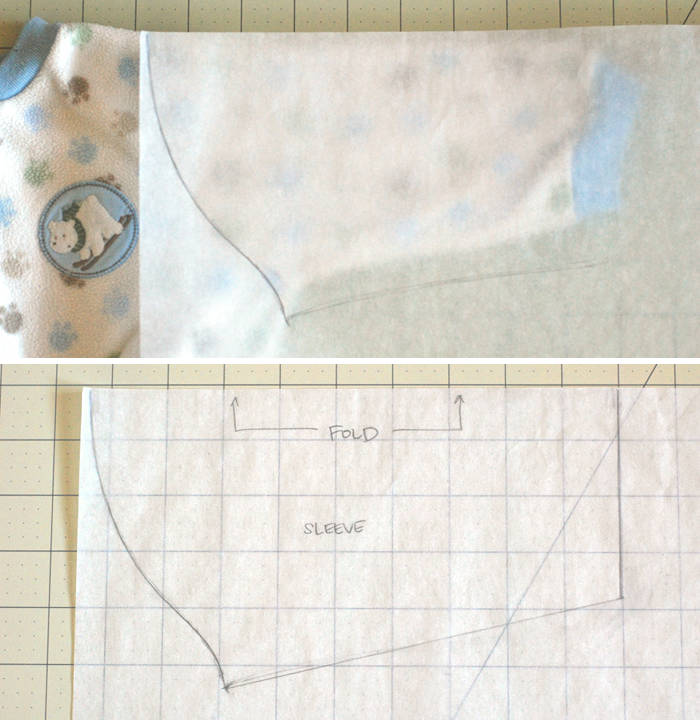
Use your pajamas to trace the sleeve shape adding seam allowance and an extra 3/4″ for hemming.
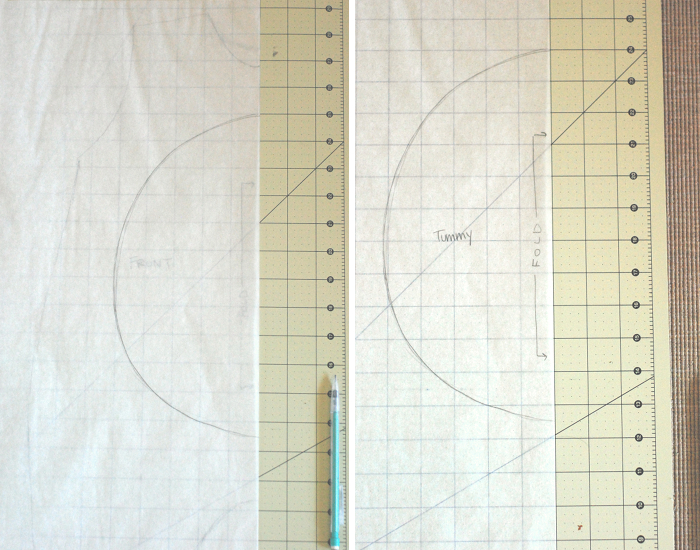
Lay another piece of tracing paper over your “front” pattern piece and draw a circular shape for the tummy. This will also be cut on the fold.
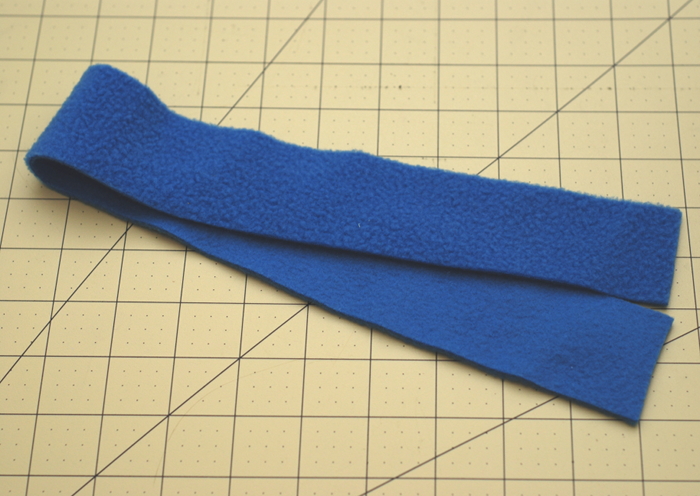
Cut out your fabric. You’ll need one front piece cut on the fold, 2 back pieces, 2 sleeves cut on the fold and 1 tummy circle cut on the fold. You’ll also need a strip of fabric for finishing the neckline that is 2″ wide and several inches longer than your neckline. I cut mine over 20″ long and it was pleeeenty long enough. I’d rather be safe than sorry 🙂
Make sure that your fabric it cut so that it stretches when you pull on the short ends of the fabric.
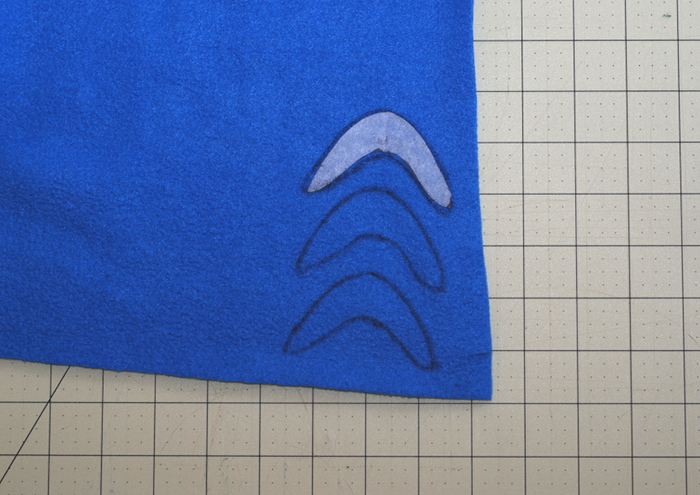
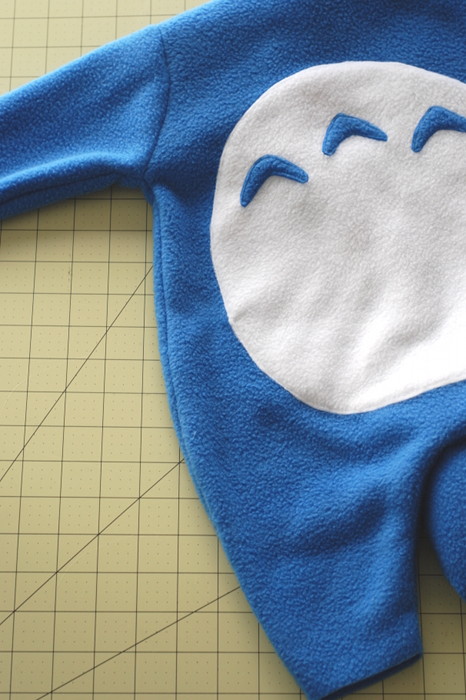
Draw the chest details and cut them out of your main fabric. The large Totoro has 7 (most of the time) and the medium Totoro has 3.
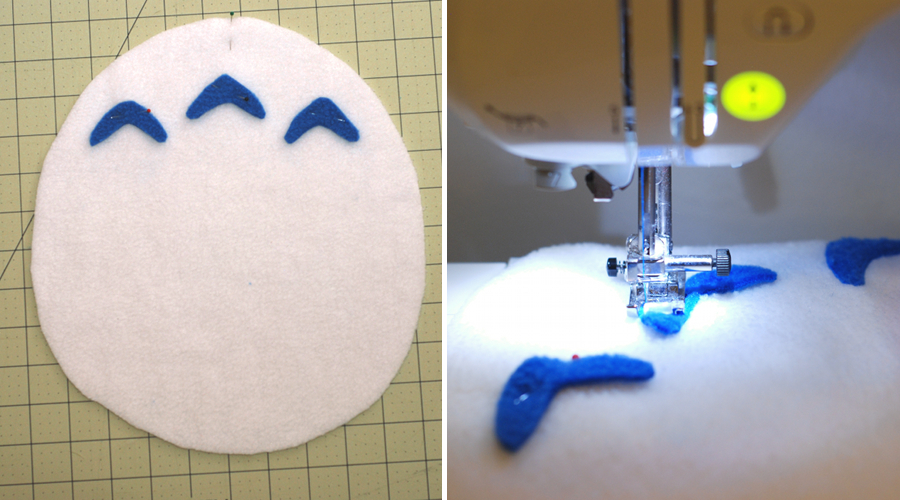
Pin the arrows on the tummy piece and top stitch as close to the edge as possible. In the original costume I zig zag stitched everything on, but the edges got wavy. This is easier and looks much better.
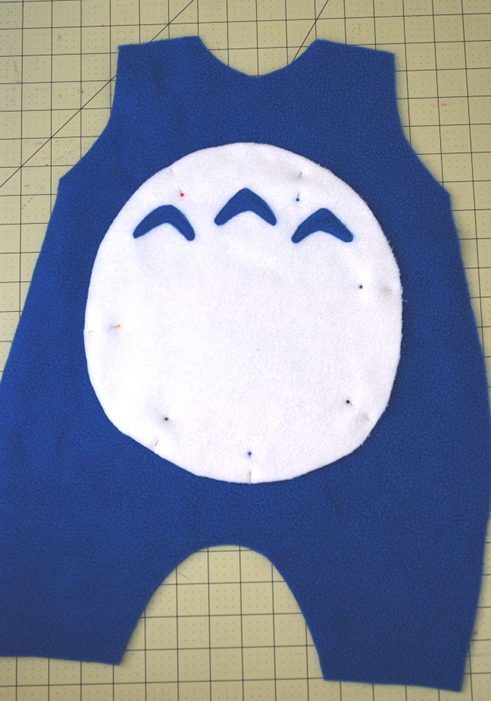
Pin the tummy onto the front piece and top stitch close to the edge. Set aside.
Now it’s time to attach the invisible zipper. I won’t go into great details here on how to do this, but you can check out this great tutorial (with video) on how to install an invisible zipper. Honestly, I skipped some steps since this is just a costume and it’s fleece and I didn’t think it needed to be perfect. I didn’t iron the zipper and I don’t have an invisible zipper foot, but it still turned out just fine.
If you are looking for a zipper alternative, I’d suggest a velcro/hook and loop closure. This won’t be nearly as clean of a finish, but if you’re just looking to put together a costume, it will be totally sufficient. Line up your back pieces, right sides together, and sew along the straight edge about 1/4 of the way up the back. Finish the neckline as directed below and then sew a few 2″ long strips of velcro to each side evenly spaced out. You’ll have raw edges exposed, but knit fabric doesn’t fray, so no worries!
Moving forward with the zipper!
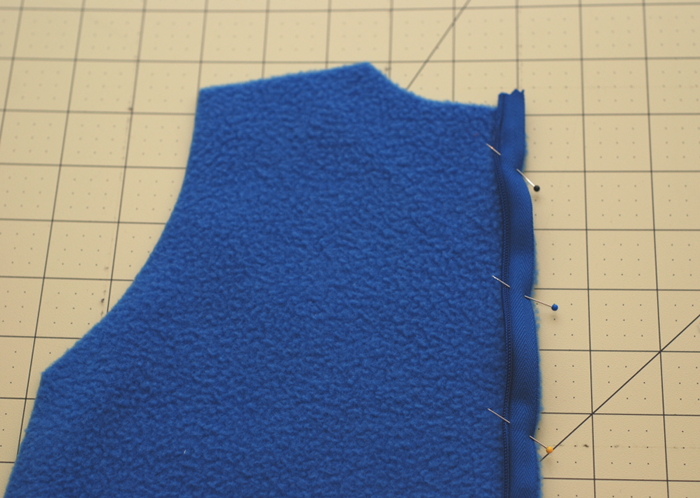
Open up your zipper and place it right sides together along the straight edge of one back piece. Using a zipper foot, sew as close to the teeth as possible.
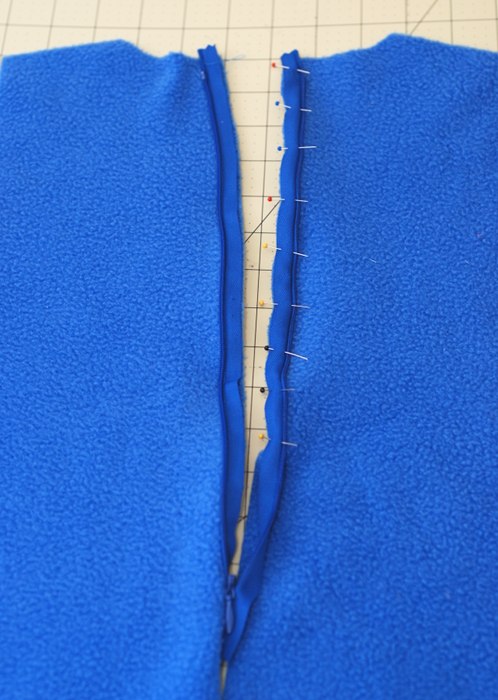
Repeat with the other side. Flip the zipper so you have right sides facing and attach to the other back piece. I realize these are some pretty sparse instructions, but just head over to the tutorial for plenty of pics and details.
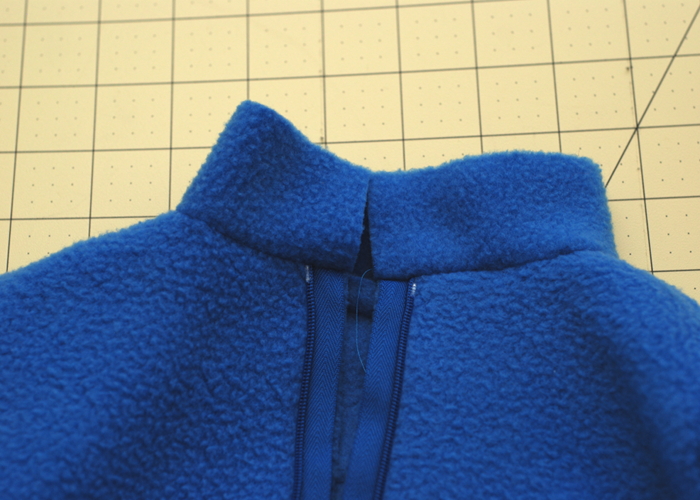
Fold the back along the zipper (I had flipped my back piece around here, so the you’re looking at the leg hole up at the top). Finish sewing the center seam together with a 1/2″ seam allowance (white line). Be sure to sew beyond the end of the zipper and on the inside of the zipper. Reinforce this end by backstitching several times.
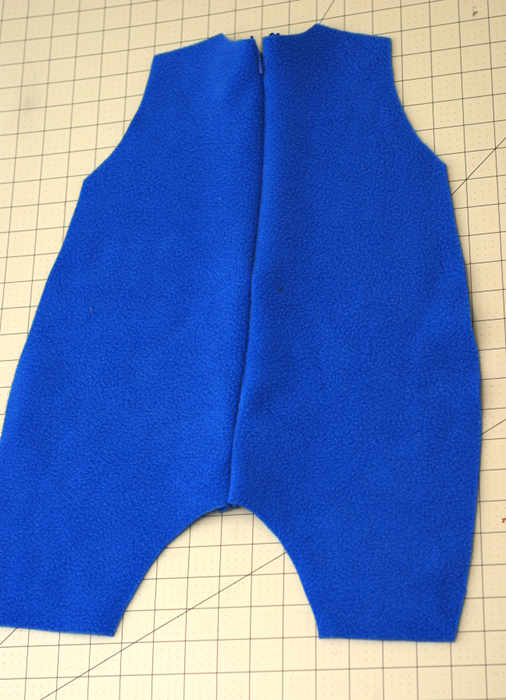
Your back is constructed and should look like this!
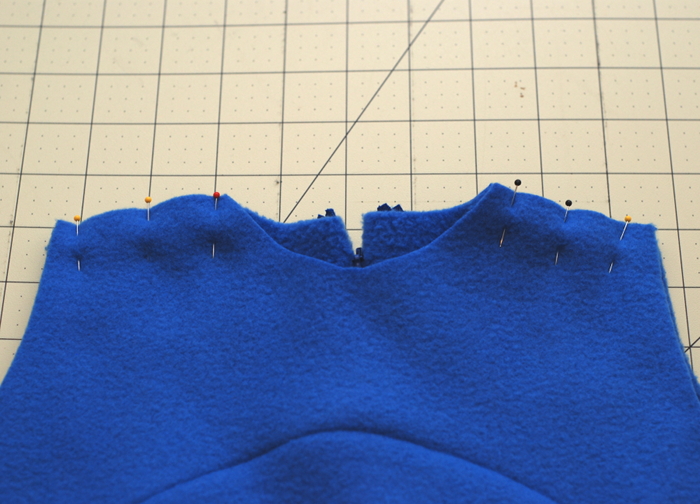
Line up the shoulder seams of the front and back pieces with right sides together and pin. Sew along shoulder seam with a 1cm seam allowance. At this point, if your model is available, you can throw the bodysuit over their head like a poncho and see if you’re happy with the neckline. Adjust if necessary.
(Ignore the fact that the sleeves are already attached in the picture, I was sewing a little out of order :P)
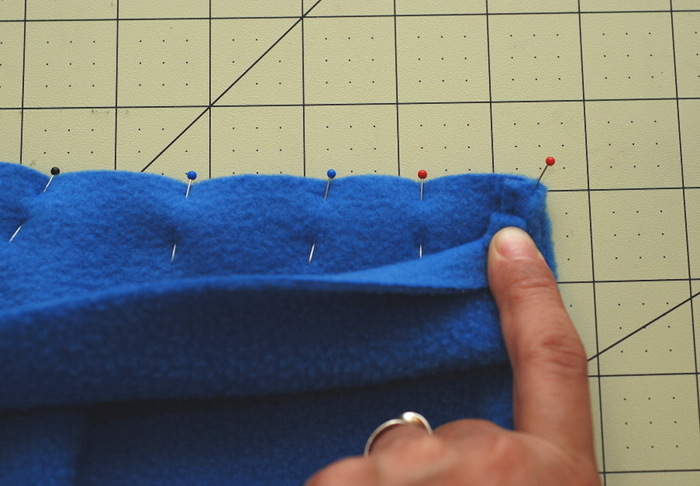
With the edge of your neck binding strip lined up with the zipper tape, pin the strip on with the raw edges lined up, right sides together. Sew with a 1cm seam allowance and trim off the extra strip to be lined up with the fabric tape. See close up below . . .
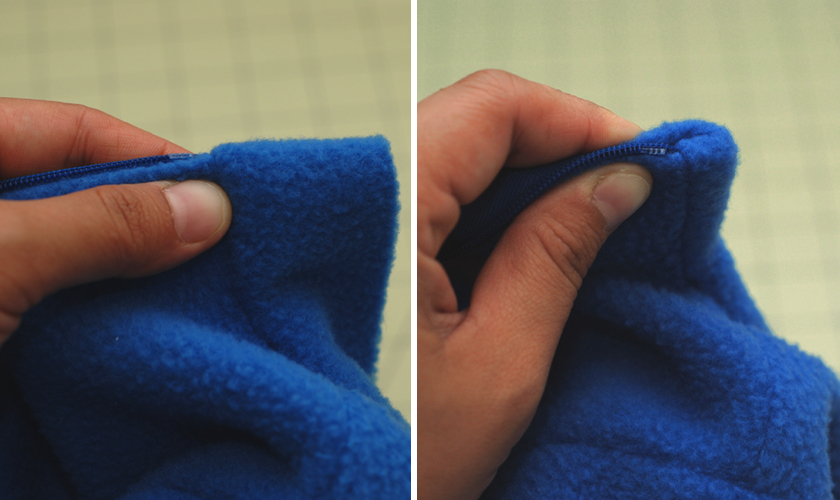
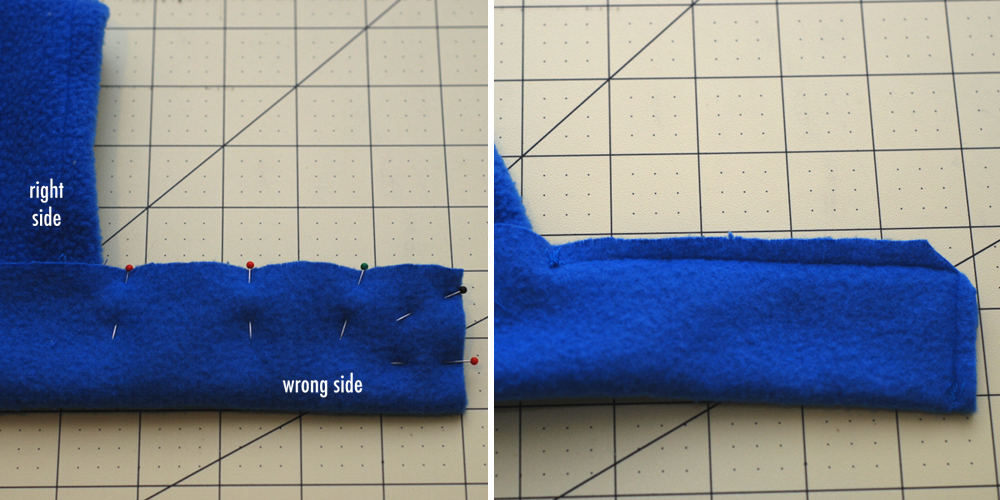
Fold the edge of the strip over so that the zipper teeth are now along the edge. Then fold the binding over to the wrong side of the bodysuit so that the neckline is enclosed.
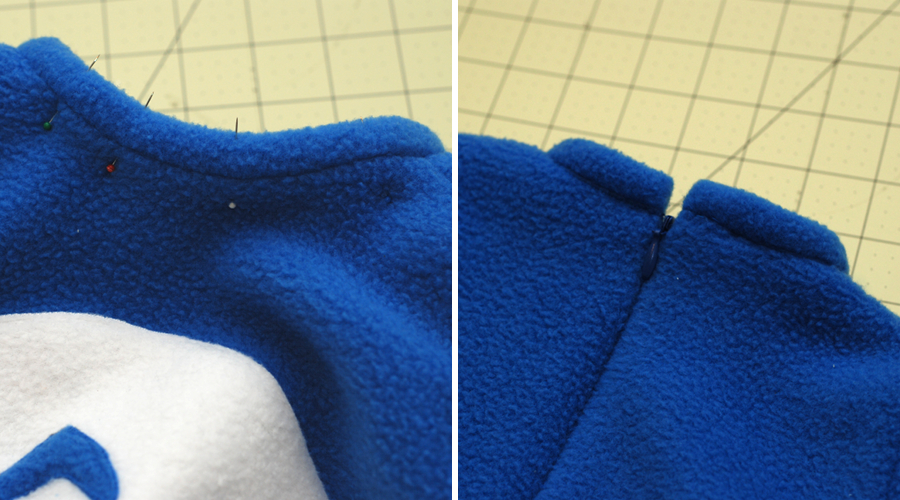
Pin along the neckline and stitch in the ditch to sew the binding down on the inside. Fleece is too thick to fold the raw edge in on the inside, but it looks and feels just fine. Trim down the extra fabric on the inside close to the stitch line.
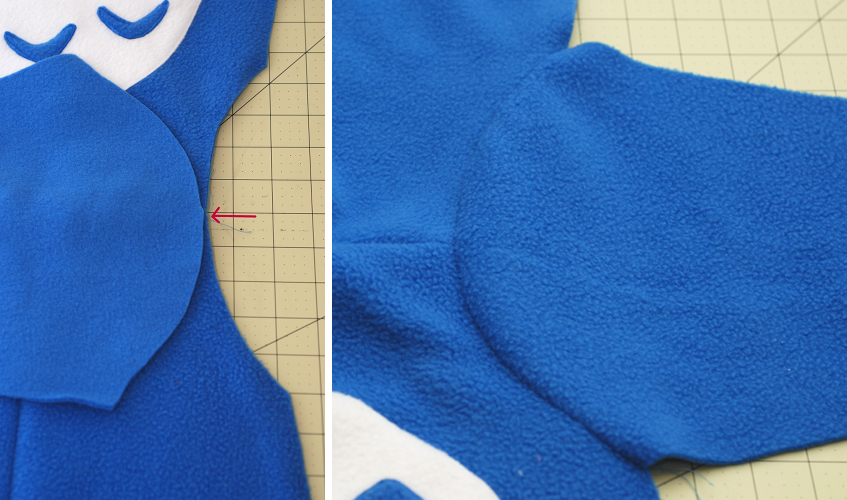
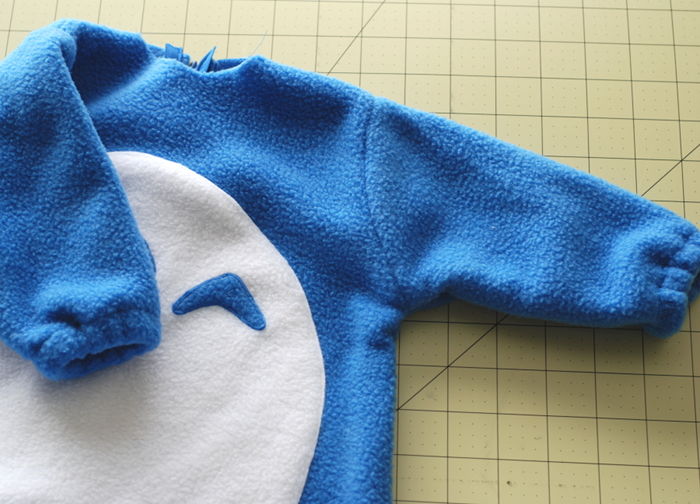
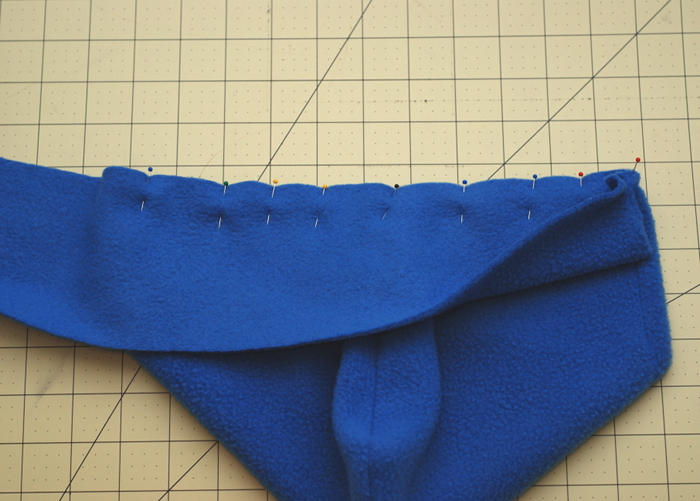
To attach the sleeves, lay your body suit out with the shoulder seam flat, right side up. Line up the center of the sleeve with the shoulder seam, right side down and pin. Then carefully continue to pin the sleeve to the arm hole. Sew together with a 1cm seam allowance.
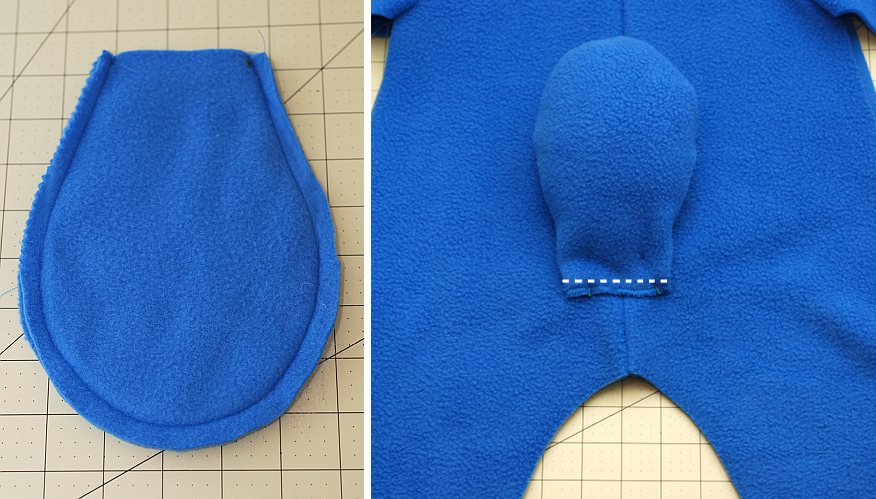
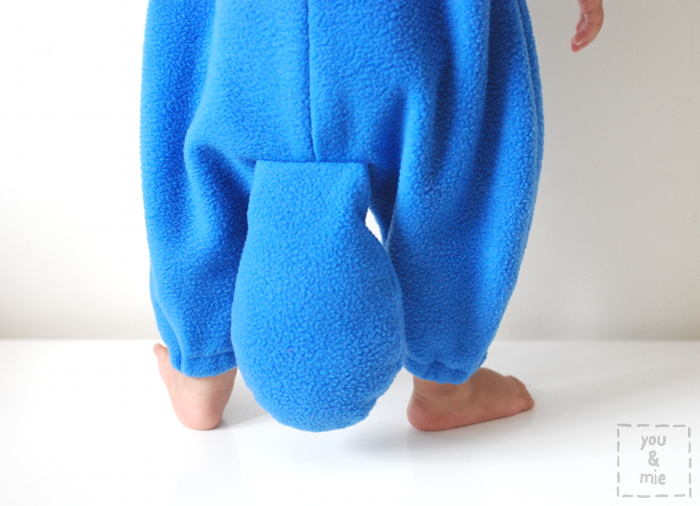
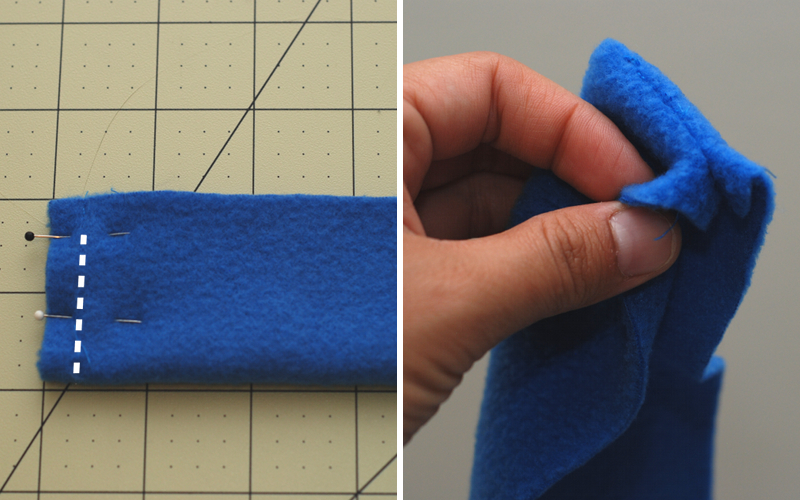
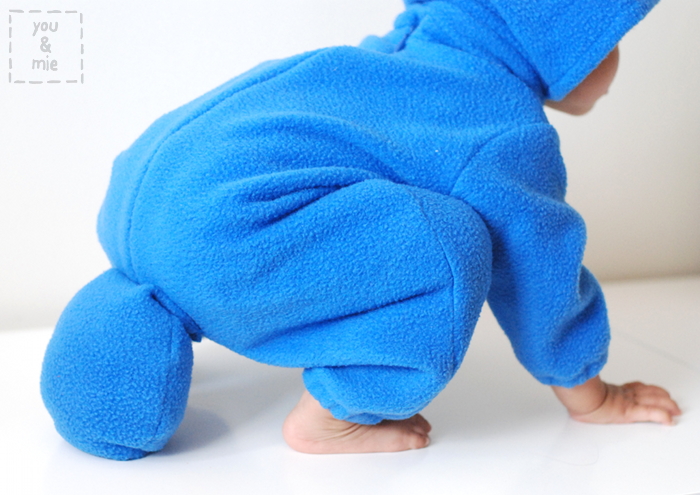
For the tail, cut two pieces in whatever shape you want. Place them right sides together and sew the curved edges together leaving the flat/top edge open. Flip it right side out and stuff it. Close the tail with a zig zag stitch or serger. Place the tail pointed up on the right side of the back bodysuit piece just below the bottom of the zipper. Sew along the dotted line to attach the tail and be sure to back stitch a bunch at each end to make sure that sucker doesn’t get pulled off!
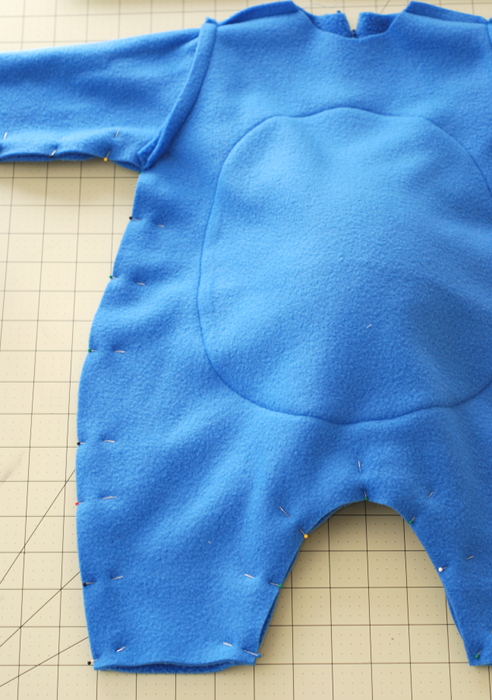
With the tail flipped up and out of the way, place the front piece on the back piece, right sides together and pin along the bottom of the sleeve, line up the seams at the armpit, along the side seams and the inseam. Sew together!
Flip it right side out and you’ll see that it’s really coming together!
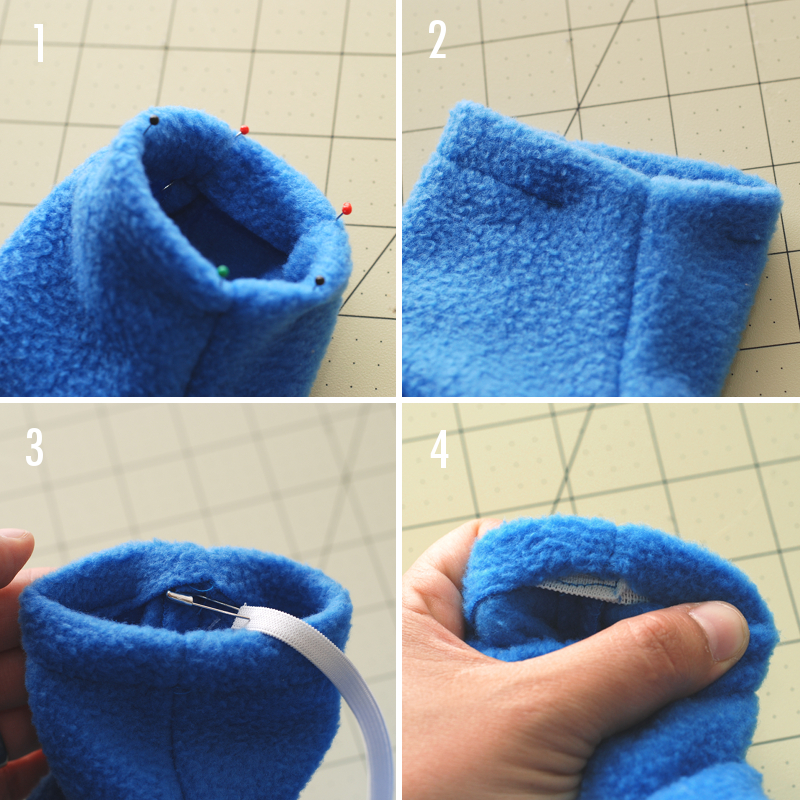
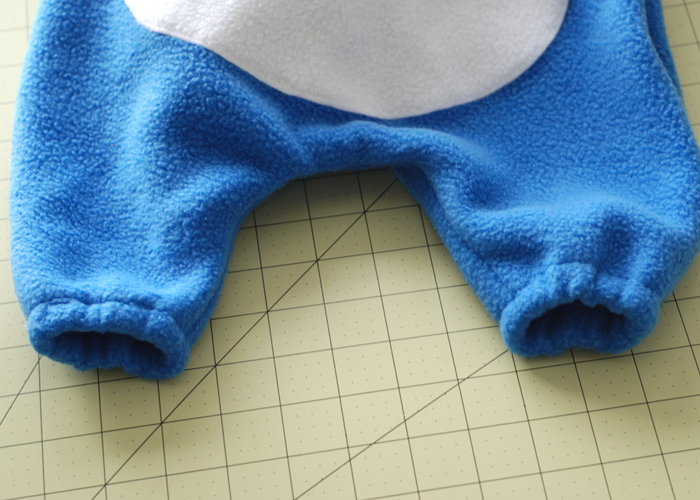
To finish the arm and leg holes, fold the fabric in towards the wrong side by 3/4″. Sew close to the raw edge to create a casing and be sure to leave about 1.5″ open to insert the elastic. If your model is handy, measure around their wrist and ankle to find a comfortable length for the elastic. You don’t want it to be too tight or too loose. I just guessed and made both 5″ in length and overlapped them by about 1/2″. Using a safety pin, thread your elastic through your casing and sew the ends together. Sew up the rest of the casing to enclose the elastic. Repeat with all leg and arm holes.
Your bodysuit is done!!
HOOD:
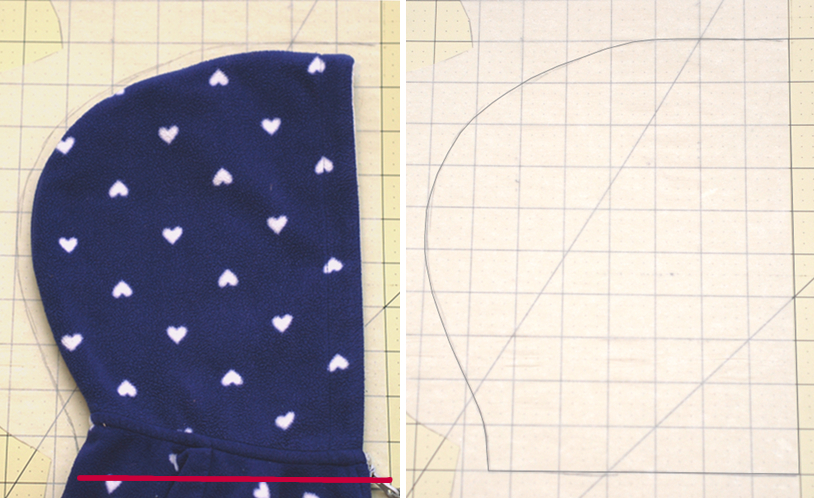
To make the hood pattern, grab a hooded sweatshirt or jacket and place it on top of your tracing paper. Leave a 1/2″ of space between the edge of the paper and the edge of your hood. Trace along the curved edge with a 1cm seam allowance. Draw a straight line 1 cm below the bottom edge of the hood at the front of the jacket.

Cut two hood pieces. You’ll also need a strip of fabric that is 4 inches wide. To determine the length, measure the bottom edge of the hood, multiply that by two and then add about 4 inches.
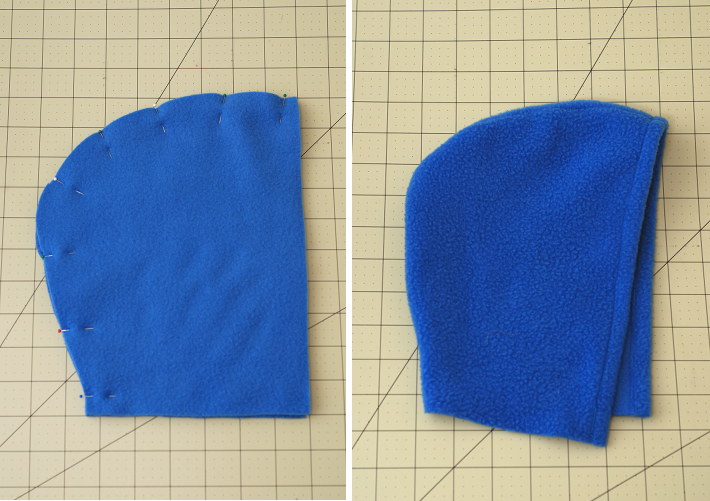
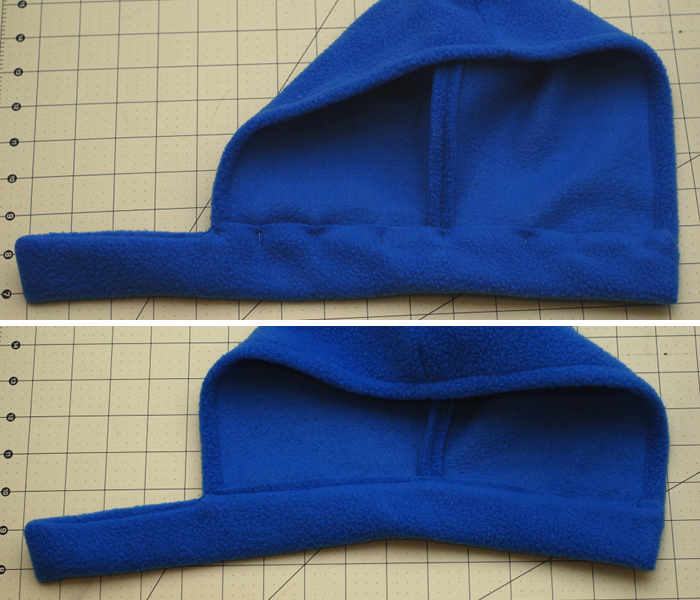
With right sides together, pin the curved edge of the hood and sew with a 1cm seam allowance. To finish the front of the hood, fold it in a 1/2″ and sew along the raw edge.
Take your strip and fold it in half lengthwise, right sides together. Sew along one of the short edges starting a centimeter away from the edge (in the picture, the raw edges are on the top and the folded edge is along the bottom). Flip it right side out, use a chopstick or something to poke the corner out.
With your hood right side up and raw edge along the top, line the edge of the strip up with the edge of the hood and pin along the raw edge. When you attach the band to the hood, be sure you only sew through one layer of the band.
Sew along the edge.
At the other end, fold the band right sides together and sew from the edge of the hood around the corner of the band. Clip the corner and then turn right side out.
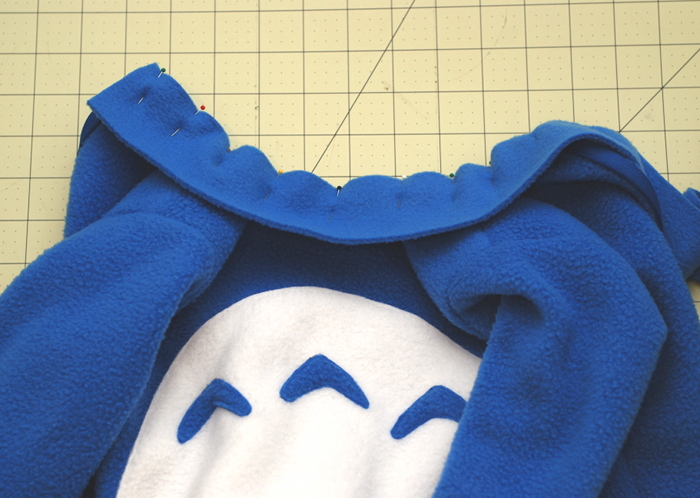
Pin the rest of the band up on the inside of the hood and on the outside of the hood, stitch in the seam (make sure you’re catching the inside of the band in your stitching. Trim any excess fabric.

Sew velcro to the hood.

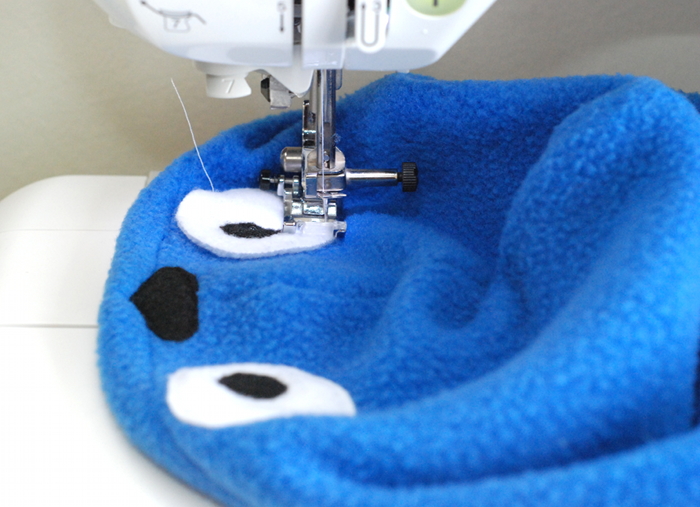
Cut out your eyes and nose out of fleece or felt. Top stitch everything down as close the edge as possible.
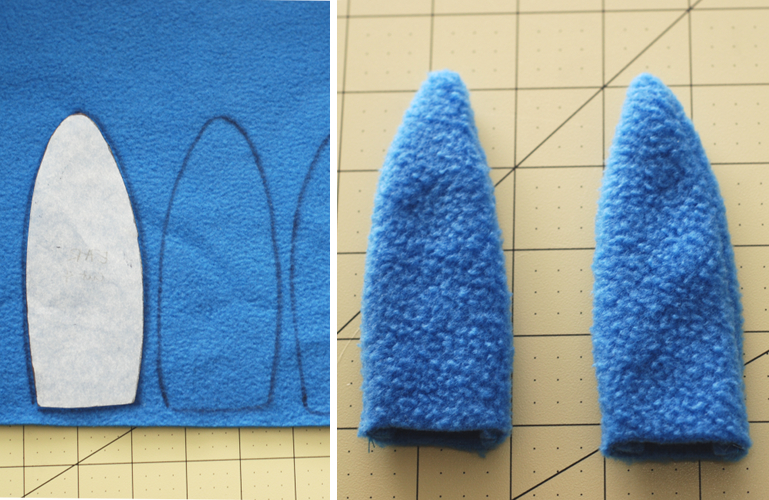
Draw and cut out 4 ear pieces. Place two, right sides together, and sew along edges, leaving the bottom open. Flip right side out.
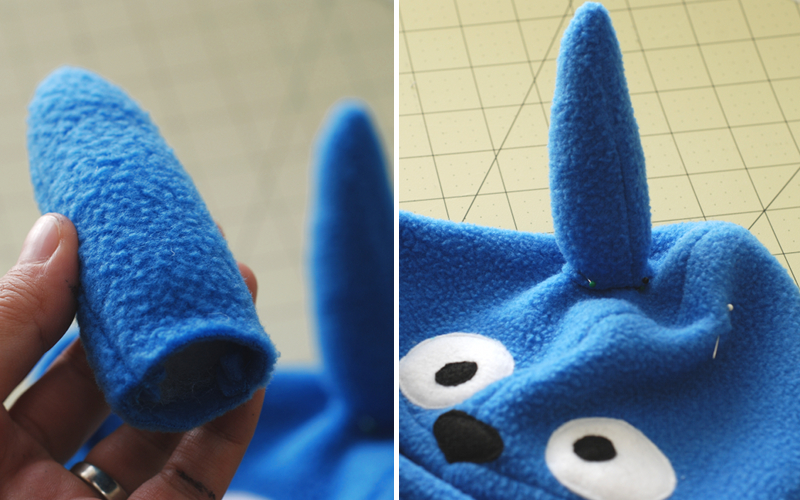
Stuff with stuffing. A lot of people ask how I get the ears to stand up, so this part is important. It’s very simple though! You want to sew the ears on as a circle. If you try to close the bottom by sewing the two sides together into a straight line, or if you sew the ear on by sandwiching it in a seam, it’ll just flop down. Figure out your ear placement and pin the ear down in place making sure the bottom of the ear is open and in a circular (or oval) shape.
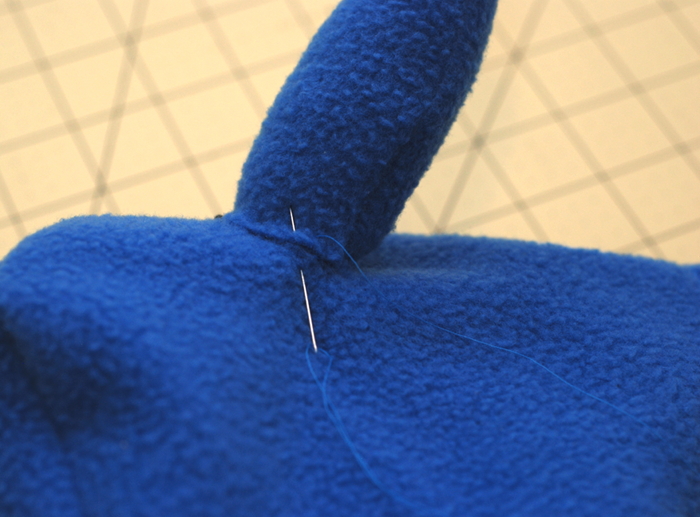
With a hand sewing needle, attach the ear to the hood with a quick whip stitch. Tie the knots on the inside of the hood.
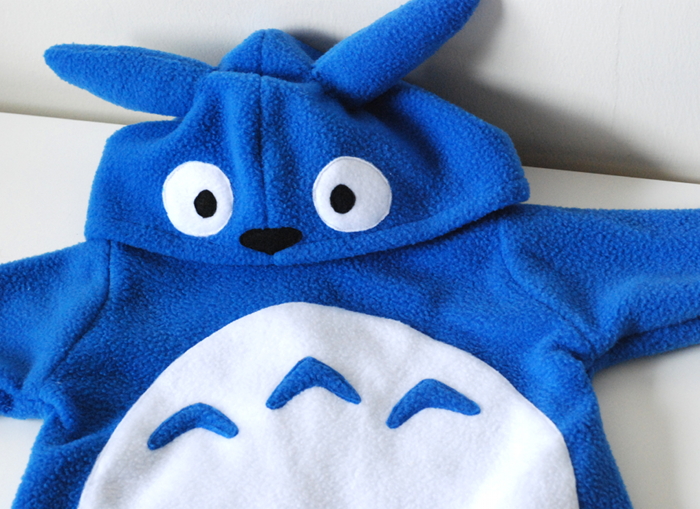
And you’re done!! Unless you want to add whiskers or a leaf to your hood – then head over HERE for those directions!
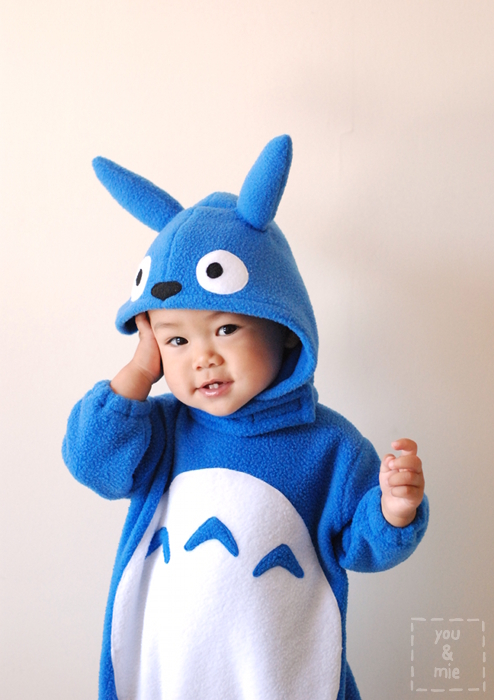
Now try the costume on your little one and be prepared to swoon. Cuz c’mon – there are few things in this world cuter than a kid dressed up as Totoro!!
I really hope that people out there are able to use this tutorial! And seriously, you can use this tutorial to make pretty much any animal costume – just change the shape of the tail and ears and add other details and you’ve got a cat, dog, tiger, cow, monkey, whatever!
I LOOOOVE seeing your creations with my tutorials. I’ve already gotten to see a lot of Totoro costumes inspired by the original one I made and I shared some of them here. If you use this tutorial please share your photos with me! You can email me, upload them to the you & mie flickr group, or post them on the you & mie Facebook page!!
Happy Sewing!
**I am not taking any orders/selling this costume. This is a free tutorial for your personal use. I mentioned on Instagram that I was going to be selling this particular costume, but I’ve decided to hang on to it for a little longer – I’m sorry for changing my mind!**

SO well done and beautifully sewn. And of course, your model, is darling!
Adorable!!
WOW, this is the most amazing Totoro DIY costume I’ve ever come across. Yes, so well-made and beautifully done. Lovely!
Great timing i was just thinking of making an Appa (from the last airbender) costume which is basically the same as a totoro 🙂
Very sweet! One day, I’m actually going to make time to sew some fun things for my girls!
This is amazing 😀 It looks so cute! I love Totoro and you have got it spot on. 😀
that original totoro costume is such a signature piece for you, i think it’s awesome you got around to making a tutorial for it! yay! it’s so cute i kinda want to switch C’s costume now…haha.
This is far too adorable!
This is so darling and your little one is so cute in it!
This is amazing! I love totoro, my all time favourite Studio Ghibli, I wish I had this kind of talent to make something for my little girl
Hi Cherie, JC asked me for Totoro costume for this coming Halloween, thanks for this tutorial, I’ll share the photo once it’s done!
I really want to make this, but I have limited sewing experience, and I’m terrified! My daughter wants to be a totoro for Halloween.
Wow!! Lovely Totoro!!
This is awesome and Your little boy is so cute :))
Oh my goodness, you did not just do this. So perfect!!! Studio Ghibli is my life ❤
Pingback: Princess Unikitty of Cloud Cuckoo Land! | you and mie
Such a cute costume! x
Loving your blog and especially this article!!
Pingback: Favorites from 2014 | you and mie
Pingback: Totoro au carnaval | Rainbow Souk
Certainly a detailed & time-consuming tutorial on creating/designing a Totoro costume for your little boy! Looks like LOTS of Mom’s LOVE sewn into it! An inspiration to others, indeed! THANKS for sharing. Sarah in Minneapolis
Pingback: Sew & Tell: Totoro Costume | you and mie
Pingback: Totoro costumes - Confused Kitty Creations
Pingback: Totoro costumes | Confused Kitty Creations
Pingback: » 16 Babies In Cosplay Costumes To Brighten Up Your Day
Pingback: Confused Kitty Creations - Totoro costumes
I love the look of this, but I have a silly questuon, would this be able to be adapted (the tutorial I mean) to make an adults version on the costume
Yeah, I’m sure it could! Just make sure that the zipper is long enough for you to be able to get in and out of it. I’d love to see if you (or anyone) makes an adult version!
I am making this for my 5yo son for this Halloween, and I am about 95% through (just have to sew the velcro and face details to the hood). However, I am sad to see that I sewed the neckline far too wide, and there is a 1″ gap between the bottom of the hood strip and the top of the strip encasing the neckline. What do you think would be the easiest way to fix this? Should I rip off the neckline strip and attach a wider one, or should I make the strip on the bottom of the hood wider? Or perhaps something else? Maybe rip out the shoulder seams and take it in an inch on both sides before reattaching the neckline strip? My model was asleep during the “try it on like a poncho” part, ha ha, and this is only my 3rd sewing project ever so I eagerly await your response. Thanks!!
Hey, I have a question….did you count for diaper room? I have almost finished the bodysuit but it’s snug in the inseam area 😦 I didn’t count for diaper room like his pajamas do. You think I can get a seam ripper and add fabric like baby pajamas have?
Oh I’m sorry to get back to you so late! Since I used pajamas that fit with a diaper on to make my pattern, it wasn’t a problem for me. What did you end up doing?
I had a similar problem. Even my legs were too narrow when i made them pudgy and allowed for an inch of seam allowance. I think she had a growth spurt and the onsie is a bit tight. Anyhow i fixed it with a panel on the bottom and 2 leg panels. Was a hot mess inside on the outside looks fine! Mine is no where near as gorgeous as yours but not bad for my first time sewing clothes!
Thanks for the tutorial. The costume came out beautifully! Harry didn’t like the hood with the strap under his chin so I sewed snaps to attach to the suit as a flip on hood instead.
Pingback: Halloween 2015 | how's it going, eh?
Pingback: Enredados con el Carnaval – 2016 | Crisnasa Blog. Niños y tecnología
Pingback: Totoro-Kostüm für Karneval | Skyjawn
I’m so happy i found your tutorial. My little boy ist going to be Totoro in german carnival next week :). I did my first zipper on this costume, i’m so proud ;).
Thanks so much for sharing! It looks great! I tried to comment on your blog but I couldn’t remember my login information >_<
Pingback: Disfressa de Totoro | Nàiades
Pingback: Happy Halloween! | Yu Mama
Pingback: Maia the Totoro | Steggy
Pingback: Vancouver Fall Festivities 2017 | how's it going, eh?
Pingback: Totoro costumes – Confused Kitty Sewing
I cannot thank you enough for this. I have used this tutorial for FOUR different costumes over the past few halloweens. This year I’ll be making a giant red panda costume for my seven year old. You did a great job with this tutorial. Thank you for all the time you put into it!