Mei-chan

Yay, it’s done!  My “movie inspired” outfit is finally done – better late than never, right?  When Project Run & Play announced the challenges for this season and one of them was “Going to the Movies” it didn’t take me very long to decide what I wanted to do.  I mean, the options are ENDLESS, but I wanted to stick with something simple and make her an outfit I thought she’d be able to wear regularly.  And since the Totoro costume I made for Yuki last Halloween was such a huge hit, I knew something from the same movie would be appreciated.  So that’s how I decided to recreate Mei’s outfit from the movie “となりのトトロ” or “My Neighbor Totoro.”  It’s a Japanese animated classic by Hayao Miyazaki and I’m obsessed with all of his movies.  So uhh, if you haven’t seen this movie, I think you should just go see it right now.

ANYWAYS, Mei is a 4 year old and the character is such a perfect match for Yuki’s personality!  Even though Yuki’s not even 2 yet, she’s got a lot of Mei’s fun, rough-and-tumble, stubborn personality and even how Mei tries so hard to keep up with her older sister.  Yuki loves playing with other kids too, even though she’s such a little runt compared to them.  I’m not going to give you a whole synopsis of the movie, you can look it up or watch a trailer, or better yet, just go watch the film if you haven’t seen it already.

So here are some screen shots from the movie:

And our little Mei-chan:

One of the most memorable scenes is when Mei is playing by herself in the yard and she spots a little peculiar creature running through the grass.  She tries to follow the chibi Totoro, and it tries to run away.  We had fun recreating that scene during our photo shoot (and I had a little fun with photo editing too :)).

Got him!!

So I made three pieces for this outfit.  The blouse and the shorts are from the Oliver + S pattern, Puppet Show Tunic and Shorts.  I don’t have a lot of experience making buttoned collared shirts, so I thought using a pattern would be a good way to learn.

The thing about a good Oliver + S pattern is that it is pretty tedious and takes a lot of time.  This, of course, results in a really high quality piece of clothing, but one of the things I love about making kids clothing is how quickly you can whip something up.  That’s just me being impatient though.  It’s really good that I’m learning how to do things the “right” way.  I made the shirt in 2T size which is HUGE on Yuki, but that means she’ll be able to wear it for a long time.  I used an embroidered white fabric just to make it a bit more interesting and added a button in the front just to make it look like the one in the movie.  I’ll probably take it off since it serves no purpose.

The shorts are so cute!  These came together very quickly and I want to make a few more of these for sure.  I made them white to match Mei’s bloomers, but I’m not sure it was a very practical move.  They make for some adorable summer shorts though!

The red jumper is a simple lined bodice that I adjusted from the Every Little Thing Tunic (recognize the lining fabric?) and a circle skirt.  I added some fun yellow flower buttons on the back.  This piece came together the fastest!

I also made the little white chibi Totoro right before our photo shoot out of some scraps of white fleece (from the original Totoro costume!) and tied little pom poms to her hair rubber bands to match Mei’s.

This blue Totoro is a stuffed animal – I didn’t make it.

Did you spot the creeper Totoro!?

And speaking of creepers, check out this paparazzi sneaking up on an unsuspecting girl.

Phew, that was a lot of photos!  Now that I’ve made a Totoro costume and a Mei outfit, all that’s really left for me to make is the Cat bus!  Haha, NOT!

Happy Halloween!

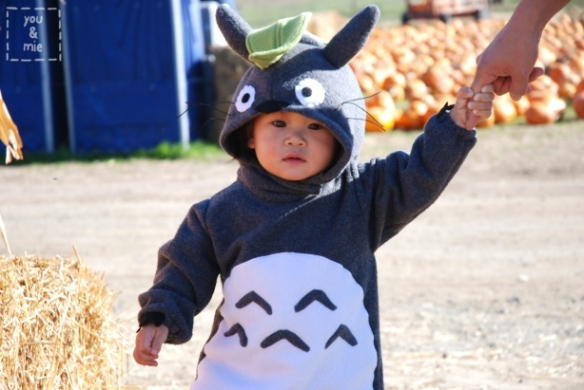
Yesterday we went to the pumpkin patch with our friends Emy and Nicky!  It was a hot and gorgeous day, but we couldn’t resist getting a few pics of Yuki in her (super thick and warm) costume.  We tried to make it quick and she was a trooper, but poor thing, we found out later she was actually sick 😦

Totoro is real.

Yuki’s favorite part of the pumpkin patch was playing all the instruments along with the live music.

Getting up close and personal with a Scottish Highlander.  These guys were HUGE but Yuki did not seem impressed.

“Ok, get me out of here now.”

Wearing flip flops and sunscreen and it’s nearly November.  Happy Halloween from California!  Hope everyone has a fun and safe night!

Tutorial: Making Whiskers and Bendable Parts

I wasn’t really planning on doing a tutorial on anything costume related, but I thought I’d share these two small projects with you.  These can be used to help you complete a lot of costumes and technically, you don’t need a sewing machine to do either.  We’ll start with making whiskers.

*I apologize for the crappy and sparse pictures.  I didn’t really think about posting this until after I had already made the whiskers and everything was done at night in our not-well-lit apartment*

Making whiskers
Yuki’s Totoro costume was starting to take shape, but it was definitely missing whiskers.  I knew that I wanted something thin, but stiff enough to stick out and not be droopy.  I decided to try some fabric stiffener and embroidery floss.  And it worked!  Here’s how you can do it.

What you’ll need:
Fabric stiffener (don’t have any?  read on for other ideas)
Foam brush
Embroidery floss
Wax paper
Flat surface like a cookie sheet or a cutting board
Needle

Lay the wax paper out on your flat surface.  Cut and lay your embroidery floss flat.  Cover generously with fabric stiffener and brush to coat evenly, but leave about 4 inches of embroidery floss without the stiffener.  This part of the floss will be used to thread the needle later.  Let it dry (overnight works well).

So this is my cookie sheet with wax paper and my six extra long pieces of embroidery floss.  It’s a good idea to give yourself extra inches that can always be trimmed at the end.  It may also be smart to make a few extra in case you make a mistake.  These have already been brushed with the fabric stiffener and dried.  The three on the left have been peeled off the paper and the three on the right have not.  You can see the ends (closest to you) have not been stiffened.

Peel the embroidery floss off and thread the needle using the unstiffened end of the floss.

Starting from the outside of your costume, pull your thread through your costume wherever you want your first whisker to be.  Pull it far enough so that the stiff part of the embroidery floss comes through.  It’s a bit stiff (duh), but tie a knot on the inside.  I tied it twice to make sure it wouldn’t slip through the fabric.

Trim the end.

Now you need to tie a knot on the other side of the whisker so that it doesn’t slide out from the inside.  The trick here is to tie the knot as close to the fabric (and the other knot) as possible.  If there is even a bit of space between the two knots, the whisker will sag.  So tie the tightest knot closest to the fabric, sometimes a bit of fabric even gets pulled into the knot – this is good.

Can you see the little knots?  From far away you won’t even notice them.

Now repeat with the rest of your whiskers and give them a trim!

DONE!  If you don’t have fabric stiffener, there are probably other ways.  Fabric stiffener is basically water soluble glue.  Now I’ve never tried it, so I can’t guarantee anything, but I have a feeling that this would work using your regular old white glue (like Elmer’s) or Mod Podge.  If you try this out, let me know if it works.

Now moving on . . .

Bendable Parts – in this case, a leaf.
In the movie Totoro, there is a scene in the rain where Totoro only has a tiny leaf on his head to provide protection from the rain.  I thought it might be a cute addition to the costume.  I wanted the leaf to have shape, so I made it bendable.  This method would be great for any small part of a costume that you want to have some form and bend – like EARS!

What you’ll need:
Fabric
Pipe cleaners
Needle & thread (if you’re hand sewing)
Paper

Start out by drawing whatever shape you want on a piece of paper (I always use something out of my recycling bin which is super full around election time).  Add about a 1/4 inch around your shape for seam allowance and cut it out (I forgot the stem on my pattern).

You’re going to need 2 pieces of your shape, so fold your fabric in half or layer two pieces of fabric on top of each other.  Then use your pattern to cut out your shape (I added the stem in here).

With right sides facing, pin and sew up your shape leaving an opening for turning it right side out.  I left the bottom of the stem open as well for the pipe cleaner.  If you’re making an ear, you can just leave the bottom open.

Flip it right side out!

Now fold that fabric from the opening in and top stitch around the leaf, again leaving an opening at the top of the stem (for the pipe cleaner!).

Now we’re going to sew the casing for the pipe cleaner.  Making sure the space is wide enough, sew two lines along the length of your shape for the pipe cleaner to slide into.

Now it’s time to insert your pipe cleaner.  Take one end and fold it down about half an inch.  This makes it so that the tip is not super sharp (the wire was getting snagged on my fabric and folding it down made it much easier to slide through).  Insert it into your casing and then clip the end about 1/2 inch longer than the stem.

Fold this end up and tuck it into the fabric to avoid any super sharp wires.

And you’re DONE!

Bend it to whatever shape you want!  You can probably sew up the end too, if you want, but I didn’t bother.  Now you can handstitch your bendable part to your costume.

And here’s the updated Totoro hood . . .

My usual model was asleep 😦

Anyways, there you have it!!  I hope you are all having fun coming up with some creative costumes for Halloween.  And hopefully these ideas may even help you put some finishing touches on them!  Remember, it’s all in the details 😉

Sew & Tell: Totoro Costume

See the full Totoro Costume Tutorial HERE!

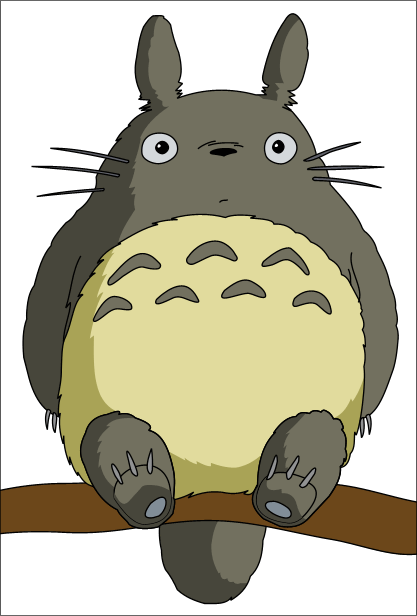
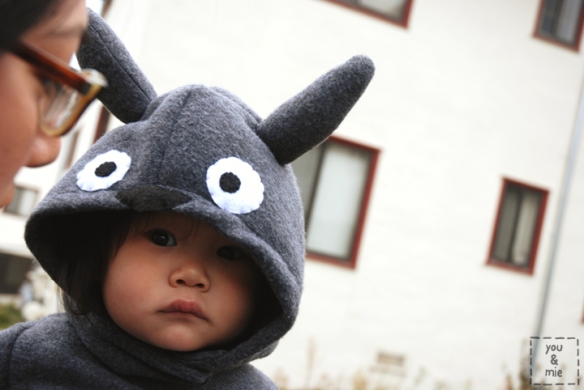
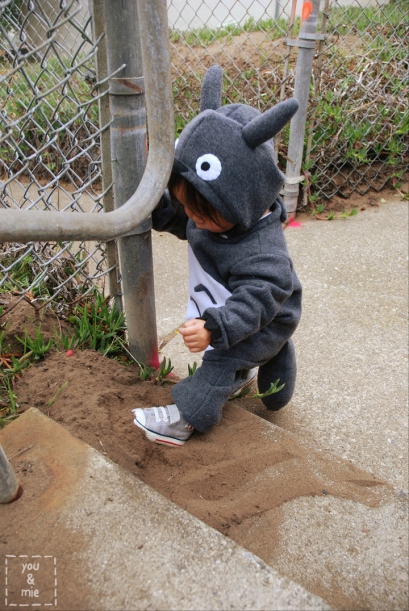
**I do not make Totoro Costumes for sale. **   *UPDATE: Since this post has been getting a lot of views, I figure I should at least add one photo of the finished hood.  This post was published with photos from her first fitting and after these were taken, I decided to add the whiskers and the leaf.  You can read more about that in this tutorial.  Hope you like it!* This year, I really wanted to make Yuki’s costume, but we could not decide for a long time what she should be.  We threw around some ideas, but none of them really excited me.  I’ve had this idea of dressing Yuki up as Totoro for a long time (since she was born?), but was worried that no one would know what she was.  But since I couldn’t think of anything better, I decided to go for it.  So what if I would have to explain a hundred times who she was supposed to be!  At least she would be adorable and original . . . right? Well, I finished most of the costume EARLY this year (meaning not the night before or morning of) and I’m a little unsure of how I feel about it.  It came out better than I expected in some ways and not as cute as I imagined in other ways.  In terms of the construction, I’m pleased.  I’d never made a full body suit before.  I’d never done an outfit with sleeves.  Or made a hood.  I just kinda made it up as I went along and it surprisingly worked out alright.  Actually, better than alright, it came out looking pretty damn clean.  On the other hand, it doesn’t look like Totoro to me.  I think there is something wrong with the shape.  Or the face.  Or the proportions.  I’m not quite sure and I might have to do a little more fiddling around (eek, that means I’m not actually done yet!), so maybe you can give me some feedback. I’m actually so impressed that I was able to get these pics of Yuki.  She does NOT like hoods or hats.  She generally rips them off the second we put them on.  I’d tried to get this hat on her a few times while sewing to see if it fit and she hated it.  She wouldn’t even let me get near her with it towards the end.  But I realized that if you keep her really really distracted, she won’t notice it for quite awhile. So in case you don’t know who Totoro is, he is a character from a Japanese animated movie, となりのトトロ or My Neighbor Totoro.  Although it’s a foreign film, there are quite a few people in the states that have seen it.  Here he is! So cute, right?!  Ok ok, so here’s our little Totoro . . .
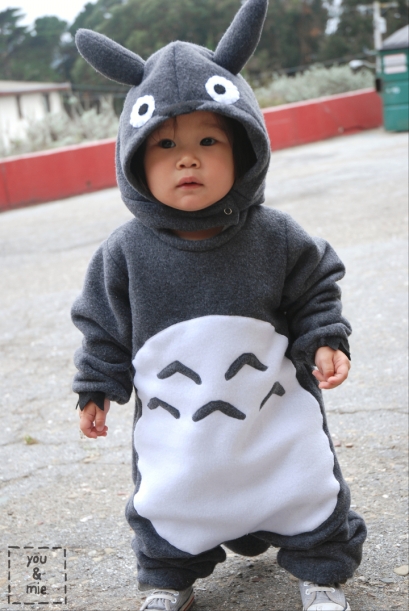
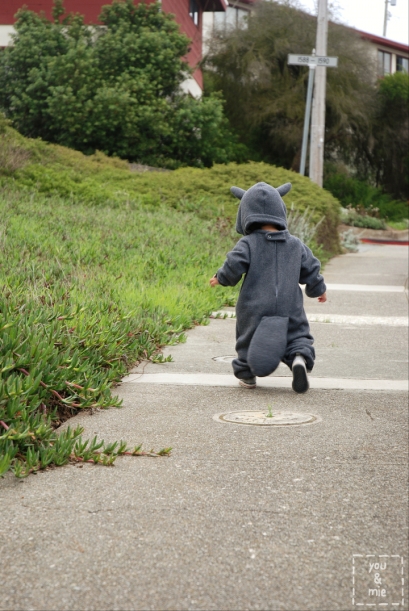
Something about this costume reminds me of Max from Where the Wild Things Are.  It’s well suited for making mischief!

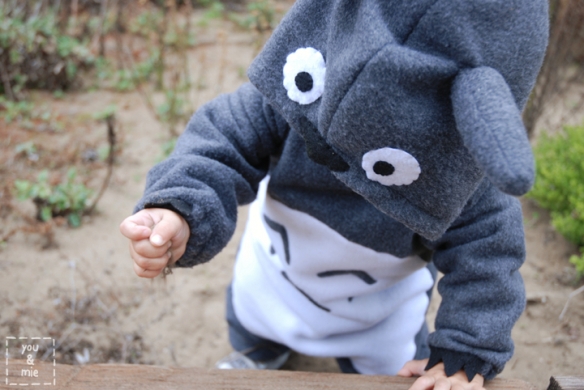
I’m actually hoping that it’ll be cold on Halloween because this costume is made out of fleece and SUPER warm!  I need to make some adjustments, but here are some of the basic details of the costume.  Overall, it’s a pretty simple design that I based off of Yuki’s pajamas.
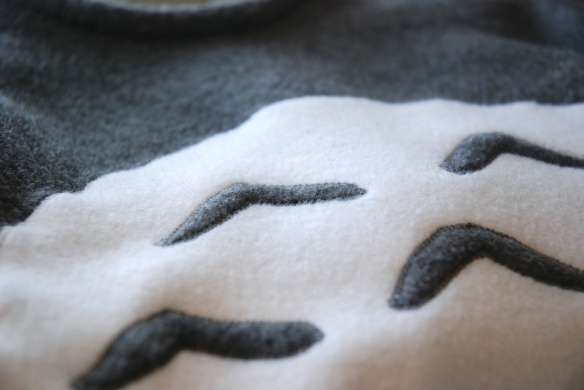
I zig zag stitched the chevrons on the chest and the white tummy to the rest of the suit.  This was the first part of the costume I sewed, and the first thing I sewed on my brand new machine.  It was dreamy 🙂

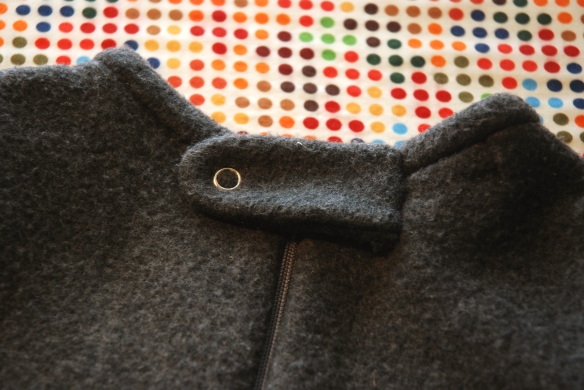
Instead of a zipper and snap in the front, I moved it to the back.

I also added elastic to the wrists and ankles and snaps to the legs for easy diaper changes.

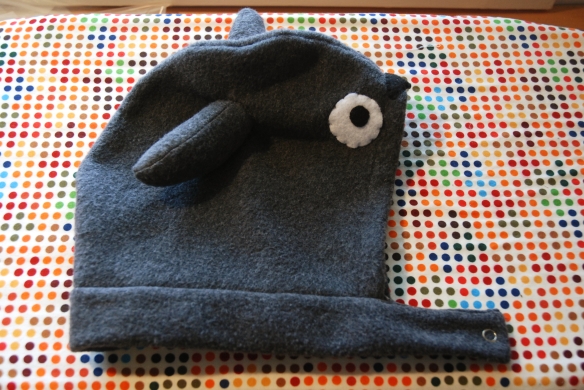
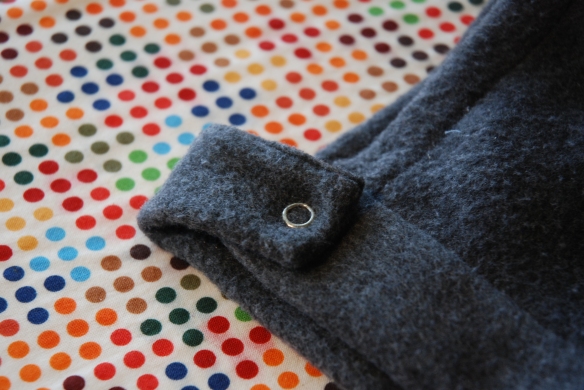
For the hood, I used a hooded jacket to trace the shape.  I cut two pieces and sewed them together, then made the snap collar thing with a long rectangle.  I made ears (and the tail) with scraps of fleece and stuffed it with poly-fil.  Then I hand sewed the ears and face on.

I want to add whiskers to the costume.  Any ideas for what I can use??  I want to use something smaller and not as sharp as pipe cleaners.  Maybe some yarn with fabric stiffener?  I’m taking suggestions.

Now I gotta work on my costume.  It’s going to be super simple this year.  What are you going to be for Halloween??