

Day Three! So we’ve prepped our pattern and cut our fabric and we’re finally ready to sew! Today we’re going to be doing steps 1-3 of the Pull-over Parka from Happy Homemade: Sew Chic Kids.

The steps are pretty basic, so our work should be fairly simple for today! Just a note:
ALL SEAM ALLOWANCES ARE 3/8 IN (1 CM) unless otherwise stated.
Now, a kangaroo pocket is not part of the pattern, but I really wanted to add one, so I thought I’d show you how to do that. If you’re not adding a pocket skip down to Step 1.
Yesterday, Meg talked a little about drafting the kangaroo pocket. You can either cut out one and fold the edges over, or you can cut two and sew them right sides together and then top stitch that onto the hoodie. I opted for the latter just because it seemed easier.
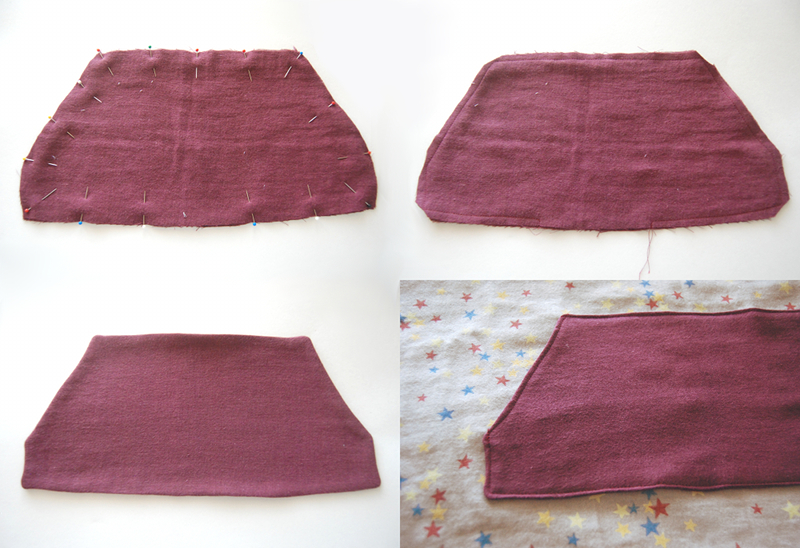
Pin your pocket pieces, right sides together. Sew all the way around leaving a 3 inch opening at the bottom. Clip the corners off. Turn right side out and press. If you want, you can top stitch the pocket openings (diagonal lines), though this is mostly just for looks. Then pin the pocket onto the hoodie (make sure to leave room at the bottom of the hoodie for hemming) and sew along the top and the bottom edge. Be sure to backstitch at the ends to secure openings.
Alright, moving along to . . .
Step 1. Sew sleeves to top
If you haven’t already, transfer markings from your pattern pieces to your fabric. You’ll need to know which side of your sleeve attaches to the front of the pull-over and which attaches to the back.

With right sides together, line up the “front” of the sleeve with the front piece of the pull-over along the armhole. Pin and sew with a 3/8 in seam allowance.
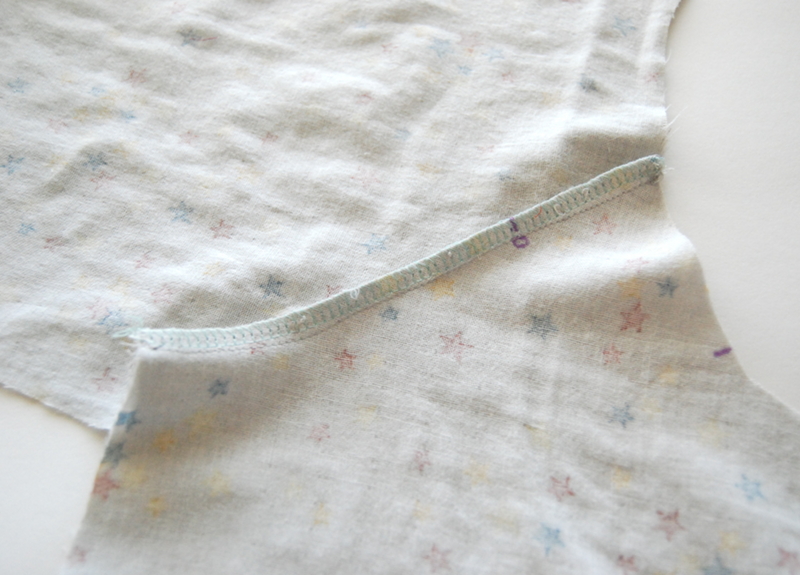
Trim and finish the edge with a serger or a zig zag stitch. Press the seam allowance toward the sleeve. Repeat with the other sleeve front.
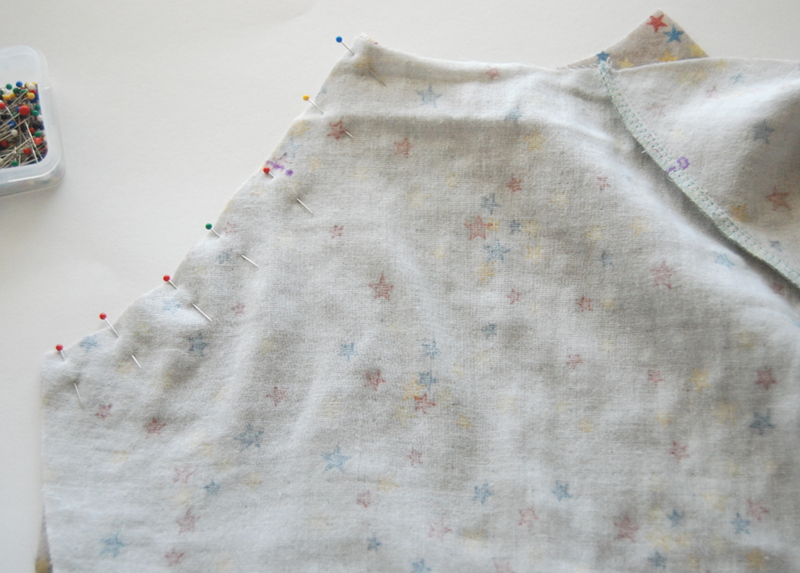
Now we’re going to repeat the same steps with the back. With right sides together, line up the edge of the “back” of the sleeve with the back of the pull-over. Pin and sew. Finish the edge and then press the seam allowance toward the sleeve. Repeat with the other sleeve. Now both sleeves and the front and back of the pull-over should all be attached.
Step 2. Sew sleeve and side seams
With right sides together, fold the pull-over at the shoulder and bring the sides and sleeve edges together. Be sure to line up the seams at the bottom of the armhole. Pin and sew a continuous seam along the sleeve and side. Repeat on the other side.
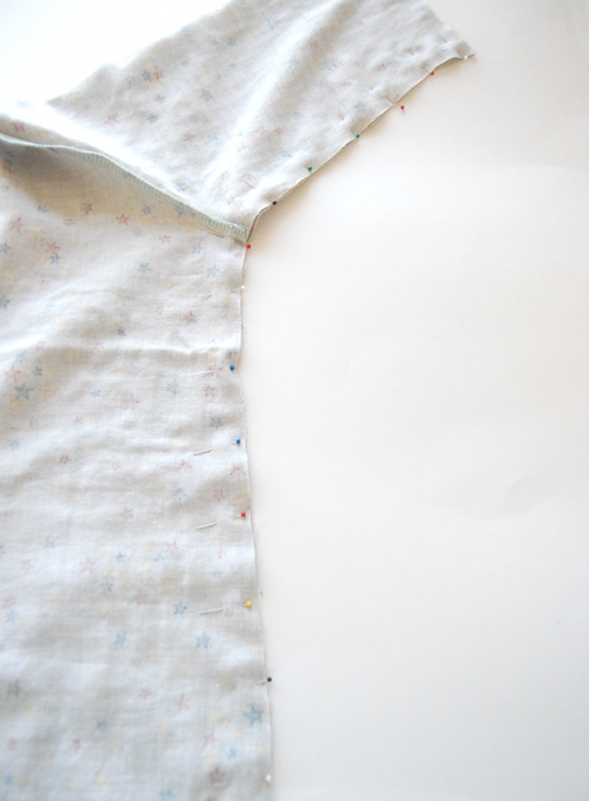
Finish your seam allowance and press towards the back of the pull-over.

Turn right side out and press.

Woohoo, the body of your pull-over is constructed! Set that aside.
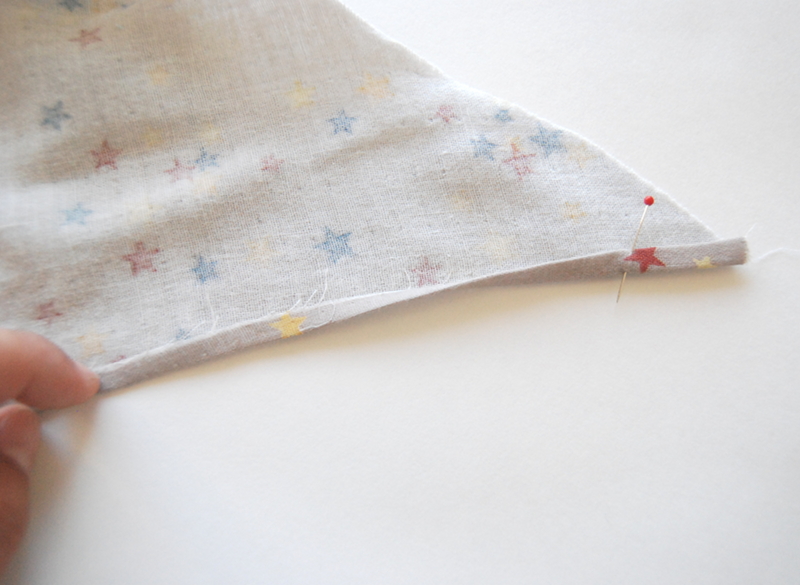
Step 3. Sew hood

With right sides together, pin along the top and back curved edge of the hood. Sew, finish edges, turn right side out and press.
I noticed that a few people plan on adding lining to their hoods. If you are adding lining, skip the next step and continue with the lining directions below.
If you’re not adding lining, you need to hem the front edge of the hood. There are specific directions at the bottom of page 42, but it is a basic double fold hem. Fold the edge of the hood 1 cm towards the wrong side. Unfold and tuck the raw edge under, within the fold, and press. Top stitch along the folded edge to secure hem down.
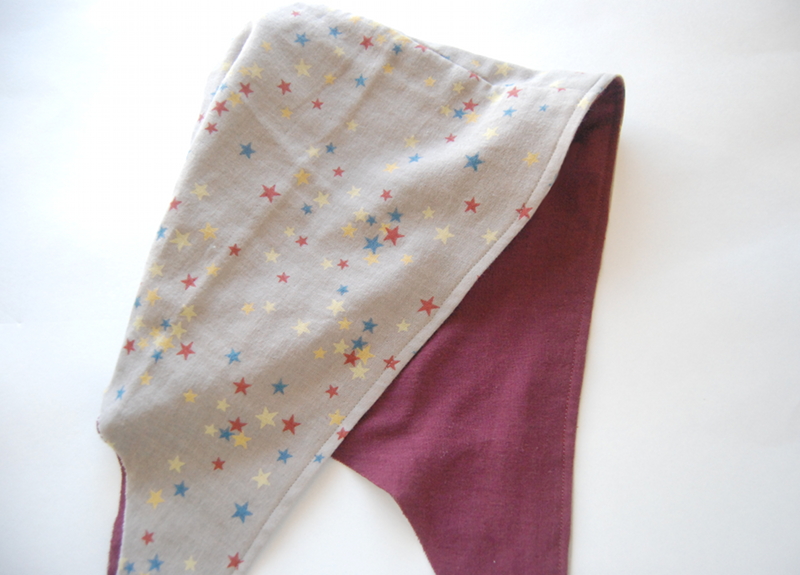
If you are adding a lining to the hood, you’ll need to cut out 2 hood pieces from your lining fabric, then sew them together like you did with the hood from the main fabric above. Press.

Place the main hood and the lining hood, right sides together, lining up the straight edge. Pin together and sew with a 3/8 inch seam allowance. Flip hood right side out so that lining is inside the main hood. Press the edge of the hood and roll the lining in slightly so that it is not visible from the outside. Top stitch along the straight edge of the hood and baste the two layers together along the bottom curve to make it easier to attach to the hoodie tomorrow.
And you’ve just completely steps 1-3! Tomorrow, we will attach the hood to the pull-over, add the elastic and finish the neckline, which are probably the most difficult steps in the whole process. But Meg will walk us through those steps on Day 4! How is your sewing coming along so far? Have you been sharing your pics on Instagram (#happyhomemadesewalong) or Flickr? Just two more days and we’ll be done with our hoodies! I can’t wait 🙂

See the rest of the sew-along posts here:
Announcing . . .
Where to buy the book
Hoodie Inspiration
Mixing it Up
Fabrics
What you’ll need
Schedule and Sew-along Prize
Day One
Day Two

Pingback: elsie marley » Blog Archive » happy homemade sew-along: day three
Hi Cherie,
Since I’m also making size 2, do you mind sharing the dimension of your kangaroo pocket? Many thanks.
Claire
Hi Claire! My pocket pattern piece (so with seam allowances included, is about 10.5 inches wide and 5.5 inches in height. Then you cut the top corners off (or you can do a curve here) and I also made the bottom of my pocket slightly curved, though you can do a straight line too. I hope this helps!
Pingback: Happy Homemade Sew-along // Day Four | you and mie
Pingback: Happy Homemade Sew-along // Day Five | you and mie
Hmmmm… shoot my back piece is smaller in width than the front piece so the side seams don’t line up after I attached the sleeves. I did add seam allowance though. I’ll have to do some investigating.
Maybe it’s supposed to be that way? I checked the pattern pieces and I cut them correctly. Can someone tell me?
I’m not entirely sure that I understand the problem. The back piece is slightly narrower than the front, but that’s how it’s supposed to be (probably for comfort, a little extra ease for tummies and movement and what not). As long as the length matches up (from the underarm to the bottom of the pull-over), you should be fine. Does that make sense? Let me know if you need more help!!
It’s all good! I just am really new to sewing and freaked out, lol. Thanks! Everything matches up!
Ok, great! Hope everything else goes smoothly!
Pingback: Happy Homemade Sew-along // Finished hoodie | you and mie
Pingback: Happy Homemade Sew-along // round-up, winner and many thanks! | you and mie
Pingback: Tinkerbell Hoodie – Happy Homemade Sew-along | Analog Bytes