
I know, I know, the last thing the world needs is another Elsa dress!! But here’s one for ya anyways 😛
So a month ago, my family and I traveled across the country to Florida for a reunion. We stayed in Fort Lauderdale for the first part of the trip, but we figured we might as well hit up Disneyworld while we were all the way out there! I knew there was a good chance that we wouldn’t be going back out to Florida any time soon and we also knew that Yuki would have an absolute blast.
But I kept hearing horror stories about the Florida’s heat and humidity. So between the unavoidable heat and all the fun activities we were going to be doing, I came up with a sewing list that was ridiculously long. Then I had my very own Kids Clothes Week and though I didn’t even get through half my original list, I did make 7 pieces of clothing in about a week or so! I’ll be sharing them throughout the next couple of weeks. First up, Elsa’s summer dress.

You may remember, Yuki already has an Elsa dress. And she loves it. But even though I kept it knit and comfy and easy to wear, it was not Florida-in-July-weather appropriate. But we had a date to meet Anna and Elsa in person, so whatever would Yuki wear!?? Well, her crazy mama would make her another dress, of course.
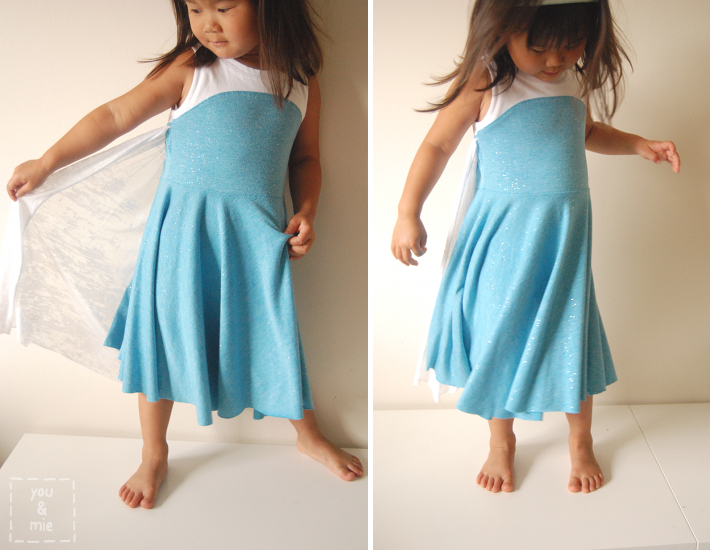
This time it would be sleeveless, and still knit for comfort, but ALL knit so it could easily be tossed in the washer and dryer after sweating all over Disneyworld and dripping melting ice cream all over it, etc. And it would have a circle skirt for twirling. And a thin cape for throwing around dramatically.
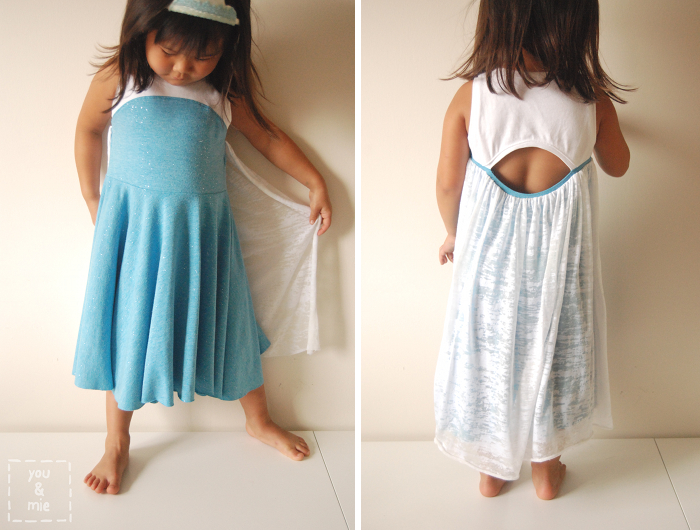
And why not an open back for fun? You may be thinking this detail looks familiar, and that it is, perhaps, the distinct feature from the Soleil Dress and you’d be right! Well, I made the Color Blocked Soleil Dress back in May and Yuki looooooves it. So I thought it would be a fun way to mix up the idea of an open back summer dress with some key elements of Elsa’s dress to make something appropriate for our date with the Snow Queen herself in the middle of a sweaty Florida summer. So I took the bodice of the Soleil Dress to start with and mashed it up with a bunch of other ideas. And hey! I even finished the neck and armholes correctly (after doing it completely wrong the first time around).
I took some photos of the steps along the way, in case you wanted to do something similar, but you’d need the Soleil Dress pattern to start with. Honestly, it’s a really fun dress you could make up a million ways, so I think it’s worth the investment.
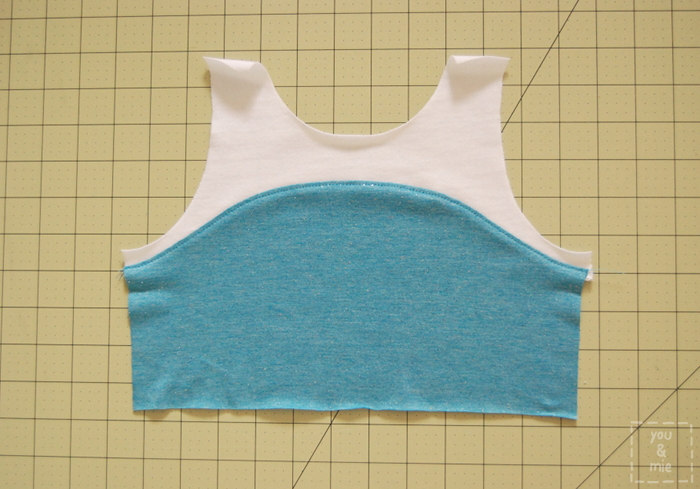
The first step is to color block your front bodice piece. Print out your front bodice pattern piece and draw a curved line where you want the two fabrics to meet. Keep in mind that there is a 1 cm seam allowance at the neck and armholes to attach the bands. Cut your pattern pieces, then trace them and add seam allowance along the curved line. I added a 1/4 inch seam allowance here.

Now cut out your two bodice pieces from your different fabrics and pin them along the curved edge, right sides together. I mark the center of each piece and pin it together there first, then at each edge. Then I carefully match up the rest of the fabric. Sew together with a 1/4 inch seam allowance.
Finish edge, if desired, then press open with the seam allowance down towards the bottom half of the bodice. Top stitch using a stretch stitch or a lengthened regular stitch.
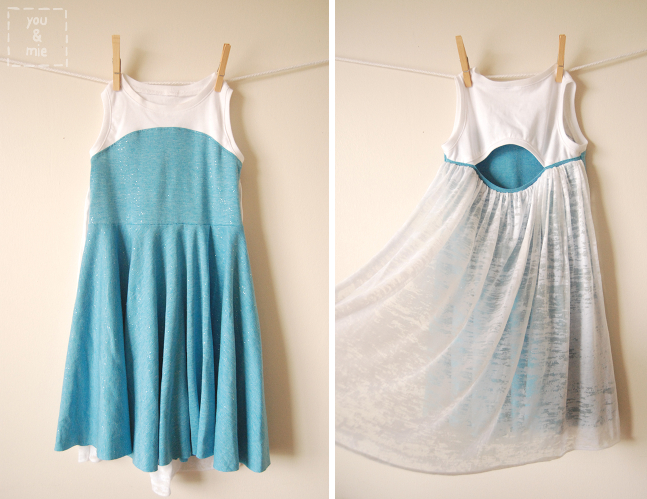
Assemble the back of the bodice almost as directed except with 2 big differences. First, you’ll sandwich a cape between the bottom back piece and the “edging,” as it’s called in the pattern. Also, instead of the top back piece overlapping the bottom piece, I switched it to accommodate the cape.
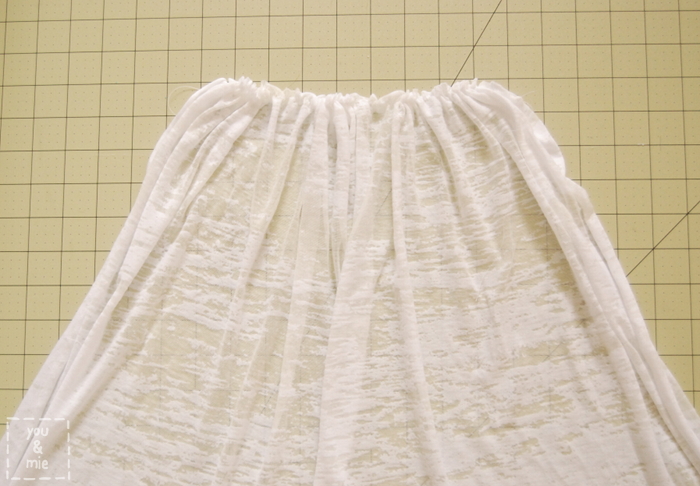
Cut your cape fabric into a rectangle, the length you want the cape to be and a couple times wider than the finished width. Gather the width with 2 rows of basting stitches.
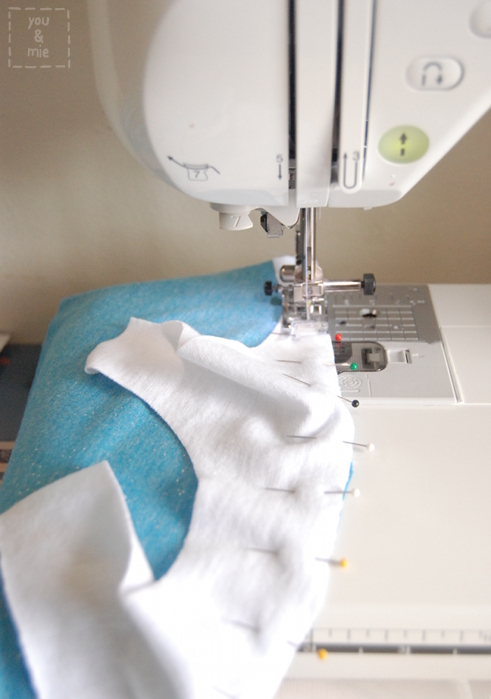
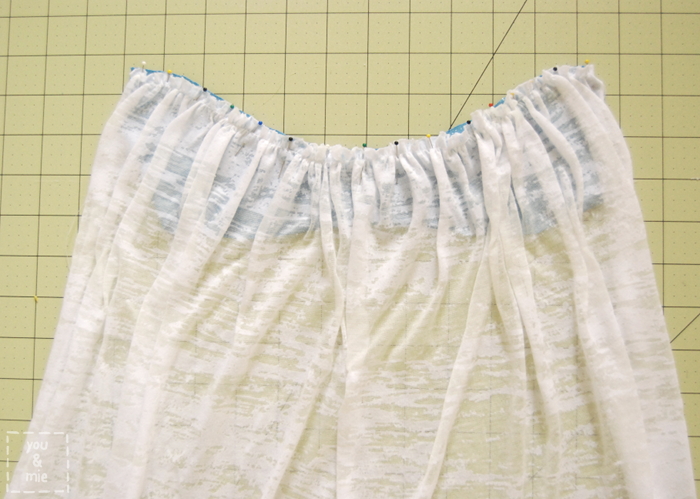
*IMPORTANT* I forgot this next part and had to redo it, so pay more attention to what I say, than what you see in the pic below!
Starting 1 cm in on each side of the bodice, pin the cape onto the bottom back bodice piece, right sides up. You’ll want to leave that 1 cm of bodice on each end because that is the seam allowance for the side seams and you don’t want your cape getting sewn up in that.
Baste the cape to the bottom back piece with a 1/4 inch seam allowance.
Attach the “edging” as directed in the pattern with the cape sandwiched between the bodice and edging. Finish the edge and press the binding up and seam allowance down.
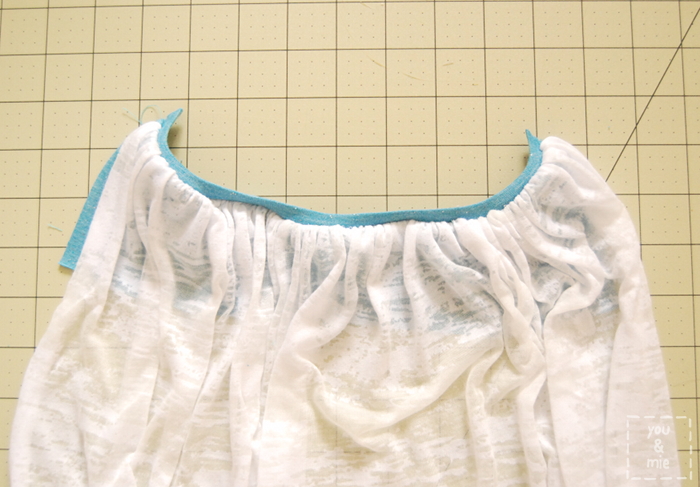
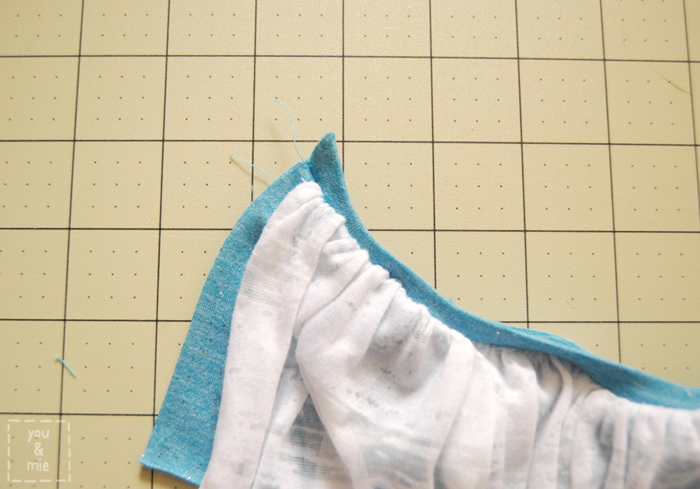
Below you can see the 1 cm of bodice extending past the edge of the cape. Flip the cape up and top stitch along the seam (with a stretch stitch or lengthened regular stitch) securing the seam allowance down.
Finish assembling the bodice as directed, except you’ll want to place the bottom back bodice piece over the top piece.
The last thing I added was a full circle skirt, for twirling.
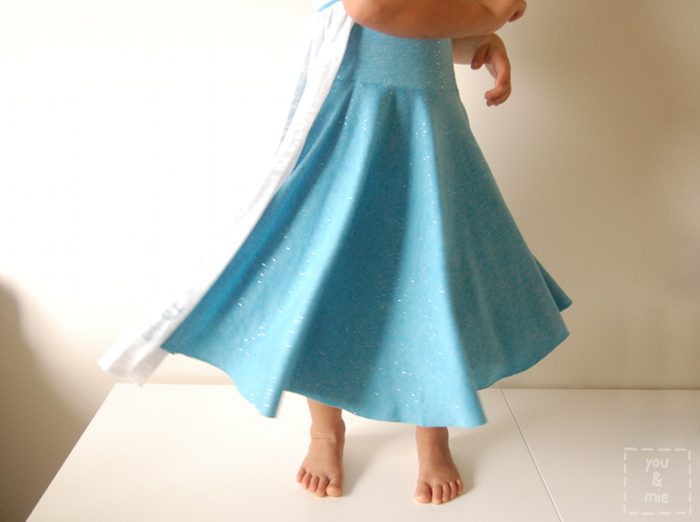
I always use Dana’s Circle Skirt tutorial whenever I make one, except I did not add 2 inches to the waist measurement to come up with the circumference. I just measured the bodice width and doubled that for the “waist” measurement. I didn’t add the extra inches because I didn’t want the waist to be any bigger than the bottom of the bodice. I figured that if it was too small, I could always trim some away from the waist to make it bigger, BUT it ended up fitting perfectly!
I didn’t even bother hemming the bottom of the skirt or any of the edges of the cape. Oh, the beauty of knit fabric!!
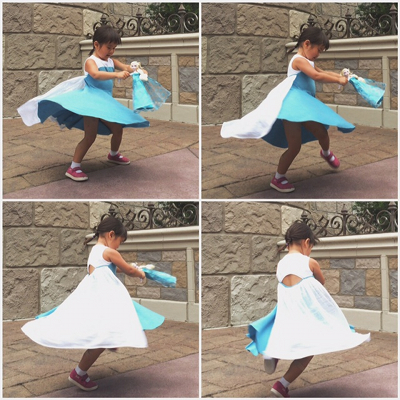
And boy, does this dress have MAD twirl. Just check out this spin!
Needless to say, Yuki is pretty pleased with it. And I’m glad that she didn’t have to walk around in that sweltering heat wearing one of those store bought long sleeved synthetic dresses all day! Not that there is anything wrong with the store bought dresses, but I just know that if my kid was wearing one of those, she would be so whiny and grumpy all day, but also refuse to take it off. The dress I made was “Elsa” enough to satisfy my own princess, but keep her comfy and cool. It’s also casual enough that I let her wear it around now, including to school. She’s pretty thrilled about that.
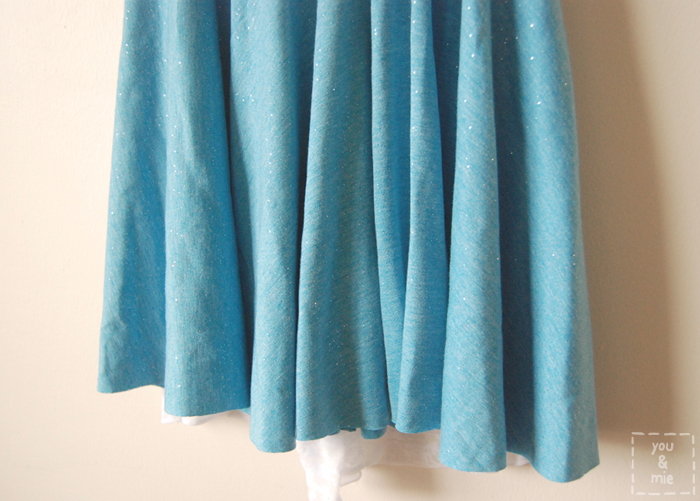
The blue fabric is from Jo-ann and is some sort of synthetic blend (I think) with glitter. The first time I saw it, I knew it would be perfect! But then I read the cleaning directions and it said to hand wash separately or something like that, which I am NOT down with when it comes to kid’s clothes (who am I kidding, I’m never down with hand washing). So I put it back and searched for something else. But I ended up coming back to it because it was just so perfect and I couldn’t find anything better. I figured that it needed to be hand washed because of the glitter. But while the glitter remains after several trips through the washer and dryer (it’s great, the glitter does not come off during sewing, wearing, or washing), it did start to pill immediately.
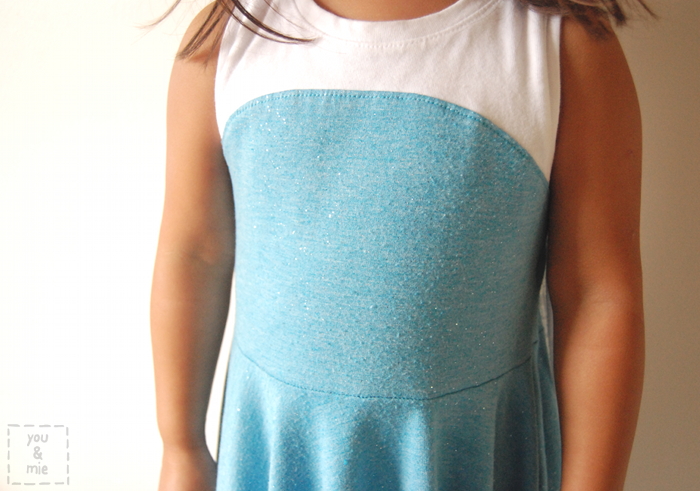
This picture was taken after one trip through the washer and dryer.
So while it doesn’t look new or perfect anymore, Yuki certainly isn’t complaining. And I can’t say that Jo-ann didn’t warn me. A little pilling is totally worth it, if I have a happy child and I don’t have to hand wash anything 🙂
Oh, and if you ever wondered what dreams coming true looks like . . .
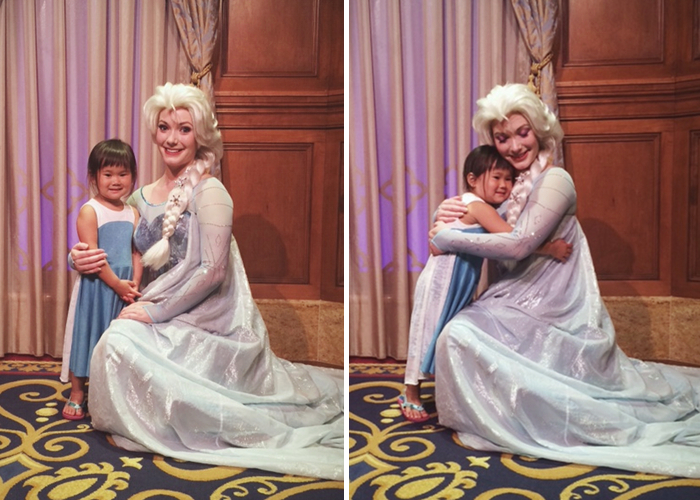
. . . that’s pretty much it (she was a little star struck).
Alright, I’m really hoping that this is the last time Elsa will be mentioned on this blog. Though Yuki still loves this dress and her new Elsa doll, we’ve definitely slowed down with the movie viewing and soundtrack singing/listening. And we’ve recently talked about her birthday party and potential Halloween costumes and there has been no mention of Elsa there either, so I’m thinking we’re almost in the clear. Fingers crossed.

Reblogged this on Senyegahsaviour's Blog and commented:
This is very impressing, I love it, keep it up.
I love this! I think my daughter would love this! Ah, only if my talents consist of a sewing machine.
Oh man, she’s the cutest. I can’t believe she got to meet Elsa, my girls would freak out! Elsa dresses for all seasons, I say 😉
I love it! I have been wanting to buy the Soleil pattern all summer, I guess I have an excuse now. My daughter would love that dress!
I’m glad you added the last 2 pictures of her meeting Elsa. (Aw, I might even be a little teary right now!) You are such a wonderful momma! And I totally hear you about how little ones will totally complain about a piece of clothing AND refuse to take it off!
sweet! the circle skirt was a stroke of brilliance. alright, alright, maybe i have to make one of these for my daughter. she wants the anna (ahna?) dress, though…
I’d love to see your version! I struggle with making things like this . . . promoting her obsession and such – but when you see how HAPPY it makes them . . . *sigh*
Love this!
sweet.. 🙂
What a fabulous, yet practical, dress. She looks so sweet with her idol!
My heart melts at the last picture… fantastic job on the Elsa dress!!
Such sweet fun!! I feel a little teary myself!
Hehe, thanks everyone! It is really sweet seeing your child experience something so special to her! And while wearing a mama-made dress 🙂
Love this! I have the soleil pattern and haven’t tried it yet…I think a trip to Joanne’s is in order! 🙂 I saw the blue fabric was from there, did you get the white fabric from there also? I’ll re-read now…maybe I missed it! Great post! Now to make an Elsa doll for my little! 😉
Pingback: Cosi Swimsuits For Two! | you and mie
Once upon a childhood….:-)
Beautiful work! Plus, what great memories! I look forward to more posts.
Pingback: Strawberry Skaters | you and mie
Pingback: Frozen's Elsa Dress Tutorials (Ice Queen) - Andrea's Notebook
Cool! My cousin absolutely LOVES cinderella.She has a pair of princess shoes,and she has a baby “Cinderella” doll that she calls Cinderbella, and she loves watching the movie even though she walks away after 5 mins. of the movie. Anyway. She’s 2 1/2. 🙂
Pingback: Flashback skinny tee Elsa dress | papers, tapers and capers
Pingback: Favorites from 2014 | you and mie
This is adorable! My mother sews and I have confidence she can make this for my 3 year old for our Disney trip. You are so generous to share the pattern, I appreciate it ,and say Thank you in advance : )
How much of each fabric please