Sew Geeky: Jiji the Cat

Jiji Sweatshirt by you & mie

So so so much sewing going on over here!  I wish there were more hours in the day so I could sew more!  But who doesn’t right?  I’m here with a post for Sew Geeky, a fantastically nerdy series hosted by Sew Chibi and Max California.  Each month, they pick a theme and invite some people to sew along with them!  In fact, everyone can sew along!  Everyone is encouraged to celebrate their inner geekiness!

This month’s theme is Studio Ghibli.  I jumped on this opportunity, because I’m a HUGE Ghibli fan.  If you’re not familiar with Studio Ghibli movies, I urge you to go and look some up and watch them immediately.  The director/writer/producer that is most strongly associated with Studio Ghibli is Hayao Miyazaki and he has created some of my favorite movies.  He is the genius behind My Neighbor Totoro, Princess Mononoke, Spirited Away, Ponyo, Howl’s Moving Castle and many others.  And Studio Ghibli has produced other amazing movies as well, like Grave of the Fireflies, Arrietty and Whisper of the Heart.  Seriously, go watch them all now. Continue reading

Panda Raglan Tee {tutorial}

Yes!  I did it!  I finally made something for Yuki that she really likes!

Panda Raglan Tee Tutorial by you & mie

Panda Raglan Tee Tutorial by you & mie

I have to admit, I’m pretty psyched about this project.  A couple of months ago I saw a little toddler wearing a tunic that was similar and definitely had an “I can make that!” moment.  Well the idea has been rolling around in my head since then and I just needed the time to do it.  Isn’t that what KCW is all about!?

Panda Raglan Tee Tutorial by you & mie

The theme for this Kid’s Clothes Week is “Mini Me” so I decided to make one for little sister as well.  Yuki loved that she and Kaya had matching shirts!  Unfortunately, Kaya wasn’t really feeling the photo shoot.  But I have a feeling she really loves the shirt too 😛

Panda Raglan Tee Tutorial by you & mie

Yuki says, “Can you see my panda ears?”  The 3D ears are definitely the most fun feature of these shirts.  And though these are pandas, you can really make this shirt into almost any animal!  Want to make one for your favorite animal lover?  I made a tutorial!

Here’s what you’ll need:

  •  a raglan t-shirt pattern (I used the Oliver + S Field Trip Raglan T-shirt Pattern, but you can use any, or draft your own)
  • knit fabric (refer to your pattern for amounts) and coordinating thread
  • scraps of fabric for the ears (knit or woven)
  • freezer paper
  • precision knife/scissors
  • iron
  • fabric paint and brush (be sure to read all the directions on your fabric paint before you begin your project)

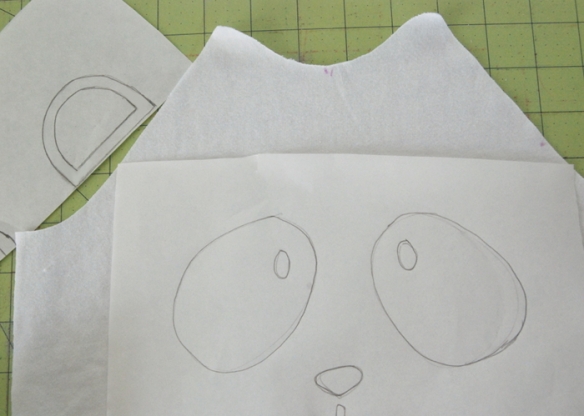
To get started, cut out all your shirt pieces as your pattern directs (shirt front, back, two sleeves and a neckband).  Lay out the front shirt piece and place your freezer paper on top, shiny side down.  Sketch your animal face.

Panda Raglan Tee Tutorial by you & mie

Make a pattern piece for the ears.  We will add a small pleat to the ear, so add a little width to the base and also 1/4 around for seam allowance.

Panda Raglan Tee Tutorial by you & mie

Carefully cut out your stencil, making sure to keep any small pieces you need to place on the inside of your stencil, like the eyes.

Panda Raglan Tee Tutorial by you & mie

Place your stencil where you want on the shirt (shiny side down) and iron it on using a high heat setting.  Be sure to press well especially around the edges of the design.

Panda Raglan Tee Tutorial by you & mie

Put your fabric on cardboard or paper, in case the paint seeps through.  Apply the fabric paint in a thin and even coat.  Try not to paint towards the edges of the stencil to avoid sweeping paint under the stencil.  Wait till the paint is mostly dry (30 minutes) and apply another thin and even coat.

Panda Raglan Tee Tutorial by you & mie

Allow the paint to dry completely before peeling off the stencil.

Panda Raglan Tee Tutorial by you & mie

What a fun (and slightly nerve wracking) moment 🙂

Now for the sewing part.  Cut out 4 ear pieces.

Panda Raglan Tee Tutorial by you & mie

Place two ear pieces right sides together and pin.  Repeat for other pair.

Panda Raglan Tee Tutorial by you & mie

Sew along the curved edges with a 1/4 inch seam allowance.  Leave the bottom open.  Trim the curved edge to 1/8 inch.

Panda Raglan Tee Tutorial by you & mie

Turn right side out and press.  Add a small pleat to the center of the ear (the two ears should have pleats going the opposite direction).  Pin and sew pleat in place.

Panda Raglan Tee Tutorial by you & mie

Trim the bottom edge so it is straight again.

Panda Raglan Tee Tutorial by you & mie

Figure out where you want your ear on the shirt front and align the raw edges, right sides together.  Pin and baste the ear in place 1/8 inch from the edge).

Panda Raglan Tee Tutorial by you & mie

Panda Raglan Tee Tutorial by you & mie

Now we will attach the sleeve to the shirt front.  Align the raw edges of the shirt front and the sleeve front, right sides together.  The ear should be sandwiched in between.  Pin and sew according to the pattern directions.

Panda Raglan Tee Tutorial by you & mie

Finish edge if desired.  Press the seam allowance towards the shirt and the ear pointing “up” towards the sleeve.  On the right side of the shirt, top stitch the ear to the sleeve close to the seam.

Panda Raglan Tee Tutorial by you & mie

Repeat on the other side with the second ear.

Panda Raglan Tee Tutorial by you & mie

Now finish the shirt as directed in your pattern and voila!  An awesome panda shirt for your little one!

Panda Raglan Tee Tutorial by you & mie

Trust me, I reeeeeally think they’ll like it!

Now I’d seriously love to see what other animals you guys can make into shirts!!  If you use this tutorial to make a fun animal shirt, please let me know!  You can add a picture to the you & mie flickr group or just leave me a comment or email me.  I imagine a whole zoo of fun animal shirts 🙂

It was so great to just make something fun, not for a specific project.  Thanks for the motivation Kid’s Clothes Week!  Hope you’ve been able to make something fun too!

KCW Day 5 – Burnout Raglan Tee

Ok, so technically today is Day 6, but this tee was made mostly on Day 4 and finished and photographed yesterday, so we’re calling it Day 5, ok?  OK!
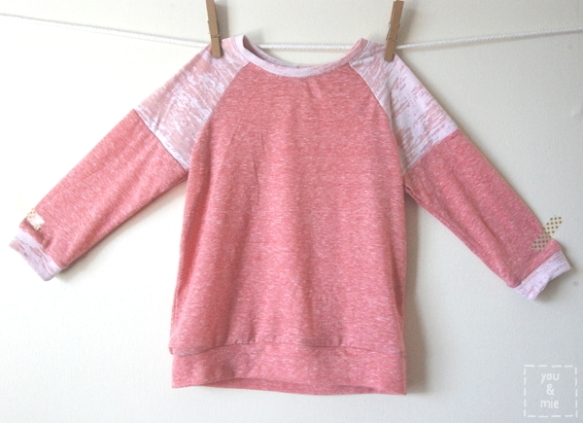
BurnoutRaglan1

The pattern is the Oliver + S Field Trip Raglan T-shirt which is now available as an individual PDF pattern!  I’ve had my eye on this raglan shirt pattern for awhile, but couldn’t fork over the cash for the set, knowing I’d probably never make the cargo pants.  But Oliver + S have started offering some of their basic pieces as separates!  And a good raglan pattern seems like a staple for any collection.  This one doesn’t disappoint and I already have several ideas for more raglans and remixes that I can’t wait to try.
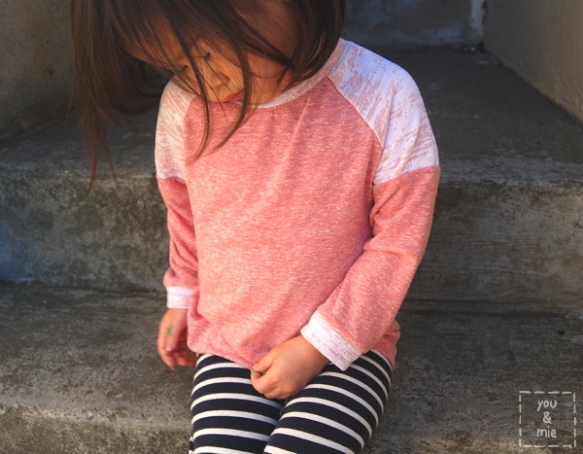
BurnoutRaglan4

I made the shirt in size 3T and it is a little large for Yuki, which isn’t much of a surprise considering her petite size.  I probably could have gone down a size, but this is great because I know it’ll fit her for awhile.  It’s definitely a looser fitting shirt than the Flashback Skinny Tee, which, of course, is supposed to be a skinnier/tighter fit.  I had to shorten the sleeves a bit.
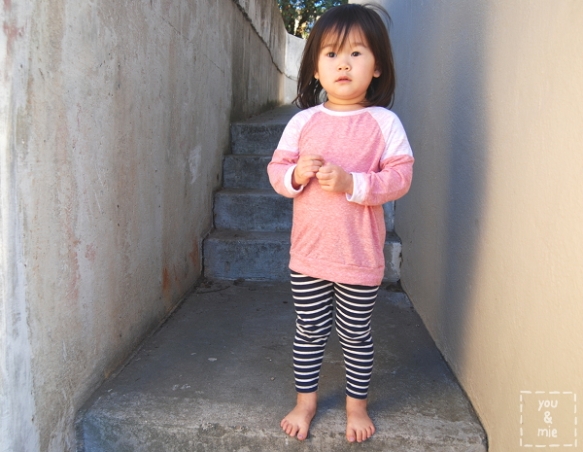
BurnoutRaglan3

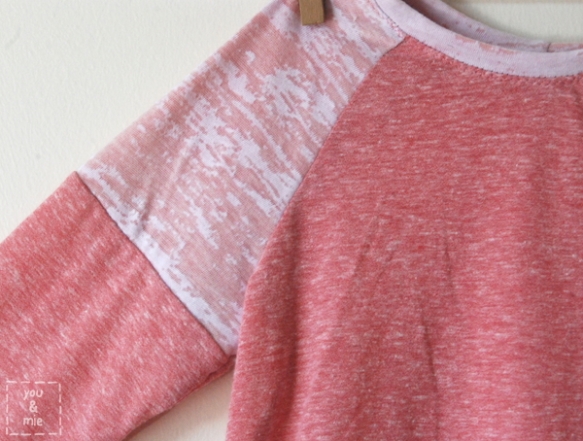
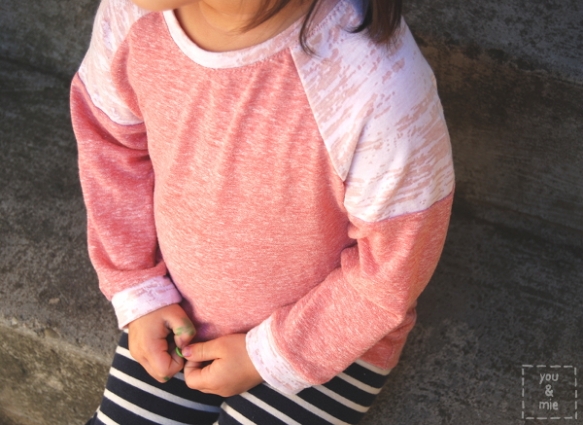
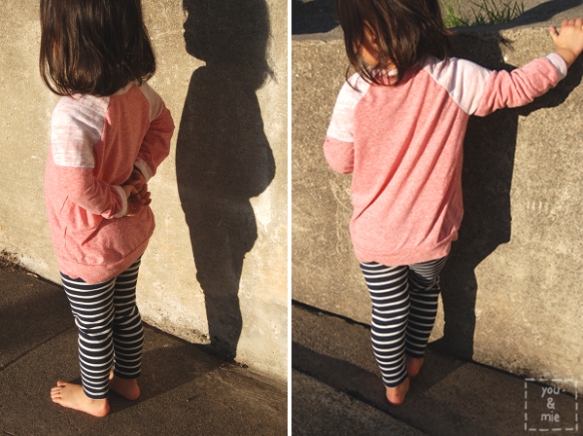
The biggest adjustment I made to the pattern was adding color blocking to the sleeves.  It was super simple to do and I love the finished look.  I also decided to finish the sleeves and bottom with bands/cuffs instead of just hemming it and omitted the pocket.
BurnoutRaglan2

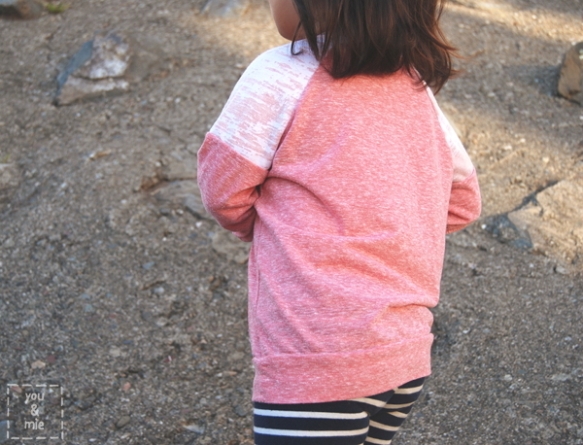
The main fabric is a suuuuper thin and soft heather red knit.  It’s so heathered that it looks pink.  I bought it from the remnant bin at Discount Fabrics awhile back.  I picked it out because it is really soft and comfortable, but I don’t think I realized just how thin it is.  I wasn’t sure if it’d be stable enough or opaque enough for a shirt, but it worked out fine, it just isn’t very warm.  But definitely soft and comfy.  The color blocked shoulder, neckband and arm cuffs are actually two layers.  An ever MORE suuuuuuuper thin and see through, burnout tissue knit in white on top of the heather red knit.  I don’t even know why I bought this burnout knit since it’s pretty impractical on it’s own (unless you can pull off the see through top look, which unfortunately, I cannot).  I actually had thrown it in my “get rid of” pile because I didn’t think I was going to use it, and then fished it out for this.  Turns out, it looks great layered!
BurnoutRaglan6

You can kind of see how see through the top is here, over Yuki’s striped leggings.

I knew that these knits, being as thin as they are, were going to be a bit of a challenge to sew.  In fact, they were a challenge to cut!  They are so stretchy that if you’re not really careful, your pieces can come out a little misshapen.  I tried the stretch stitch with a ballpoint needle and my walking foot, but even with all that, the fabric was getting sucked into the machine and stretched out.  I probably could have busted out the tissue paper trick and been fine, but instead I switched over to my serger and it sewed up so easily.  So I constructed the entire top using only my serger – this is my first time doing that – and I loved it!  The only time I used my sewing machine was to topstitch the neckband down with a stretch stitch.  I would have used it to hem the sleeves and bottom, but since I finished those with cuffs instead, I didn’t need it.  SO EASY.
BurnoutRaglan5

Doing a color blocked shoulder panel/sleeve is a very simple pattern adjustment, but if you’re not sure how to do it, I’ll tell ya!

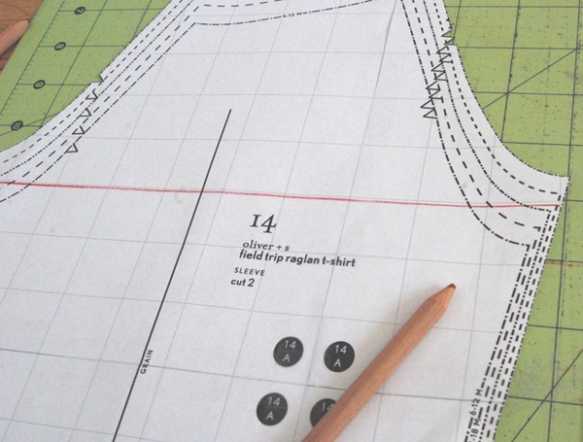
First, I cut out my sleeve pattern in the appropriate size.  Then I drew a line horizontally across the sleeve where I wanted to add the contrast fabric.  My line is 1/2 an inch below the bottom of the armhole.
colorblocksleeve1

Place a piece of tracing paper on top of your sleeve pattern piece and trace the top of the pattern up to the line you created.  You’ll want to add a 1/4 inch for seam allowance.

colorblocksleeve2

On a separate piece, you’ll need to do the same for the bottom part of the sleeve.  Trace around the bottom of the sleeve up to the line you created and then add a 1/4 inch for seam allowance above the line.  Now you have your two sleeve pieces!

The first thing I did after cutting out my fabric was sew the two sleeve pieces together with a 1/4 inch seam allowance and press.  Then I followed the rest of the pattern instructions as directed!  An easy alteration that makes a pretty big statement 🙂
BurnoutRaglan7

This Oliver + S pattern, like all Oliver + S patterns, is really well written, with clear directions and diagrams and helpful tips.  I can never speak highly enough of their patterns.  They are just so reliable and . . . GOOD.  The shirt comes together really quickly and is a great first-knit-project, if you’re looking for something to get you started.  It’s a great basic for boys and girls and now that it’s offered as a separate pattern, there’s no reason NOT to get it.

So that’s a wrap for my Kids Clothes Week.  I made two things, this and the Knit Baby Vest.  Back in the day I might have tackled 6 projects, but I’m just not that same young sprightly thing I used to be!  😛  I love both of the things I made and that makes me feel happy.

How did your week go?  I haven’t actually had a chance to do much browsing of other people’s projects unfortunately, but maybe that’s what I’ll do today and tomorrow.  But if you sewed along, leave me a link to your favorite project from your week and I’ll be sure to check it out!

*This pattern was generously given to me for this review, but all opinions are 100% my own.*