
It’s already day three of the series and we’re really starting to get into the meat of these books. Honestly, when I tried sewing from a Japanese sewing book for the first time, the most intimidating part for me was unfolding the huge pattern sheet and not being able to figure out which pieces I needed for the garment I was trying to sew. And the most time consuming part, by far, is still tracing the pattern and adding seam allowance. But here to offer us some helpful tips is Meg from elsie marley.
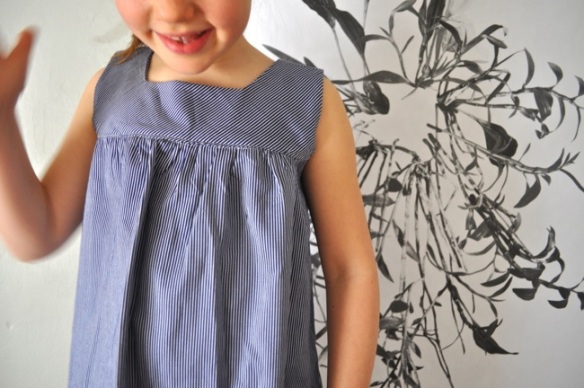
I’m assuming that you all know Meg from elsie marley (and if you don’t, you should, like right now) because she is one of those “must follow” bloggers if you’re into sewing children’s clothing at all. Everything that comes out from under her presser foot is pure gold. Seriously original and stylish clothes that are not too flashy, but always cool. And she was one of the bloggers that turned me on to Japanese sewing books in the first place! I think this adorable top must have been one of the things I’d seen on her blog and it had me hooked on both her style and Japanese patterns.
She is probably most well known for being the creator and host of Kids Clothes Week (formerly known as Kid’s Clothes Week Challenge or KCWC for short). Meg came up with an idea to challenge people to devote one hour per day for an entire week to sewing children’s clothes and ended up creating what is one of the most popular, most anticipated, and most fun sewing events out there. For one week, literally hundreds and hundreds of people are sewing together, sharing their creations, being inspired, forming a community, being productive and having so much fun doing it! There is another one coming up soon, so be sure to check out the brand-spanking-new KCW blog for all the details.
Not only is she an awesome seamstress with the power to motivate hundreds to create a sewing army several times a year, but she is also ridiculously funny (her posts always crack me up) and seems so real – no fake shiny veneer on her blog – just real glimpses into her real life. Awesome cook, talented photographer, crochet-er, rockin’ mom (check out this cloud loft bed and her chalk paint!) and all around cool person. Here’s Meg . . .
***
Hello you & mie readers! I’m so happy to be here discussing one of my favorite topics–Japanese sewing books! I love the modern and simple shapes of the clothes and can’t resist the beautiful books. Each book is like a new puzzle to solve. It is an extra challenge, but a fun one! I promise after this series you will be practically fluent in Japanese sewing books. That said, I neither speak nor read a lick of Japanese. I can look at pictures and follow arrows. And that, my friends, is pretty much all you need.
***************************

I’m going to lead you through a few confusing areas in Japanese sewing books:
- how to determine what pattern you need
- how to locate it on the pattern sheet
- how to add seam allowance
Ready? Here goes…

How to Determine What Pattern you Need
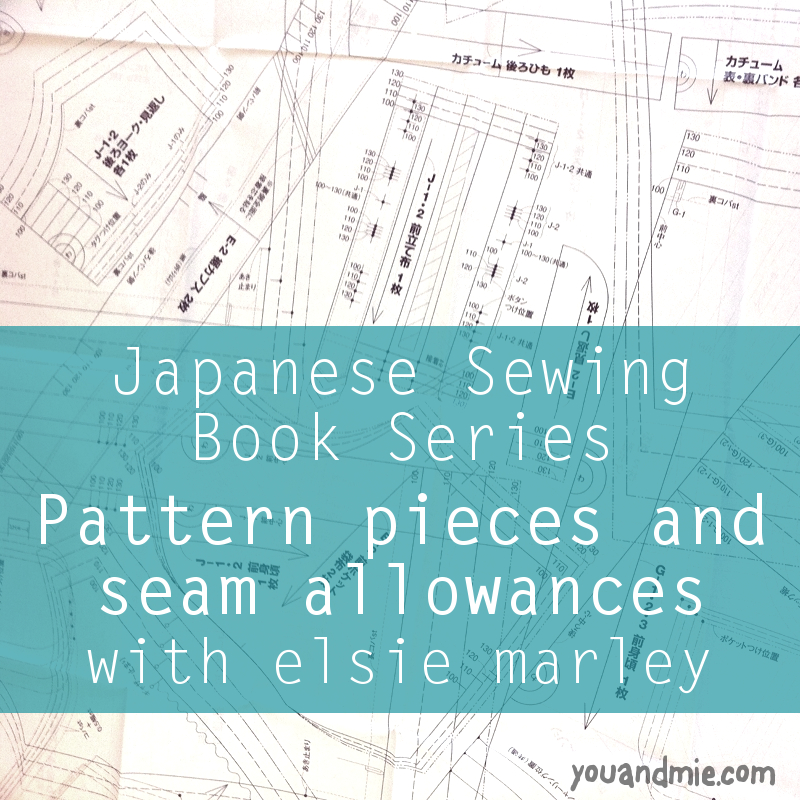
After Kristin’s and Sanae’s posts you know that the photos are in the front of the book and the directions in the back. Now you only need to match the pretty picture of what you want to make with the instruction to make it. If you look at the picture there will be, in most books, a letter of the alphabet somewhere on the picture (i.e. A, B, or C, not a Japanese character). Some book will use numbers, but most use letters. The dress above is pattern b. If you look closely you’ll see it also says, “How to Make p. 34.” This is super helpful, but sadly not in every book. If there is no page number on your pattern picture, head to the back to look for your letter (or number). They won’t usually be in alphabetical (or numerical) order. The directions are in whatever order the author thought best, but keep looking, you’ll find it.

How to Locate your Pattern on the Pattern Sheet
Once you find it, you will be ready to start tracing your pattern! Easier said than done, you are thinking. I mean look at that crazy thing up there! Relax your eyeballs and you’ll be fine. All pattern sheets are different, but they do actually want you to find you pattern so there is order in that chaos somewhere. In this book (Happy Homemade Vol.2) there is a key: on one side are patterns a,b,c,d,f,g….and on the other side e,h,i,l,m…

Other pattern books do it differently. On all pattern sheets there are two or three colors. Look for you pattern letter. Is it green? Then your pattern (and all the markings that go with it) will be drawn in green. Is it black? Your pattern will be black. Once you start to decipher the code, the crazy pattern sheet starts coming into focus.

Some pattern pieces will be for two or three different garments. I’m making dress b, can you see the bodice piece I need up there? It is in the upper, middle of the photo, drawn in black. That piece is also used for dress a. See the little line drawn from the letters to the pattern? Those are your arrows and they are very helpful. Follow the arrows, people.

Okay, after you know–sort of–where your pattern pieces are, go back to the direction page and look for the pattern piece layout picture. This little picture is invaluable. It will show you all the pattern pieces you need (and need to find on the pattern sheet). It will also tell you what pattern pieces aren’t on the pattern sheet. Oh that’s right, some are not there, but don’t worry they are usually just long rectangles or something simple. On the pattern for dress b, I need bias tape 2.5 cm wide and 15 or 20 cm long. Or maybe both. Or maybe one 15cm long and two 20cm long. I don’t know, because I can’t read it! This is where you have to look at the rest of the pictures and puzzle it out. Look at pictures and follow arrows. You can do it!

How to Add Seam Allowances
Now you know–pretty much–what pattern pieces you need. Go back to the pattern sheet and locate all of them. To trace (and you have to trace, there is no cutting that pattern sheet up) the patterns I use freezer paper, but use whatever you like. Japanese patterns are a bit odd because they have no seam allowances. Let me say that a little louder, THERE ARE NO SEAM ALLOWANCES IN JAPANESE PATTERNS. I’ve sewn many patterns from these books and I still have to remind myself every time. So how do you add seam allowances?
I like to use a trick my friend, Mary Jo taught me.
- Tape two pencils together.
- Draw a line with both at the same time.
- Measure the distance between them.
It is usually about 1/4 in or 1 cm–the perfect seam allowance. Now you can trace the pattern and draw the seam allowance at the same time. (In the photo above, my pattern shifted a bit, but I was drawing with my left hand and taking a photo at the same time, so cut me some slack).
One more thing about seam allowances and then I’ll be done. Go back to the pattern piece layout picture. It’s invaluable, remember? You can see that the pattern pieces are drawn and then the seam allowances are drawn darker. The default seam allowance is 1 cm, but sometimes they want different seam allowances in different places. In the picture above do you see the 4 with the arrow drawn to the bottom? For dress b the seam allowance on the bottom edge is 4 cm. You can’t use the pencil trick for this, you’ll have to get out your handy ruler. Sometimes there will be edges that require no seam allowance; these will be marked 0. Keep referring back to your pattern piece layout picture and you’ll be good to go.
When in doubt follow arrows and look at more pictures. Good Luck!
***
She makes it seem so easy, doesn’t she? But Meg is right, you CAN figure it out, you just have to train your eye a bit and know what to look for. Now be sure to head over to elsie marley to see this adorable dress she made for her daughter.
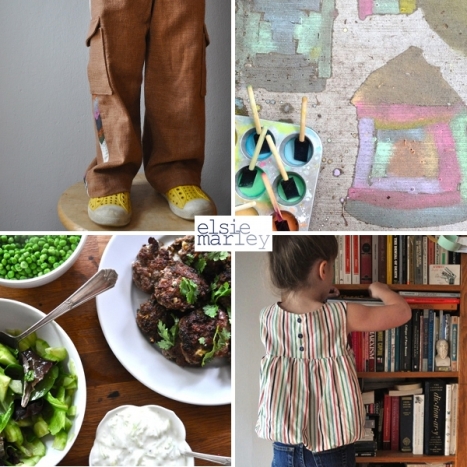
 And here’s some more eye candy for you – all to be found on elsie marley. Thanks Meg, for being here and dropping some of your knowledge on us.
Only 2 days left of the series!! We have two more great posts coming up this week AND a giveaway! Anyone interested in winning a Japanese sewing book?! Well, be sure to check in the rest of the week so you don’t miss a thing 🙂

Hello Cherie and Meg,
After reading this post I came to the realisation, that you guys just made my life so much easier. I did not know about that “taping two pencils together” trick. I mean, this is like a life changing moment 🙂
Here is my contribuition for today: http://www.flickr.com/photos/mybabylittlefeet/8594161677/in/photostream
Thank you so, so much.
Carla
Such great tips, Elsie! Thanks so much sharing your wealth of information, especially the double pencil tracing tip! And love that top:)
wow, that pencil trick is so clever!! between this and all of the great instructions over the last few days, i’m feeling much less intimidated and may actually tackle a japanese pattern someday!
meg is awesome! Man, I hope spring comes soon, I’m ready to bust out my japanese books!
Cherie – WONDERFUL SERIES THUS FAR!!! So informative, and very methodical in covering the basics of Japanese pattern sewing…. And, YES! A giveaway sounds pretty good as well…
Cherie, the series is great. I love it, especially the way you and guests are presenting. !!Genial¡¡ It will be ambitious to want to win a book too?
So good to know that I need to add in seam allowances! I am so much smarter now!
Thank you so much for this series. I’m building my courage to start a project from happy homemade v.2 (yes there is some English there, but these posts are invaluable!!). Congratulations on this great series! Renee
Every day I look in my mail box for the two books I ordered….still not here, argh! Now that I read this post I realize I would not have been able to do anything before I read this post. I LOVE to learn something new when it comes to sewing and THIS is certainly living up to that – love it!
Meg is so right about that ‘pattern piece layout picture’ – it is so useful. I also use it to help me work out how much fabric I will need as fabric width and length are shown. You can also check if you have the correct pattern pieces by comparing the shapes to those on the layout. It also lets you see clearly if a pattern piece has to be cut once, twice or more.
Enjoying the series!
Brilliantly written post. I tried the pencil trick, but my pencils must have been too skinny! Off to the art supplies store (which every bit as lovely as a fabric store visit after all!).
I’ve been sewing along with you on my blog. Thanks for a great series.
filing all this great info away for the day when i finally try a japanese pattern – thanks for all the great tips!
I love Meg’s nonchalant attitude about it all. Let’s not psych ourselves out about this – to quote the straight stitch society motto “life is hard, sewing is easy!” AMIRITE?! Just ignore the fact that it’s all in Japanese and sew. Hehe.
I guess it’s good to know about the seam allowance and right side and wrong side and all that, though… 😉
Pingback: Japanese Sewing Book Series with miss matatabi | you and mie
A few tools I like to use are as follows: Japanese tracing paper, dual tracing wheel, and Swedish tracing paper. I sell all of these tools in my shop here: http://www.finchsewingstudio.com. The dual tracing wheel traces your desired seam allowance. The tracing paper transfers your seam allowance onto you already traced pattern. This may seem like double tracing, but it’s quick with the wheel. I also like just dealing with one line when tracing off of the original because there are so. many. doggone. lines. everywhere. in these patterns. You place the Japanese Tracing paper under your freezer paper or Swedish tracing paper and follow your the original traced line. It transfers your seam allowance in whatever width you want. The tracing wheel is adjustable so you can choose from 3 widths… Pretty awesome!!
Meg, I love your seam allowance pencil trick!
Pingback: Japanese Sewing Book Series with nested in stitches | you and mie
Cherie…I’ll say it again, but this is a brilliant series!! I’ve never thought I would attempt a Japanese pattern but with the help of all your Japanese pattern experts I just might. Very informative and great pencil seam allowance tip Meg!
great series – though I seem to have the opposite problem to this – I have almost exclusively sewn from patterns where you have to add the seam allowance, so I did exactly that when I recently used a US pattern to make a coat – needless to say, I made a beautiful tent!
Oh my! That’s awful (and pretty funny too :P) – I’ve been so spoiled by US patterns with seam allowance already built in. I hate having to do it myself so Meg’s tip is a lifesaver!
I never have seen that two pencil tip and what a great idea! I sew burda patterns with no seam alowance and I will be using this technique all the time now! ~Major Moma
Pingback: Japanese Sewing Book Series Wrap-up! | you and mie
Pingback: elsie marley » Blog Archive » happy homemade vol. 2 in english!
Pingback: KCW Winter 2014: Day 1 & 2 | you and mie
Pingback: Happy Homemade Sew-along // Day One | you and mie
Pingback: 10 Modern Sewing Patterns that Flatter Women - The Sewing Rabbit
Pingback: birthday mini marthe | skirt as top
You could rig up a sturdy compass (from a student geometry set) with 2 pencils and create a seam allowance of almost any width.