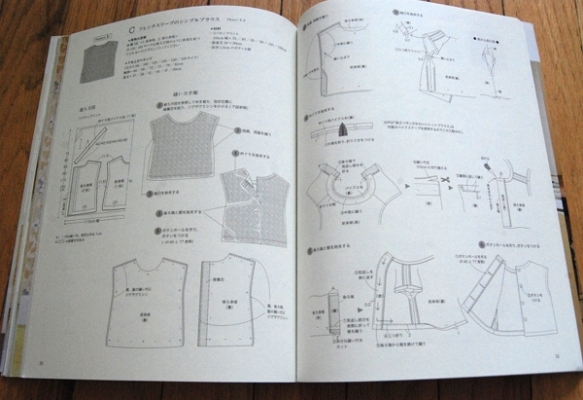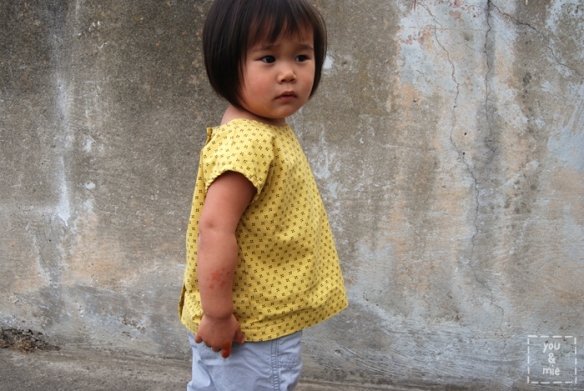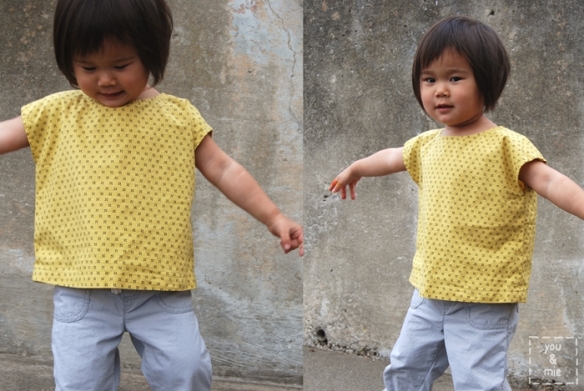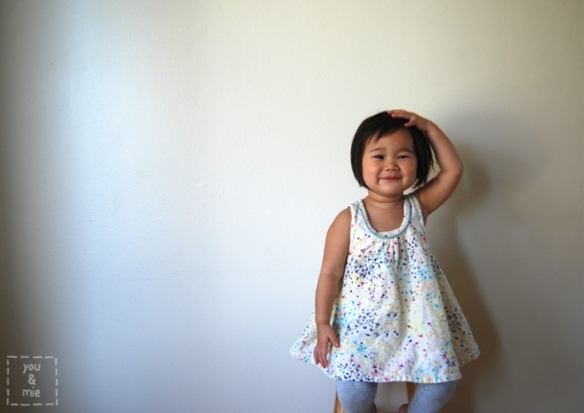
Japanese Sewing Book Series Wrap-up!

JSBS_button500

Phew!  Looks like the Japanese Sewing Book Series is already over!  I’m sad, but so so grateful for my awesome guests for all of their hard work!  I didn’t even realize it until halfway through the series, but this was the first time guest posting for three of my guest bloggers (Sanae, Frances and Robin).  Bet you couldn’t tell though, huh – they were all such pros!

And I’m super grateful for all of you for joining us!  YOU are what made it all worth it!

Thanks to everyone who entered the sewing book giveaway.  I LOOOOOVED reading your comments, and even though I won’t be able to respond to every one, I was really excited to hear that people are feeling more confident about trying Japanese patterns, or that some of you never knew about Japanese patterns before the series.  I’m glad that so many of you learned something new, or have bookmarked the posts to reference when you’re sewing.  When I had the idea for this series, I wanted to do something fun, but also something that would be really informational and serve as a great resource for seamstresses for a long time to come.  I’m hoping the series was a success!

Oh and the giveaway winners!  You thought I’d forgotten?  Congrats to:
Laura who won the Easy to Understand Baby and Little Kids Clothes and
Ajaire who won the Kid’s Clothes Sewing Lesson Book!

You should have received an email from me 🙂

And for those of you who didn’t win, check out Kristin’s post for some ideas for where you can buy your own!

After sewing from a few Japanese patterns myself and reading through my guests’ awesome posts, I think the greatest lesson that I’m walking away with is to just GO FOR IT.  It’s super intimidating at first, but pick a simple pattern and use some not-so-expensive fabric and just take your time to work through it.  Trust your sewing knowledge and instincts.  Refer back to this series or look things up online.  See how it goes.  And then try another pattern.  Things will already feel a little different the second time.  And I’m pretty sure that by the third pattern you sew, you will start to feel more confident, the patterns, words and diagrams will start to look more familiar, and your eye will be trained as to what you need to look for.

This Thursday, I get to share with you a really fun project that I got to be a part of, and though I won’t say what it is yet, I will say that I sewed my third Japanese pattern for it and I’m really proud of how it came out!  And if I can do it – you can do it too!

So here are the 5 posts from the series, in case you missed them or want the links all in one place.  A HUGE thanks again to my wonderful friends and guests, Kristin, Sanae, Meg, Frances and Robin for making this series everything that it was!

JSBS_button_KristinJSBS_button_SanaeJSBS_button_MegJSBS_button_Frances1JSBS_button_Robin

I had so much fun with this series and I feel like there are so many of you out there already sewing with Japanese patterns or interested in starting, that I’ve been thinking about a way to do another series (in the way future) with more of a community aspect – a sewalong perhaps?  Anyone interested?  I’d love your thoughts!

Until next time, happy sewing!

Japanese Sewing Book GIVEAWAY! {CLOSED}

*UPDATE* The giveaway winners are . . .
Laura who won the Easy to Understand Baby and Little Kids Clothes and
Ajaire who won the Kid’s Clothes Sewing Lesson Book!

***

THANK YOU THANK YOU for joining us for the Japanese Sewing Book Series!!  I can’t tell you had much fun I had working with my 5 fabulous guests and how much I learned from them.  I’m honestly so excited to start digging into my Japanese patterns and get sewing!  How about you?

Well to thank you for following along and give you something to start with, I’ve got TWO Japanese sewing books to give away today!

The first is 子供服ソーイング LESSON BOOK (Kid’s Clothes Sewing Lesson Book) and was featured in Miss Matatabi’s post (check out the adorable outfit she made from the book)!

photo by Frances of Miss Matatabi

This book is aptly named, because it really is a lesson book.  It takes you through garment construction step by step and look how many awesome pieces you can make with the book!

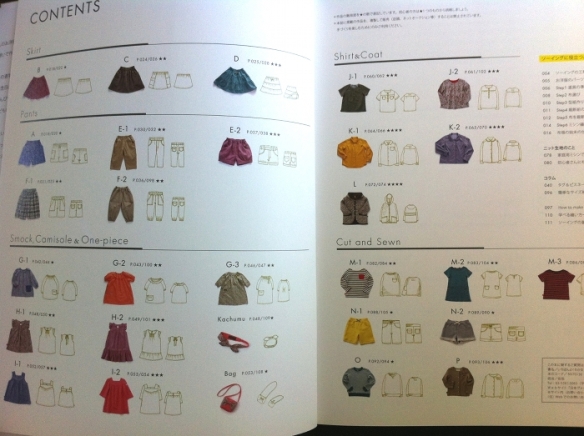
Kids Clothes Sewing Lesson BookThe pattern book covers sizes 100-130cm, which according to the book fit ages 3-10 approximately.  It has a great size chart with full body measurements so you can choose the size appropriate for your child.  Go check out a full book review with lots of pictures over at Japanese Sewing Books.

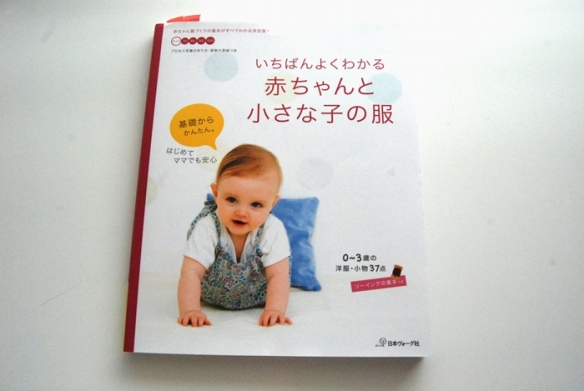
The second book I’ll be giving away is いちばんよくわかる赤ちゃんと小さな子の服 (Easy to Understand Baby and Little Kids Clothes).

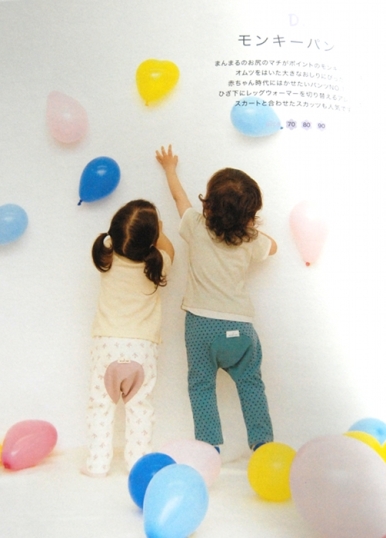
DSC_2832This book is geared towards beginners (as you can tell by the title) – it even says on the cover that it’s easy and not stressful for the beginning mama (excuse my rough translation).  And it’s meant for smaller/younger children – which I think is a bit harder to find!

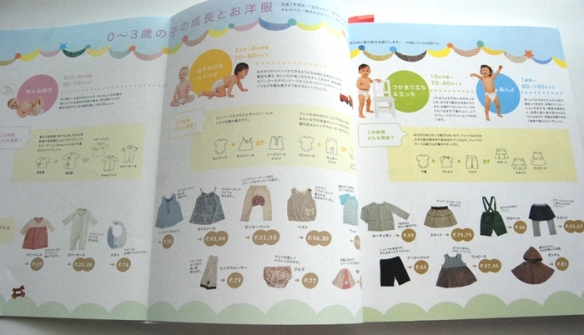
DSC_2836This book has patterns in sizes 70-100cm, (0-3 years old).  Perfect for someone with a younger child.  It’s got patterns for tiny newborns all the way up to cute toddlers.

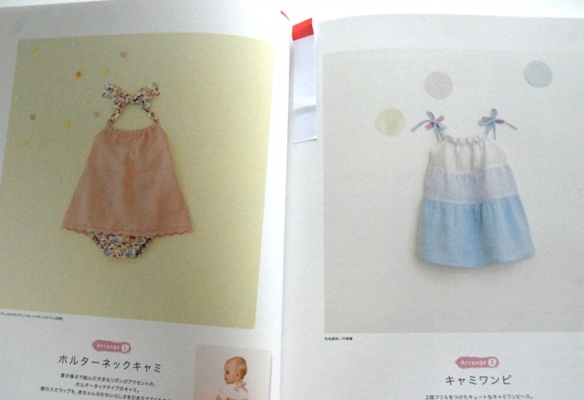
DSC_2839I can’t wait to sew up these cute summery tops for Yuki!

DSC_2843The photos here are taken of my personal copy of the book, but I’ve yet to sew from it (those little markers are for future projects).  I love the cute and simple projects for little ones.

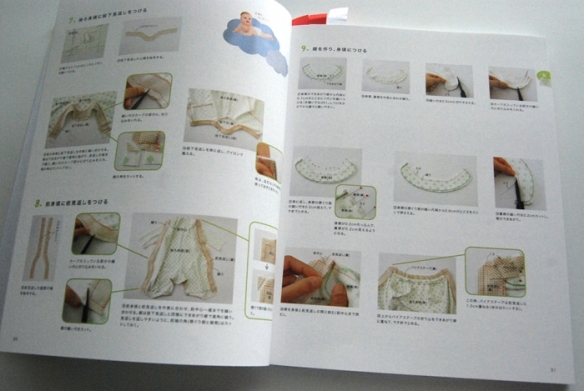
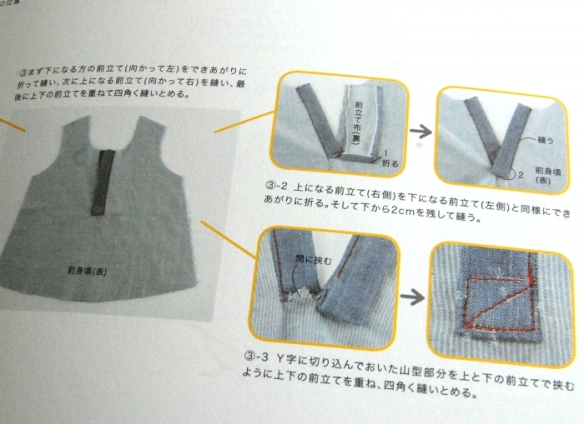
DSC_2842DSC_2844The best part are the step-by-step photographs for constructing the garments.  Drawn diagrams are great, but I love the full color photographs.

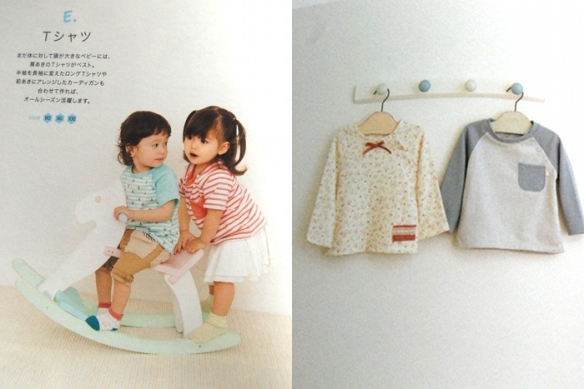
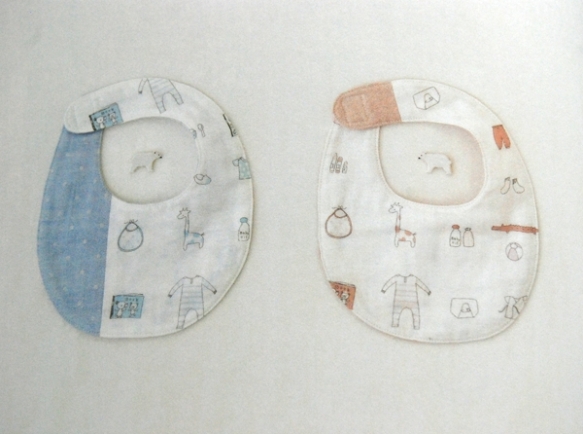
DSC_2840DSC_2858It’s got great basics like t-shirts and shorts, and also accessories like a bib, hat, and leggings.

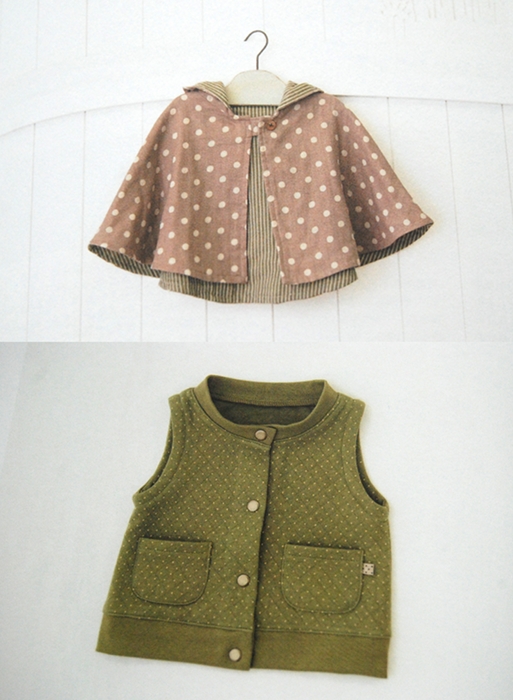
DSC_2845DSC_2848And look at this cute cape and vest!!!

DSC_2849Two prizes means, two winners!  Both books contain great basics for both boys and girls and have tons of helpful diagrams and photos to aid you as you sew (plus you’ve got the series)!  And since the books are geared toward different ages/sizes, I want you to tell me which you’d like, if you are chosen as a winner.

Giveaway details:
– Giveaway will remain open until Monday, April 1st at 5pm PST
– Winners will be chosen at random and will be contacted by email and announced on the blog on Tuesday, April 2nd.
– Open to international readers
– Void where prohibited

Here’s how to enter: {CLOSED}
– Leave a comment on this post telling me which book you’d like to win: Easy to Understand Baby and Little Kids Clothes (ages 0-3) OR Kid’s Clothes Sewing Lesson Book (ages 3-10) OR “either”
AND (though it’s not required), I’d love it if you shared with me what you thought about the series – something new you learned, a question you still have, a suggestion or tip for our readers – ANYTHING!

Additional entries:
PLEASE LEAVE A SEPARATE COMMENT FOR EACH
– Follow my blog (some people prefer email subscription, some have a favorite blog reader.  I use Bloglovin and really do love it) and leave a comment telling me you do so.
– Follow you & mie on Facebook and leave a comment telling me you do so.
– Follow you & mie on Instagram and leave a comment telling me you do so.

(maximum number of entries is 4)

Good luck and thanks for entering!

JSBS_button500

*This promotion is in no way sponsored, endorsed or administered by, or associated with, Facebook, Bloglovin or Instagram. We hereby release Facebook, Bloglovin and Instagram of any liability. No purchase necessary.  Prizes will ship within 7 days of the end of the giveaway. you & mie takes no responsibility for packages lost by the postal service. Giveaway starts Friday, March 29th at 2pm PST and ends Monday, April 1st at 5pm PST. Once the giveaway ends, winners will be chosen at random and contacted within 24 hours by e-mail. This post will be updated with winners’ names. Winners will need to respond within 48 hours to claim their prize or another winner will be chosen. Giveaway is void where prohibited.*
***
you & mie is an Amazon affiliate.  I will earn a small commission for Amazon purchases made through links provided in this post.

Japanese Sewing Book Series with nested in stitches

JSBS_button_RobinIt’s the last day of the series!  *sniff sniff*  I really hope you’ve enjoyed all the posts my guests have put together for you.  Are you beginning to feel like you can tackle these patterns on your own?  Well today’s guest, Robin from nested in stitches, is going to walk you through all the steps of constructing two garments.  Now this is really helpful if you want to make these specific garments, but you’ll also learn a whole bunch of useful tips and things to look for that you can apply to any pattern!

Robin is another awesome sewing wizard who hails from the Pacific Northwest (seems like there are a lot of them up there!).  She is also a jack of all crafty trades – she sews, she knits, she quilts, she enjoys all things you make with needles apparently.  Her blog is filled with adorable clothes that she’s made for her daughter, like this O+S dress, this apron, and these skirts.  She also occasionally sews for herself and check out this modern crosses quilt!

My absolute favorites though, are the Moonrise Kingdom outfits she made for film petit.  I LOVE that movie and I LOVE Robin’s inspired outfits – she really nailed it!!  You’ve got to check out the 2 outfits she made and the awesome photos of her daughter in them.  Seriously awesome.

I’ve recently been lucky enough to see some of Robin’s handy work up close and not only is it stylish, but the workmanship is gorgeous and high quality.  It looks straight out of an expensive boutique.  And on top of all that, Robin is also just a total sweetheart.  She’s always willing to help out – in fact, during my last sewing project from a Japanese pattern, I got stuck on step ONE.  I felt like an idiot, but she totally helped me figure it out and she’s been a huge help to me with this series too.  So without further ado, here’s Robin to close out the JSBS guest posts . . .

***

Hello you & mie readers! I am so excited to be here today to help guide you through sewing with Japanese patterns. This series has been so awesome and has provided tons of invaluable information that will help you decipher these patterns. I started sewing from Japanese pattern books several years ago, and once I learned a few basics, I figured out how to muddle my way through. I do not speak or read a bit of Japanese, so if I can do it, you can too!

Before I get started, I want to offer my four main pieces of advice for sewing with Japanese patterns.

  1. Know the Japanese characters for back: 後ろ. Google translator says this translates as “behind, back, rear”. I look for that character that looks like a 3 on instructions and pattern pieces. This helps me navigate the instructions a ton.
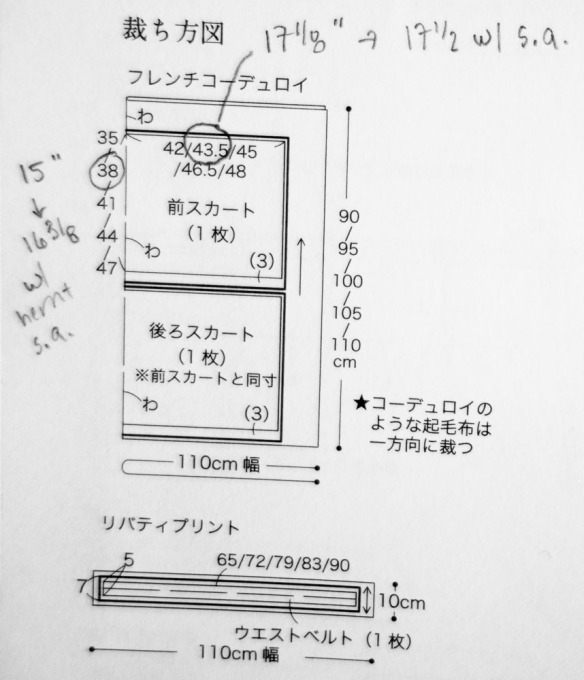
  2. Remember the seam allowances. As Meg showed you on Wednesday, you need to add seam allowances to all your pattern pieces. The standard seam allowance is 1 cm, but look for places that indicate you should add more. I always add my seam allowances in inches, since my machine has seam allowance demarcations in inches but not centimeters. Whenever I’m supposed to add the standard 1 cm seam allowance, I add 3/8 inch. It just seams like a good standard number to me, so that’s what I do. The main thing is to add whatever seam allowance is easiest and makes the most sense for you, and do it consistently.
  3. Google translator is your friend. If you need help in understanding what the text says, type in what you think it might be in English and see if the Japanese characters match.
  4. My biggest advice to you? Rely more on your own knowledge of garment construction than on specifics of the instructions.While I do follow the instructions,  if something is confusing, I ask myself: what would Liesl do? Just trust yourself. After all, you can always use your seam ripper!

The nice thing about so many of the patterns in these books is that they are pretty simply constructed. If you want to start sewing with these patterns but are still feeling a bit unsure, definitely start with some of the more straightforward patterns- a pillowcase dress, simple top, basic pants or a skirt.

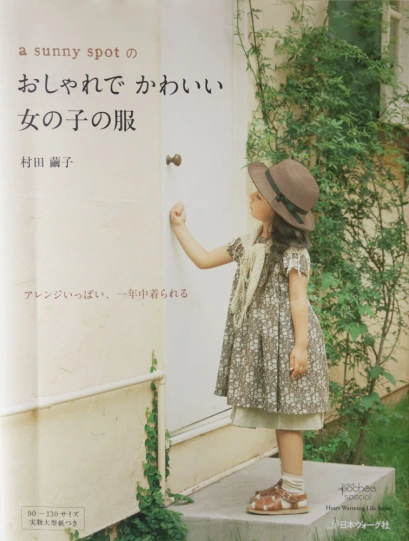
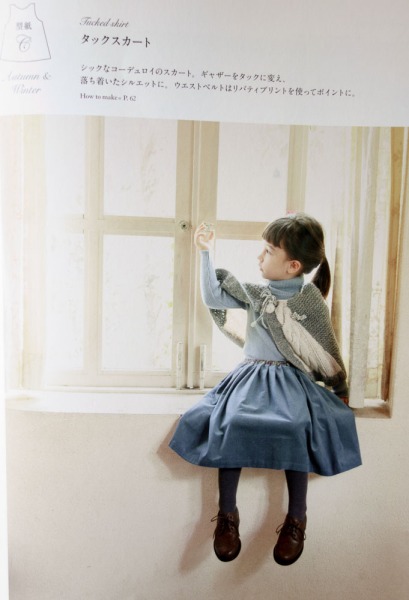
Let’s start with a simple skirt from my personal favorite, A Sunny Spot.

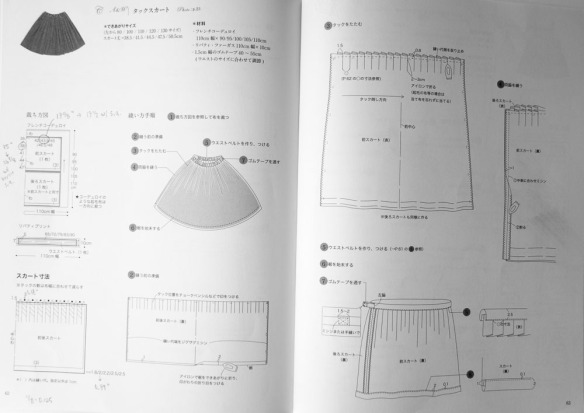
20130328-_DSC016620130328-_DSC0168Turning to the pattern instructions on page 62, this is what you see.

20130328-_DSC0169

First things first, here is your pattern layout. We’ve got two rectangle skirt pieces cut on the fold, plus one waistband piece that measures 5 cm tall (7 cm with added seam allowances) and 65/72/79/83/90 cm wide for sizes 90/100/110/120/130.

20130328-_DSC0146

And you’ll notice the handy dandy graphic that shows what the final skirt looks like. This is the money image- it tells you the order in which the skirt is constructed.

20130328-_DSC0147

Step 1: Using the layout diagram measurements, draft the skirt pieces.
(This is from Sanae. Since there were no images associated with step 1, I had no idea what it meant. Turns out I didn’t really need to.)

Step 2: Prepare the skirt pieces.

20130328-_DSC0149

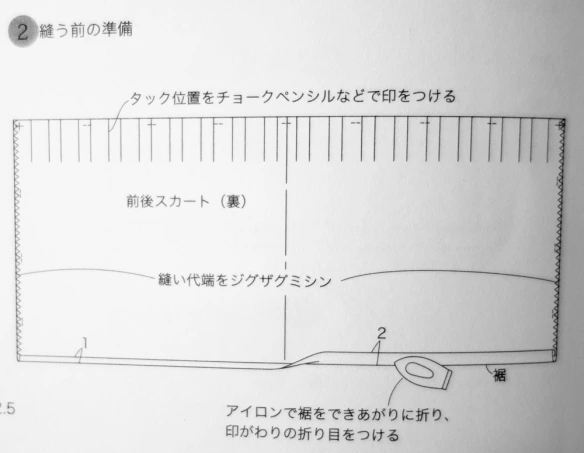
  • Press the skirt hem into place: Looking back at the diagram of the pattern pieces, you’ll see that the skirt has a 3 cm hem allowance. First fold the bottom edges up 1 cm, press, then fold up again 2 cm, and press again.
  • Finish the side seams- of course, you want to avoid cutting into your seam allowance when you do this, since you haven’t sewn the pieces together yet.
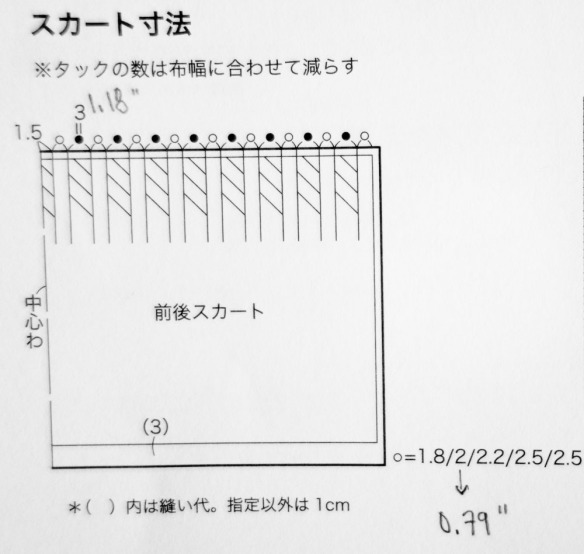
  • Prepare the pleats by marking the top skirt pieces as indicated and press the pleats into place. There is a graphic next to this step that shows you the measurements to use. Following this from left to right along the top, mark the first pleat line 1.5cm in from the fold. You’ll see an open circle that indicates the distance to the next pleat line- this corresponds to 1.8/2/2.2/2.5/2.5 cm for sizes 90/100/110/120/130. Next, there is a dark circle indicating that the distance to the next pleat line is 3 cm. Continue marking the pleats as indicated. The hatched lines indicate that this is where you will fold the pleats.

20130328-_DSC0148

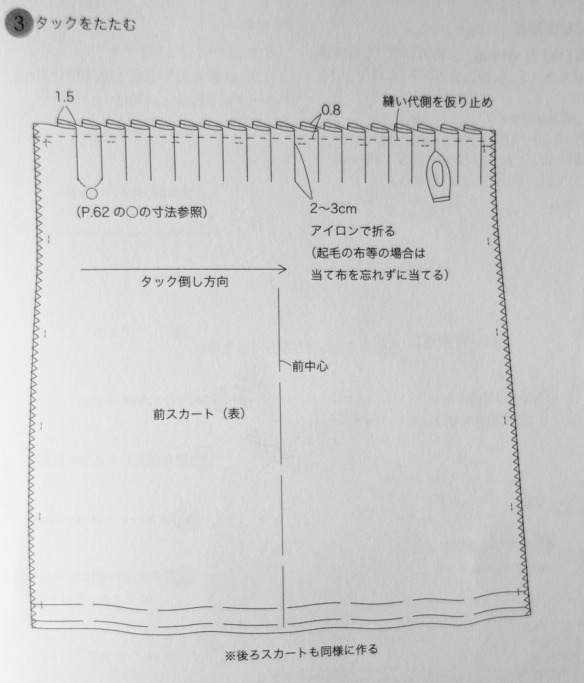
Step 3: Press and sew the pleats in place using a seam allowance of 0.8cm.

20130328-_DSC0150

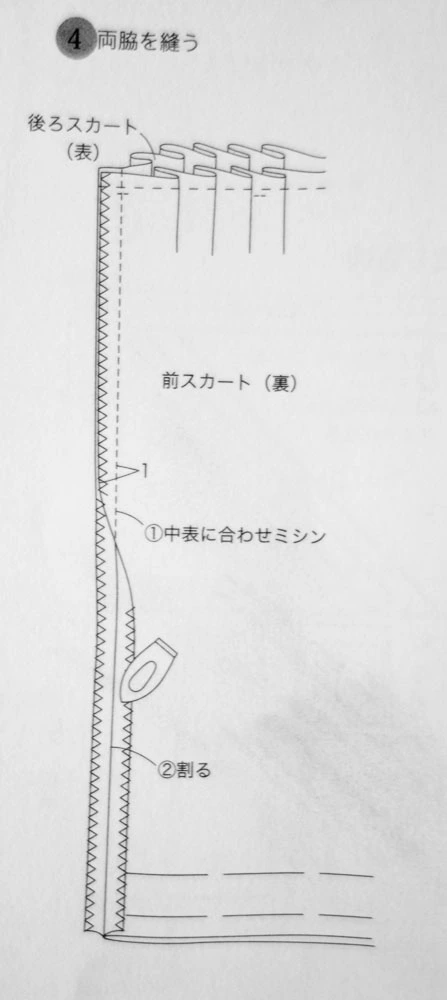
Step 4: Sew the front and back skirt pieces together at the side seams, press seam allowances open.

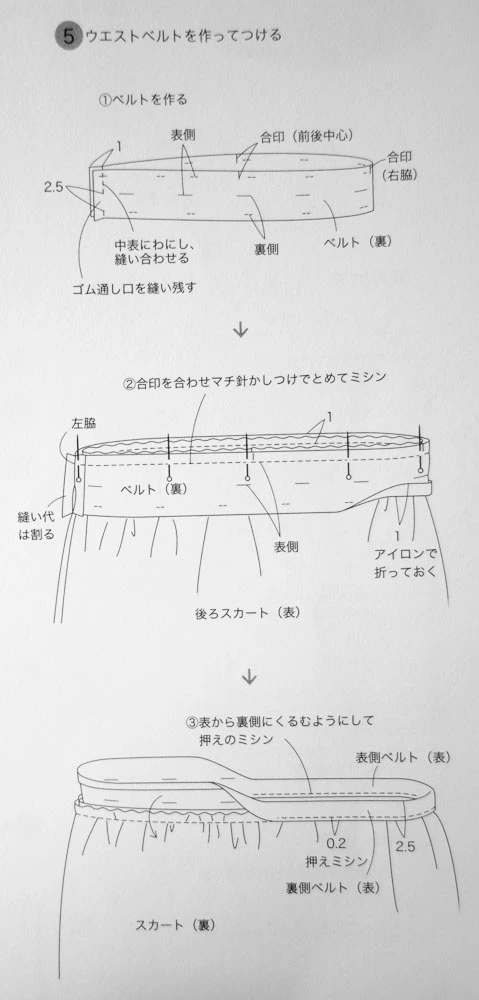
20130328-_DSC0151Step 5: Sew the waistband pieces together. (Notice that here there is text only in the original pictures, which refers you to step 5 on page 61, shown here.)

20130328-_DSC0171

  • There is a 1 cm seam allowance, and notice you want to leave a 2.5 cm opening to insert the elastic in the middle.
  • Now pin the waistband in place along the top of the skirt right sides together, and sew with a 1 cm seam allowance. How do I know it’s right sides together? The waistband has 裏 in parentheses, which means “wrong side”, while the skirt piece has 表 in parentheses, which means “right side”. So the right side of the skirt faces out, and the right side of the waistband faces in.
  • Fold the unsewn edge of the waistband piece up 1 cm and press. (This would of course be done more easily before you sew the waistband on!)
  • Turn the skirt wrong side out (see the 裏 in parentheses?), fold/press your waistband up and then over to the wrong side. Topstitch in place.

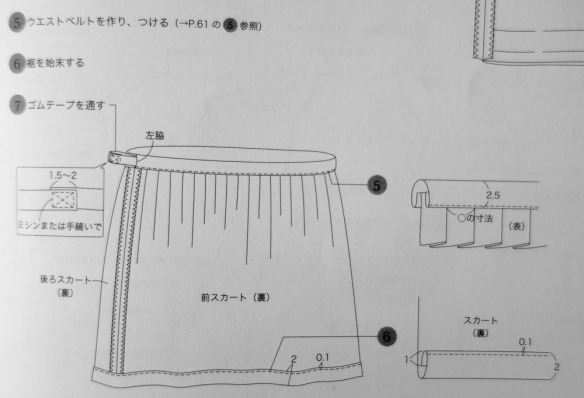
Steps 6 and 7: 20130328-_DSC0152

Step 6: Hem the skirt. You had folded and pressed it into place in earlier steps. Topstitch.

Step 7: Insert elastic into the waistband. Stitch the ends together as shown.

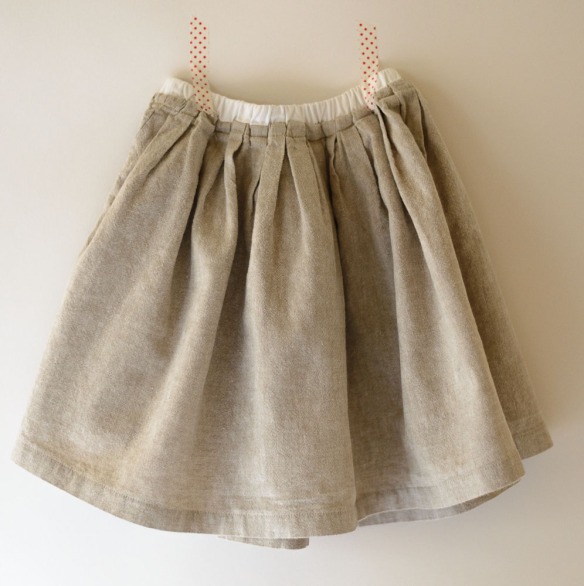
And done! You have a skirt!

20130328-DSC_2663

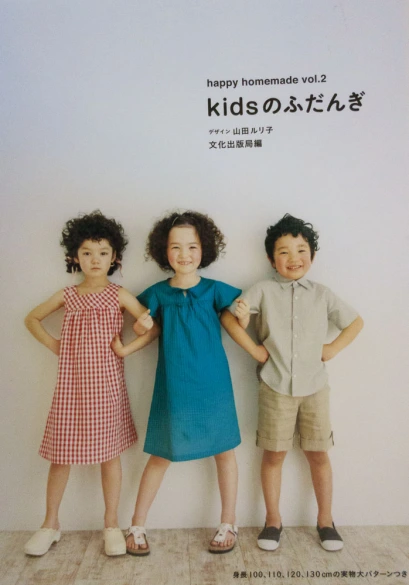
Let’s look at another, slightly more complicated pattern. Since Happy Homemade volume 2 has a lot of good basics for girls and boys, I think it’s a great book to start out with. So I’ll walk you through the pattern that Meg posted about on Wednesday. It’s a straightforward piece, but there are definitely more details than some of the even simpler pieces will have. I also want to point out that while I had Sanae check my translation, nearly everything I am providing below is taken using my four pieces of advice plus a little graphic studying.

20130327-_DSC0120 20130327-_DSC0121For more detailed steps on how to get to the point at which you’re ready to sew, be sure to check out the previous posts in this series. Sanae gave info on the basics for this book in her post, which is super helpful.

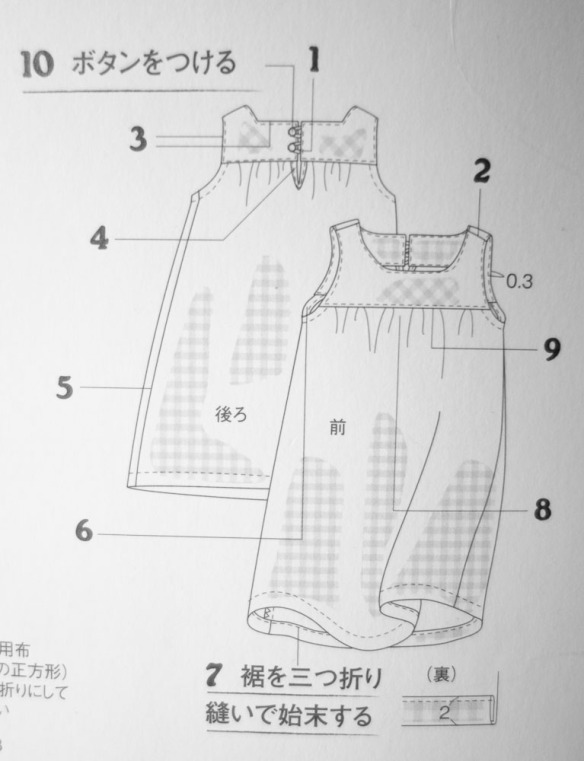
Once you’ve got all your fabric pieces cut out and everything else is ready to go, direct your eyes to this diagram- like the one from A Sunny Spot, this provides a nice visual overview of the steps and the order in which you will construct the garment.

20130328-_DSC0153Before we delve in, take a moment to think about how this pattern would be constructed using the pieces you’ve cut out. We’ve got a lined front and back bodice, a back that closes with buttons and button loops, and a gathered skirt. Pretty familiar, right? Let’s dive in.

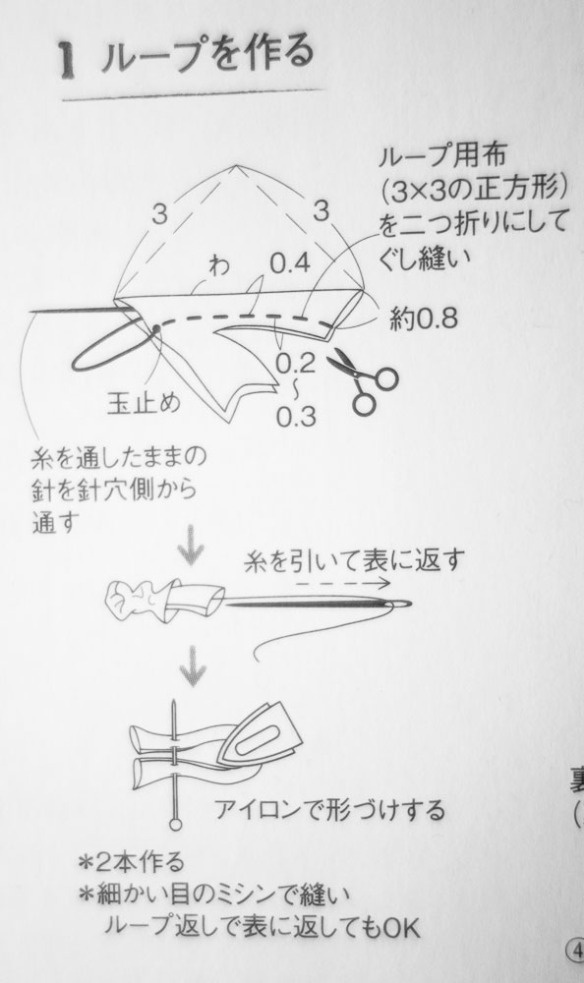
Step 1:  Construct the button loops.

20130328-_DSC0155

  • Sew the two bias button loops from 3x3cm squares, noting the slightly curved seam line.
  • Trim the seam allowance to 0.2 cm.
  • Using a needle and thread, flip that puppy right side out.
  • Press.
  • Make 2.

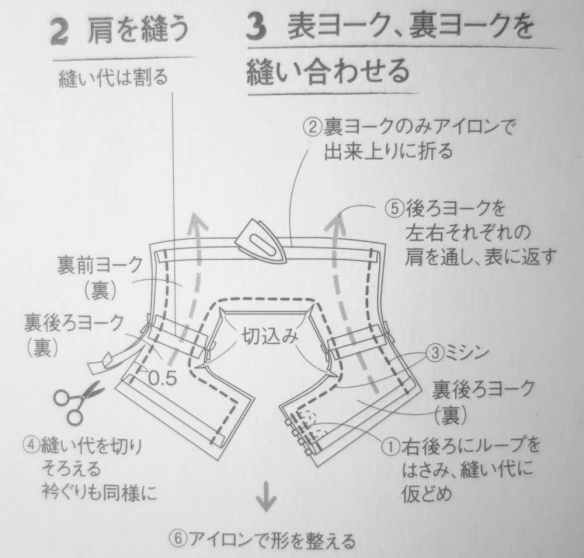
Steps 2 & 3: Construct the bodice (yoke).

20130328-_DSC0163

Step 2: Sew the shoulders.

  • Sew the front and back bodice pieces together at the shoulder. Remember, these pieces have the standard recommended seam allowance of 1cm (~1/4 inch), so sew these pieces together with that seam allowance. Of course, you’ll want to finish your edges using your preferred method. See how the diagram shows that the seams are pressed open? Press those seams open.
  • There’s a lot of text in this pic. Again. Focus on the pictures and your knowledge of garment construction. It’s easy to feel frustrated that you can’t understand every last bit of the instructions. Don’t be! You know what you’re doing!

Step 3: Sew the front and back bodice (yoke) pieces together. Notice… there’s a lot of substeps here.

  1. Base the button loops to the right side of the back bodice piece so that when you put the outer and inner bodice pieces right side together, it will be sandwiched as shown.
  2. Press the inner front and back outer bodice pieces up along the bottom edges. I don’t see any specific measurements noted here, so I would just press up the seam allowance of 1 cm.
  3. Sew the with right sides facing. Sew along the dashed lines with the 1 cm seam allowance.
  4. Trim the seam allowance in half (from 1 cm to 0.5 cm) along the arm edges. Also clip the curves of the neckline as shown.
  5. Turn the sewn bodice right side out.
  6. I don’t know what this means. But I know how to construct a bodice, and so do you. So I’m gonna go with pressing the bodice. 🙂

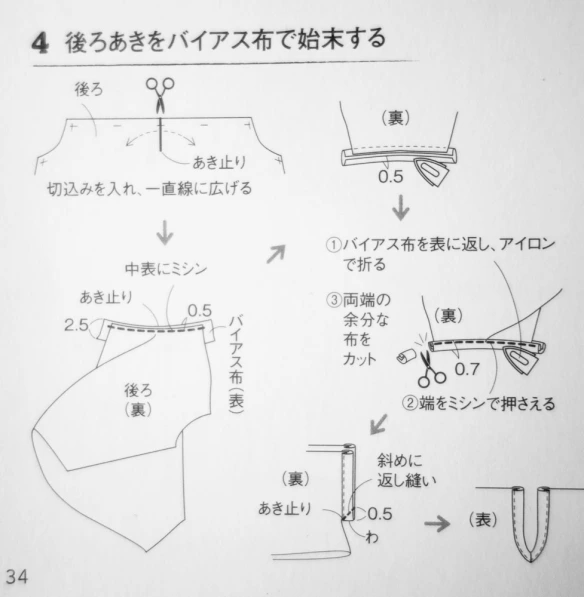
Step 4: Finish back opening/slit with bias strip (I’m not even entirely sure what this means, but we’re going to look at the pictures to figure it out.  See that 後ろ? That means we’re looking at the back. Also, the picture looks like a skirt piece. Let’s take a closer look…)

20130328-_DSC0157

  • Cut the back skirt piece. Your pattern piece has a mark indicating how far down you should make this cut.  Spread the piece apart along the cut line, following the arrows out.
  • Moving down, you’re looking at the back skirt panel again- the top part is the slit you just cut spread as horizontally as possible. Here you’ll want to sew one of your 2.5 cm wide bias strips to the right side of the skirt with a 0.5 cm seam allowance. (That character on the skirt in parentheses? 裏 indicates wrong side).
  • Back up to the top right graphic, you see to press the bias strip first out, then press the edge up 0.5 cm.
  • Next, press the whole shebang to the right side and topstitch. Trim the edges.
  • Fold your skirt piece in half and stitch along the bottom of the bias strip on the diagonal as indicated.
  • Turn your piece out… press to the wrong side.

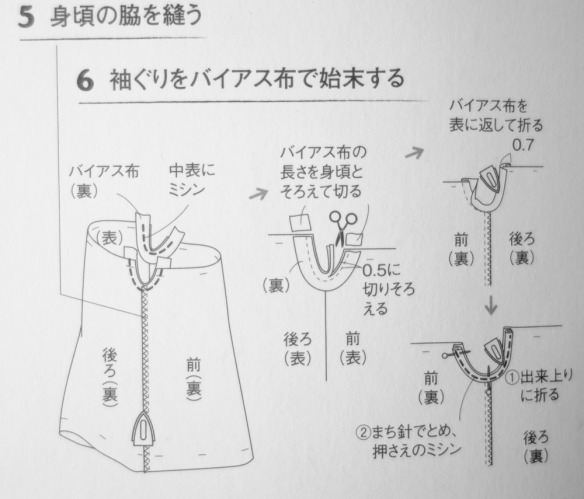
Step 5: Sew your skirt side seams. Finish your edges as desired, press.  (see below for pic.)

Step 6: Finish the armholes on the skirt.

20130328-_DSC0158

  • Right sides facing (see the 表 in parentheses in the middle pick? That indicates its the right side), sew the bias strips to the each armhole on the skirt piece.  Trim the seam allowance in half.
  • Turn the bias strip out, press, then turn the unsewn edge in and press.
  • Press and pin the bias strip in place, topstitch.

Step 7: Hey, there is no illustration for step 7! A look back at the general sewing diagram indicates that here you’ll finish your hem. You should have added 4 cm or so to your skirt pieces for the hem allowance. Press the edge up 2 cm, then again another 2 cm. Topstitch.

20130328-_DSC0153

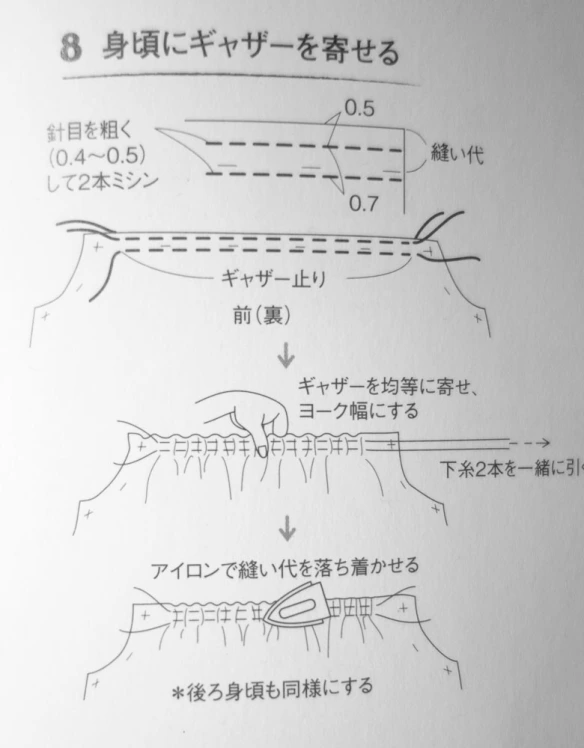
Step 8: Sew gathering stitches on the front and back skirt pieces.

20130328-_DSC0159

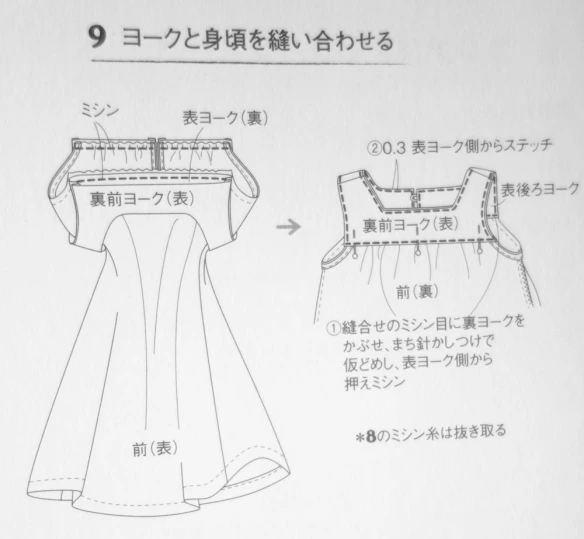
Step 9: Assemble the dress.

20130328-_DSC0160

  • Gather your skirt pieces to match the width of the bodice. Sew the gathered skirt pieces to the outer bodice piece using the standard seam allowance.
  • Flip that bodice up, press, and topstitch as indicated. Here you’ll catch that folded edge of the bodice pieces, stitching it closed will allow you to enclose the top of the skirt.

Step 10. Attach buttons. You have a dress! High five.

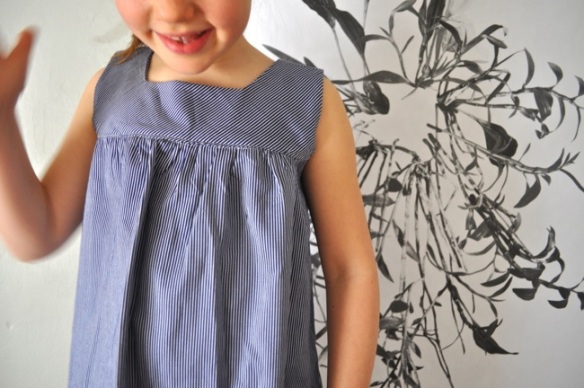
Dress and photo by Meg of elsie marley

***

Thank you, Robin, soooo much for walking us through two patterns and all your helpful hints!  If you’d like to see more of Robin’s awesome creations from Japanese sewing patterns, head over to her blog to check out her round-up!  Along with all her other beautiful work . . .

Robin_collageAnd a big thank you to all five of my guest bloggers who have shared such an amazing wealth of knowledge with us this week!  Thank you Kristin, Sanae, Meg, Frances and Robin – this week would have been nothing without you!

We may have wrapped up the guest posts, but the series hasn’t quite wrapped yet.  After all these amazingly informative posts, I think you’re ready to dive into Japanese sewing books, right?  Well check back in later today for the chance to win a Japanese sewing book of your own to dig right into!

Thanks for stopping by!

JSBS_button500

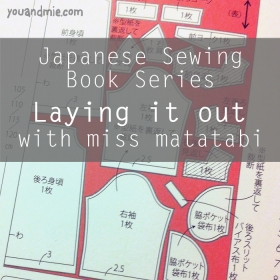
Japanese Sewing Book Series with miss matatabi

JSBS_button_Frances1Welcome to Day 4 of the Japanese Sewing Book Series!  Remember the invaluable little layout picture (see above) that Meg kept referring to yesterday?  Well, today we’re going to break that down for you a bit more and here to help us with that is Frances of Miss Matatabi.

I already introduced Frances a bit last week during her giveaway, but if you missed it, she runs an awesome online fabric shop, Miss Matatabi, that features gorgeous Japanese fabrics that are often very hard to find elsewhere.  Go check out her shop and some of my personal favorites (although it really is too hard to choose, they are all so beautiful)!  If you buy something from her shop, you know that it’s coming from a person who loves fabric as much as you do.  She’s got great customer service, her packages always arrive promptly and packaged so nicely – it really is such a treat to get fabric from her!

On her blog, she shares some of the things she sews, like this adorable Geranium dress for her daughter, or this amazing Washi dress with 3/4 sleeves.  And I REALLY want this scarf for myself!  She’s got impeccable taste and we obviously share a love for Nani Iro, but beyond that I’ve found a true friend in Frances.  She’s incredibly smart, kind and thoughtful and I’ve really loved getting to know her the last few months.  And I’m so excited to have a friend in Tokyo to shop with next time I visit!

Speaking of which, I’m lucky to help introduce a big project that Frances has been working on with her friend, Angela!  It’s called the Tokyo Craft Guide and it showcases some of the best craft shops around Tokyo. With over 50 shop listings organized by neighborhood, they have curated a series of craft-shopping-excursions complete with illustrated walking maps, shop highlights, favorite cafe spots, and even some Japanese-inspired project tutorials. An e-book will be available next month, but in the meantime they will be offering additional shop profiles, events, and interviews on their blog.  You really should go check it out!

Here’s Frances . . .

***

Hello! I’m absolutely thrilled to be here for the Japanese Pattern Book series. Thank you for inviting me to participate, Cherie! I’m Frances, an Australian living in Japan and I blog about my sewing adventures at Miss Matatabi. I have been sewing from Japanese pattern books for about 5 years and I especially enjoy Japanese sewing patterns for children. The styling is wonderful, they are great value for money, and I love being able to think in centimeters rather than inches!

Sewing Lesson Book ISBN 978-4-529-05076-0 : photo by miss matatabi

Kids Clothes Sewing Lesson Book ISBN 978-4-529-05076-0

One good thing about Japanese sewing pattern books is that they usually include a diagram showing the pattern layout. This gives you a clear idea of how your yardage will be used and therefore eliminates any guesswork. This is helpful if you cannot read Japanese. However, there are some terms that will be useful to know which will make your sewing project go even smoother. Japanese Sewing Books has an extensive list of translated sewing terms here.

Today I’m going to talk about how to lay out your pattern pieces and translate the terminology on the pattern diagram. I have chosen two projects from Kids Clothes Sewing Lesson Book (子供服ソーイング LESSON BOOK) and another from Easy to Understand Baby and Kid’s Clothes (いちばんよくわかる赤ちゃんと小さな子の服) to show you.

Let’s talk about the basics of the pattern diagram starting with this very simple pair of shorts from Kids Clothes Sewing Lesson Book.

Kids Clothes Sewing Lesson Book ISBN 978-4-529-05076-0 : photo by miss matatabi

Pattern A : Kids Clothes Sewing Lesson Book ISBN 978-4-529-05076-0

If you are new to Japanese patterns and want to try a simple project these shorts are a good place to start. Let’s have a look at the pattern layout.

Shorts pattern layout : Kids Clothes Sewing Lesson Book ISBN 978-4-529-05076-0

Pattern A : Kids Clothes Sewing Lesson Book ISBN 978-4-529-05076-0

The numbers (in cm) running down the left of the diagram indicate the yardage needed for each size. For example, 50cm of fabric for size 100cm, 60cm for size 110cm, and so on. The number along the bottom shows the width of the fabric. The rest of the markings on the diagram are particular to each pattern, although there will always be some overlap of terms.

I made a size 100cm and so the pattern called for 50cm of fabric. As you can see there are only two main pattern pieces and two pockets. The main pattern sheet has only one pattern piece for the shorts and one for the pockets, as they are identical. Take care when tracing patterns to make sure you make enough copies of each piece. The diagram shows you to place the fabric right side up and cut without anything on the fold. Easy! Please keep in mind that if you are using a directional print or stripes and want the left and right side to match, you may need to use more fabric than the pattern calls for. I wanted to match the print I used so I prepared around 65cm of fabric.

As Meg mentioned yesterday, you are going to need to add the seam allowances to your pattern. The numbers along the edge of the pieces refer to the seam allowance, for example the waist has 4cm seam allowance. Where there are no numbers a standard 1cm seam allowance is required. Some people like to trace the pattern as is, then add the seam allowance directly on to the fabric. I prefer to add the seam allowances when I am tracing the pattern. You can choose which way works best for you.

Kids Clothes Sewing Lesson Book ISBN 978-4-529-05076-0 : photo by miss matatabi

Pattern H-1 : Kids Clothes Sewing Lesson Book ISBN 978-4-529-05076-0

Next is a ruffle sleeve blouse, which is a little step up in terms of difficulty and pattern layout wrangling.

Ruffle blouse pattern layout : Kids Clothes Sewing Lesson Book ISBN 978-4-529-05076-0

Pattern H-1 : Kids Clothes Sewing Lesson Book ISBN 978-4-529-05076-0

The fabric is arranged right side up here, and the selvedges are folded underneath to meet at the back. The main blouse pieces are cut on the fold, while the ruffle sleeves, arm facings, and back opening are not. Lay your main blouse pieces on the fabric as shown in the diagram and then cut them both on the fold. You will need to cut 2 fabric tab pieces. There is only one pattern piece so cut that on the double layer, although not on the fold. Unfold the fabric to cut the other pieces on a single layer of fabric. The back facing piece has diagonal stripes in the diagram which indicates that you need to cut one from fabric, and another from interfacing. Be sure to transfer any markings on the pattern, like pleat marks, to your fabric too.

This book is unique in that it includes patterns for pieces which are simple squares or rectangles. Many Japanese sewing books require you to draft your own. Don’t worry though, it is very easy to do but also important to know which measurements you need for the size you are making. Let’s have a look at a baby shirt pattern from Easy to Understand Baby and Kid’s Clothes (いちばんよくわかる赤ちゃんと小さな子の服).

baby tunic pattern layout : Easy to understand baby and kids clothes : ISBN 978-4-529-04842-2

Pattern B : Easy to understand baby and kids clothes ISBN 978-4-529-04842-2

The top diagram shows a very similar layout to the patterns mentioned above. The fabric folded around to the front so wrong sides are together and the main pattern pieces cut on the fold. You can see here too that no extra seam allowance needs to be added to the neck and arm lines. The bottom diagram shows the pocket and front opening facing both of which are pieces provided on the pattern sheet. The front opening facing has shading which indicates that you need to cut one piece out of interfacing. A pattern piece which requires interfacing is most often shown with diagonal stripes or shading. The loop, armhole facing, and neck facing are pieces you will need to make yourself. They are cut on the bias and have the measurements written beside each one. The shirt comes in sizes 70cm to 100cm and the numbers next to the facing pieces reflect the measurements for each size. If you are making size 70cm you need to cut two armhole facing strips 4.4cm wide x 27cm long. For the neck facing you need one strip measuring 4.4cm wide x 37cm long. The loop is the easiest! Cut a piece 2cm wide x 6cm long and you are all done!

Sorry to interrupt Frances’ post, but I wanted to add just a couple things that I thought might be helpful to know along with all of the great information provided above.  Some of this has been touched on already, but sometimes another graphic is helpful 😛

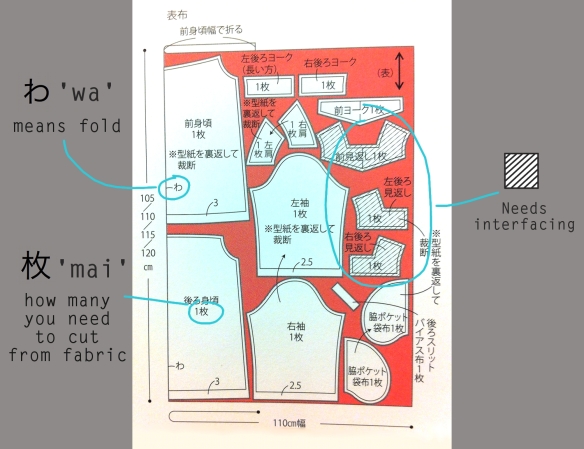
layout(click image for a larger size)

  • The line along the bottom of the image shows you how to lay your fabric.  If it’s just a straight line, you lay your fabric out flat.  If it has a curve in it (like this one), you’ll need to fold your fabric.  The dots on either end of the line represent the fabric selvedges.  One edge of the fabric is lined up with the dot on the right and then the fabric is folded under where the line curves.  The dot that is about 1/3 of the way in is where the other fabric selvedge should end.  That way the sleeves, pockets, yoke and other small pieces are all cut on a single layer of fabric, while the dress front and back are cut on the fold.
  • わ ‘wa’ means fold.  You’ll see it a lot in these layout diagrams and also on the pattern pieces.  Be sure to place these pieces on the fold of your fabric.
  • 枚 ‘mai’ is a Japanese counter for thin, flat objects like paper or a piece of fabric.  There will always be a number in front of it like 1枚 or 2枚, which tells you that you need to cut 1 or 2 of that pattern piece from the fabric.
  • Frances already mentioned this above, but when you see shading or diagonally striped pieces, that indicates that those pieces need to be cut from the fabric and also need interfacing.

Ok, back to Frances 🙂

How do you feel about all that? Please let me know if you have any questions. I hope you are going to try sewing from Japanese pattern books. Don’t let any language barrier put you off. Enthusiasm is more important than being able to understand each word in the pattern so jump in and give it a go. You can do it!

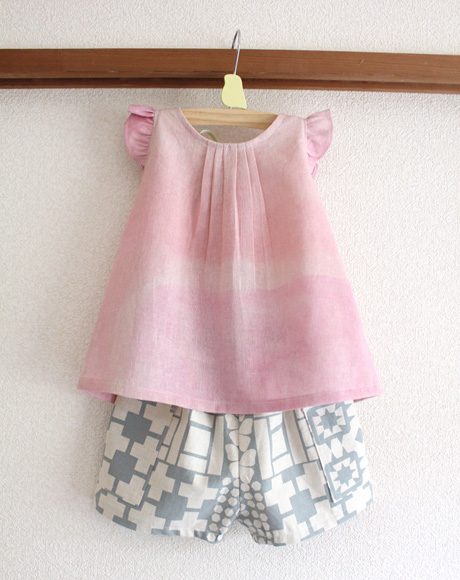
Ruffle Blouse and shorts by Miss Matatabi

If you are interested in seeing a cheeky monkey wearing the above outfit come say hi to us over at Miss Matatabi today.

Thank you so much, Cherie!

***

Oh that outfit she made for her daughter is SO cute!  Thank you, Frances, for all the amazing information and for sharing it with us today!  Definitely stop by her blog and her shop for more gorgeous goodies and don’t forget to check out the Tokyo Craft Guide!

Frances_collage

Can you believe tomorrow is that last day already!?  Join us for the fantastic conclusion to the series and . . . oh yeah, did I say something about a giveaway!?  Hmm . . . guess you better check back for more details 😛

JSBS_button500

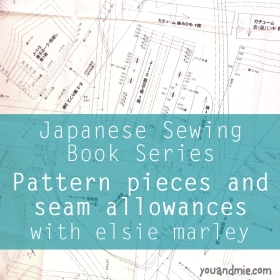
Japanese Sewing Book Series with elsie marley

JSBS_button_Meg

It’s already day three of the series and we’re really starting to get into the meat of these books. Honestly, when I tried sewing from a Japanese sewing book for the first time, the most intimidating part for me was unfolding the huge pattern sheet and not being able to figure out which pieces I needed for the garment I was trying to sew. And the most time consuming part, by far, is still tracing the pattern and adding seam allowance. But here to offer us some helpful tips is Meg from elsie marley.

I’m assuming that you all know Meg from elsie marley (and if you don’t, you should, like right now) because she is one of those “must follow” bloggers if you’re into sewing children’s clothing at all. Everything that comes out from under her presser foot is pure gold. Seriously original and stylish clothes that are not too flashy, but always cool. And she was one of the bloggers that turned me on to Japanese sewing books in the first place! I think this adorable top must have been one of the things I’d seen on her blog and it had me hooked on both her style and Japanese patterns.

She is probably most well known for being the creator and host of Kids Clothes Week (formerly known as Kid’s Clothes Week Challenge or KCWC for short). Meg came up with an idea to challenge people to devote one hour per day for an entire week to sewing children’s clothes and ended up creating what is one of the most popular, most anticipated, and most fun sewing events out there. For one week, literally hundreds and hundreds of people are sewing together, sharing their creations, being inspired, forming a community, being productive and having so much fun doing it! There is another one coming up soon, so be sure to check out the brand-spanking-new KCW blog for all the details.

Not only is she an awesome seamstress with the power to motivate hundreds to create a sewing army several times a year, but she is also ridiculously funny (her posts always crack me up) and seems so real – no fake shiny veneer on her blog – just real glimpses into her real life. Awesome cook, talented photographer, crochet-er, rockin’ mom (check out this cloud loft bed and her chalk paint!) and all around cool person. Here’s Meg . . .

***

Hello you & mie readers! I’m so happy to be here discussing one of my favorite topics–Japanese sewing books! I love the modern and simple shapes of the clothes and can’t resist the beautiful books. Each book is like a new puzzle to solve. It is an extra challenge, but a fun one! I promise after this series you will be practically fluent in Japanese sewing books. That said, I neither speak nor read a lick of Japanese. I can look at pictures and follow arrows. And that, my friends, is pretty much all you need.

***************************

happy homemade vol 2

I’m going to lead you through a few confusing areas in Japanese sewing books:

  • how to determine what pattern you need
  • how to locate it on the pattern sheet
  • how to add seam allowance

Ready? Here goes…

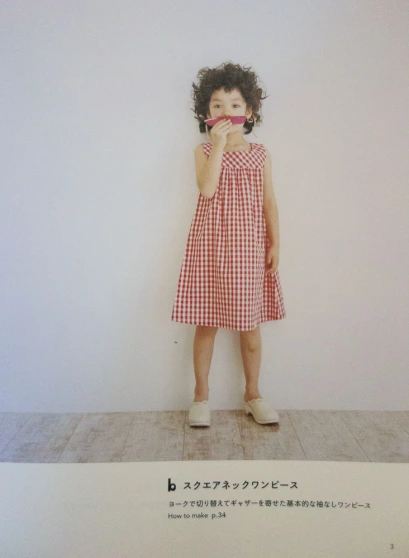
pattern (b)

How to Determine What Pattern you Need

After Kristin’s and Sanae’s posts you know that the photos are in the front of the book and the directions in the back. Now you only need to match the pretty picture of what you want to make with the instruction to make it. If you look at the picture there will be, in most books, a letter of the alphabet somewhere on the picture (i.e. A, B, or C, not a Japanese character). Some book will use numbers, but most use letters. The dress above is pattern b. If you look closely you’ll see it also says, “How to Make p. 34.” This is super helpful, but sadly not in every book. If there is no page number on your pattern picture, head to the back to look for your letter (or number). They won’t usually be in alphabetical (or numerical) order. The directions are in whatever order the author thought best, but keep looking, you’ll find it.

pattern sheet from Happy Homemade vol 2

How to Locate your Pattern on the Pattern Sheet

Once you find it, you will be ready to start tracing your pattern! Easier said than done, you are thinking. I mean look at that crazy thing up there! Relax your eyeballs and you’ll be fine. All pattern sheets are different, but they do actually want you to find you pattern so there is order in that chaos somewhere. In this book (Happy Homemade Vol.2) there is a key: on one side are patterns a,b,c,d,f,g….and on the other side e,h,i,l,m…

pattern key

Other pattern books do it differently. On all pattern sheets there are two or three colors. Look for you pattern letter. Is it green? Then your pattern (and all the markings that go with it) will be drawn in green. Is it black? Your pattern will be black. Once you start to decipher the code, the crazy pattern sheet starts coming into focus.

bodice pattern

Some pattern pieces will be for two or three different garments. I’m making dress b, can you see the bodice piece I need up there? It is in the upper, middle of the photo, drawn in black. That piece is also used for dress a. See the little line drawn from the letters to the pattern? Those are your arrows and they are very helpful. Follow the arrows, people.

pattern piece layout

Okay, after you know–sort of–where your pattern pieces are, go back to the direction page and look for the pattern piece layout picture. This little picture is invaluable. It will show you all the pattern pieces you need (and need to find on the pattern sheet). It will also tell you what pattern pieces aren’t on the pattern sheet. Oh that’s right, some are not there, but don’t worry they are usually just long rectangles or something simple. On the pattern for dress b, I need bias tape 2.5 cm wide and 15 or 20 cm long. Or maybe both. Or maybe one 15cm long and two 20cm long. I don’t know, because I can’t read it! This is where you have to look at the rest of the pictures and puzzle it out. Look at pictures and follow arrows. You can do it!

adding seam allowances

How to Add Seam Allowances

Now you know–pretty much–what pattern pieces you need. Go back to the pattern sheet and locate all of them. To trace (and you have to trace, there is no cutting that pattern sheet up) the patterns I use freezer paper, but use whatever you like. Japanese patterns are a bit odd because they have no seam allowances. Let me say that a little louder, THERE ARE NO SEAM ALLOWANCES IN JAPANESE PATTERNS. I’ve sewn many patterns from these books and I still have to remind myself every time. So how do you add seam allowances?

I like to use a trick my friend, Mary Jo taught me.

  1. Tape two pencils together.
  2. Draw a line with both at the same time.
  3. Measure the distance between them.

It is usually about 1/4 in or 1 cm–the perfect seam allowance. Now you can trace the pattern and draw the seam allowance at the same time. (In the photo above, my pattern shifted a bit, but I was drawing with my left hand and taking a photo at the same time, so cut me some slack).

pattern piece layout

One more thing about seam allowances and then I’ll be done. Go back to the pattern piece layout picture. It’s invaluable, remember? You can see that the pattern pieces are drawn and then the seam allowances are drawn darker. The default seam allowance is 1 cm, but sometimes they want different seam allowances in different places. In the picture above do you see the 4 with the arrow drawn to the bottom? For dress b the seam allowance on the bottom edge is 4 cm. You can’t use the pencil trick for this, you’ll have to get out your handy ruler. Sometimes there will be edges that require no seam allowance; these will be marked 0. Keep referring back to your pattern piece layout picture and you’ll be good to go.

When in doubt follow arrows and look at more pictures. Good Luck!

***

She makes it seem so easy, doesn’t she? But Meg is right, you CAN figure it out, you just have to train your eye a bit and know what to look for. Now be sure to head over to elsie marley to see this adorable dress she made for her daughter.

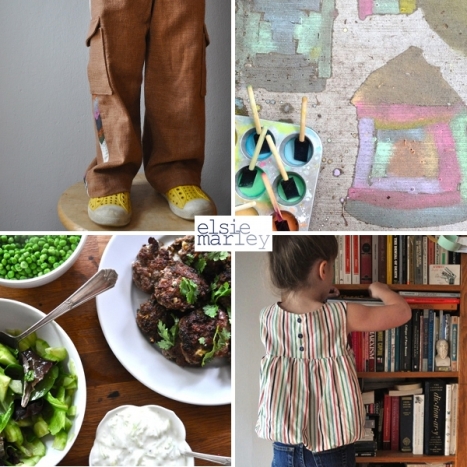
DSC_0525And here’s some more eye candy for you – all to be found on elsie marley. Thanks Meg, for being here and dropping some of your knowledge on us.

Meg_collage

Only 2 days left of the series!! We have two more great posts coming up this week AND a giveaway! Anyone interested in winning a Japanese sewing book?! Well, be sure to check in the rest of the week so you don’t miss a thing 🙂

JSBS_button500

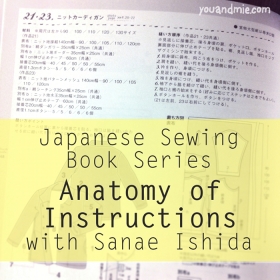
Japanese Sewing Book Series with Sanae Ishida

JSBS_button_Sanae

Oooh, I hope you are ready for today’s post because it is a BIG one.  We are starting to get into the nitty gritty details of Japanese patterns – the parts that make a lot of us cringe.  But today we have Sanae of Sanae Ishida as our trusty guide and Japanese pattern sewing expert and we are SO lucky to have her!

I was recently introduced to Sanae’s blog and have been hooked since day one.  Her blog, her words, her photos, and all of her creations live in this perfectly simple space that just exude beauty and a sense of calm. I also remember reading about her and finding that we have a surprising amount of things in common.  We’re both Japanese American, we both studied Communications (among other things) as undergrads at UCLA, we both lived in Japan and taught English there for two years before going back to UCLA for graduate degrees in the education field.  She even lived in San Francisco for a bit.  Our lives look pretty different now though, the biggest factor being that she’s about ten thousand times cooler than me.

Not only is she a skilled seamstress (I think this post pretty much sums up her gorgeous style and straight up awesomeness), but she’s a true true artist.  She writes, she paints, she sketches, has her own art shows, she knits, she bakes, and takes the most beautiful photographs.  She’s the kind of person who I want to stand close to with the hopes of absorbing some of the talent and beauty that seems to ooze out of her.

And you have to check out the incredible “100 Dresses” art show that she put together with exquisite toddler dresses made by her mom (I guess we know where Sanae gets it from!).  It really is one of the most unique and amazing things I’ve seen!  Ok!  Without further ado, I’ll let Sanae take it away . . .

***

Hello, lovely You and Mie readers! I’m Sanae of the oh-so-originally named sanaeishida.com. On my blog, I prattle on about sewing and creating in general, and I’m so pleased to be part of the Japanese Sewing Book Series! I’m a huge fan of Japanese sewing books and have amassed a lot of ’em over the years and frequently use them to sew outfits for my six-year-old. This is my very first guest post so I’m doubly excited to be here! I’ve also created two outfits to accompany this post on my own blog, and I hope you’ll get a chance to check them out.

Today, I’ll be covering the basics of the text that you see in the beginning (or top section) of the pattern instructions. The pattern instructions themselves are typically located at the back of the book. See Exhibit A below. If you don’t read Japanese, it all probably looks like gobbledygook, and I hope that I’ll be able to make that portion a bit more accessible.

Exhibit A:

exhibit-a

Pattern T from Happy Homemade v. 5 ISBN: 978-4579112951

One thing you should know about me is that I can only read at about second grade level in Japanese so I’m actually not completely literate in the language. Which means that I’m familiar with that head-scratchy feeling of, “What in the world??” and have had to figure out a lot over the years.

I will be covering the following today:

1. Anatomy of Instructions
2. References to Translated Dictionary of Sewing Terms
3. Instructions Layouts (with translations)

Lots of information coming atcha, so you might want to grab a cuppa…Without further ado, let’s jump in!

1. ANATOMY OF INSTRUCTIONS
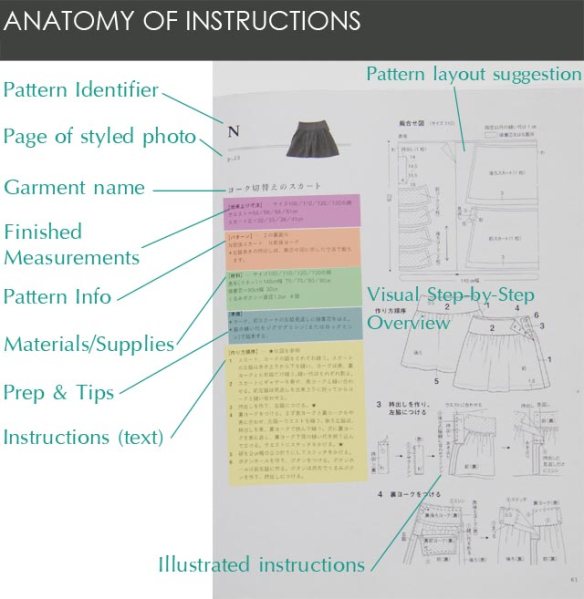
anatomy-of-instructionsI own fourteen Japanese sewing books, and the books all have some variations of the information listed above in the instructions section at the back of the book. I’ve color-coded sections you’ll most often see. Here are a few more details about each section:

Pattern Identifier – This is usually a letter or number and you will use this identifier to locate the correct pattern pieces on the crazy pattern sheets provided with the sewing books.

Page of Styled Photo – Every garment is beautifully styled and photographed in the front section of each sewing book and this page number references that image that makes you want to make the garment in the first place 🙂

Garment Name – These names tend to be very straightforward descriptions like “peter pan collar shirt”, “skirt with pockets”, “camisole dress”. You usually won’t find any cute or pun-ny names.

Finished Measurements – Basic finished measurements are provided and usually includes length of garment, chest circumference, sleeve length, etc.

This section may also have the available sizing which is usually 90cm to 130cm. Kristin covered this information yesterday. The sizing info is also often included in the Materials/Supplies section.

Pattern Info – This section will indicate the pattern sheet on which you will find the necessary pieces (e.g. in the image above, the pattern pieces for the skirt is on sheet 2). The books usually come with multiple pattern sheets. Some books also list the pattern pieces specifically such as “2 collar pieces, front bodice, back bodice, sleeve, facing”.

Materials/Supplies – This is where fabric and notions information will be listed. The quirky thing about Japanese sewing books is that they don’t really offer recommendations for fabric options. They list the exact fabric that was used for the garment featured. So instead of a list of fabric recommendations as you would see with American or European patterns, this section will list “Liberty Tana Lawn” or “Striped yarn-died cotton”. It’s interesting to see what they used, but I usually completely ignore the fabric section. Rather than spending time trying to painstakingly translate every part of the fabric listed, I would merely try to see if one of the common fabric types was used (I talk about links to a dictionary of sewing terms in the next section).

One other thing about the fabric section is that the amount of fabric required is also listed in Japanese standard widths (110cm usually). The numbers separated by slashes tell you how much length you need for the size you are making. So if the sizing available is 90/100/110/120/130cm and the fabric requirement section shows 45/50/55/60/60, and you’re making a size 90cm shirt for your wee tot, you’ll need 110x45cm in fabric.

Prep & Tips – Not every book has this section. The prep & tips section advises on things like adding interfacing, finishing certain seams beforehand, etc.

Instructions (text) – These are the step-by-step instructions to construct the garment. These steps correspond with the illustrated overview with the numbers that indicate construction order (see below). I should point out that not every step has a detailed illustration, except for A Sunny Spot and Happy Homemade books which omit this texts instructions section and literally has step-by-step written and illustrated instructions.

Note: Keep an eye out for any page numbers in the instructions as they are references to illustrated instructions to help you. For example, if you’re sewing a shirt with a placket and you don’t see any illustrated guide to how to create the placket but you see “p.57”, go to page 57 and you’ll find the illustration there.

These three sections will be covered on other days this week:

Pattern Layout Suggestion – Similar to American and European commercial patterns, this section provides recommendations on how to arrange your pattern pieces in the right direction/grainline and to minimize fabric waste. This section also shows you how much seam allowance to add and any square or rectangular pattern pieces or bias tape you may need to measure out (pattern pieces are usually not provided for bias tapes or for square/rectangular pattern pieces)

Visual Step-by-Step Overview – As mentioned in the text instructions section above, this is where you can see at a glance the construction order of the garment, and the numbers correspond to the steps in the text instructions section.

Illustrated Instructions – The illustrations are excellent, and I find that this is the section I really use above any others. More on this later this week!

*************************************************************************

2. TRANSLATED DICTIONARY OF SEWING TERMS

I was going to create a glossary of terms, but realized that Japanese Sewing Books has already done an excellent job, and you can find her translated dictionary of terms here. It’s a great compendium of terms with pretty much everything: fabrics, garment terms, measurements, general sewing terms, etc. etc.

There are a couple of small errors in the dictionary, though. 衿 is listed as “neck” but should actually be “collar” and 襟 is listed as “collar” but should be “lapel”.

An *updated* note on linen and linen blends (from Frances of Miss Matatabi, our resident fabric expert):

Many Japanese fabrics are 麻綿 blend and I find that 麻 is very commonly mistranslated as hemp, and a dictionary search shows that asa is hemp, linen, ramie, and so on. 麻 is just a term used to cover many textiles made from plant fibers, but the Japanese fabrics most people have access to (for example the blends from Kokka) are cotton – linen, not cotton – hemp.

*************************************************************************

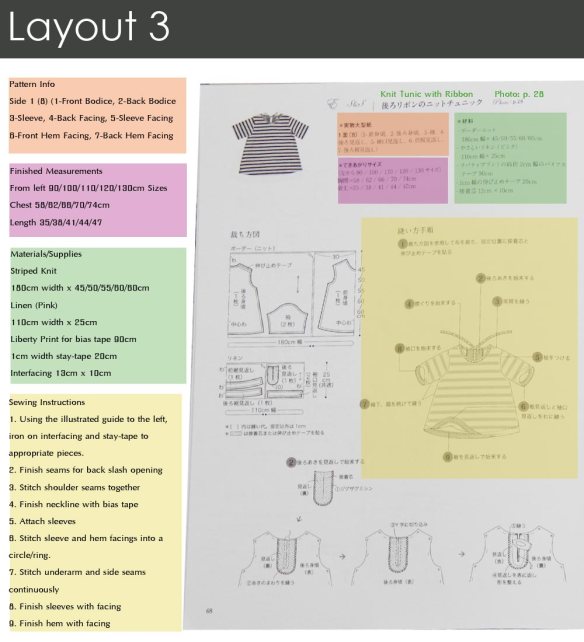
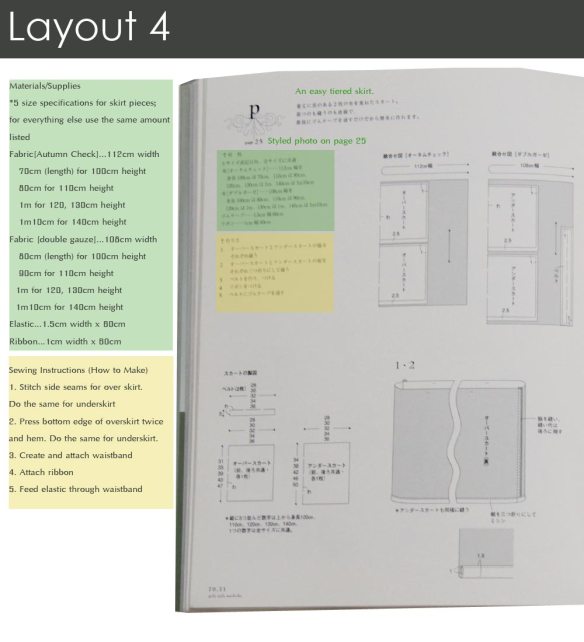
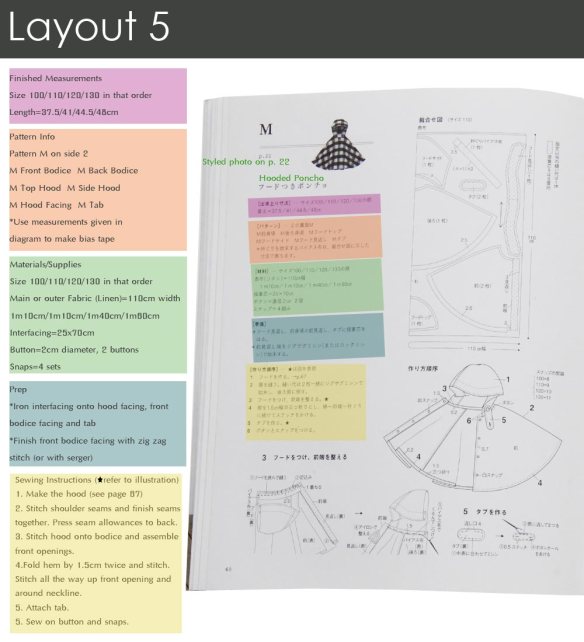
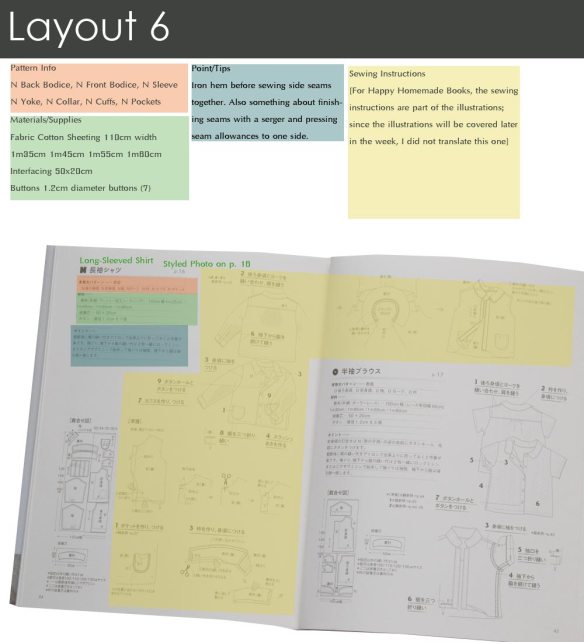
3. LAYOUTS
layout1

jsbs-heartwarminglifeseries[1] [2] [3] [4] [5]

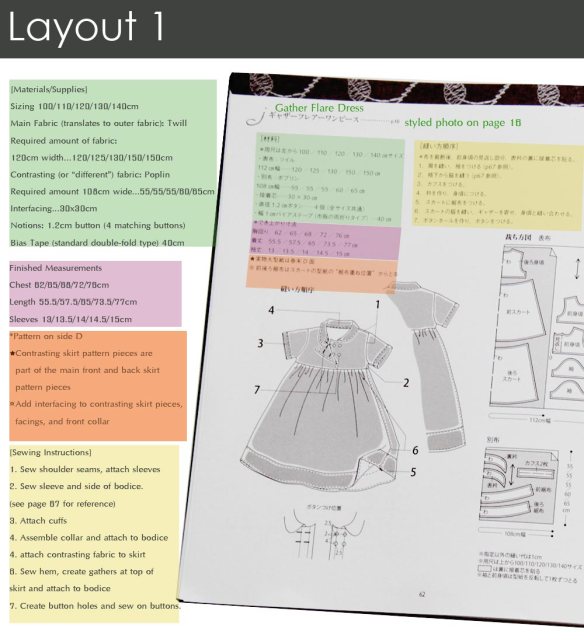
So I went through all 14 of my sewing books and identified six main instructions layouts, and you can see the first one above. I also included the books that have the same layout; click on the numbers for details on the books. The other 5 layout images are below. I quickly translated these six, and chances are good that you have one of the fourteen books that I own. Or, if you don’t own any yet, these are the ones that are typically available, so this should give you a pretty good sense of how to find information on the instruction pages. They’re even color-coded!

Green=Materials/Supplies
Purple=Finished Measurements
Blue=Prep & Tips
Orange=Pattern Info
Yellow=Sewing Instructions
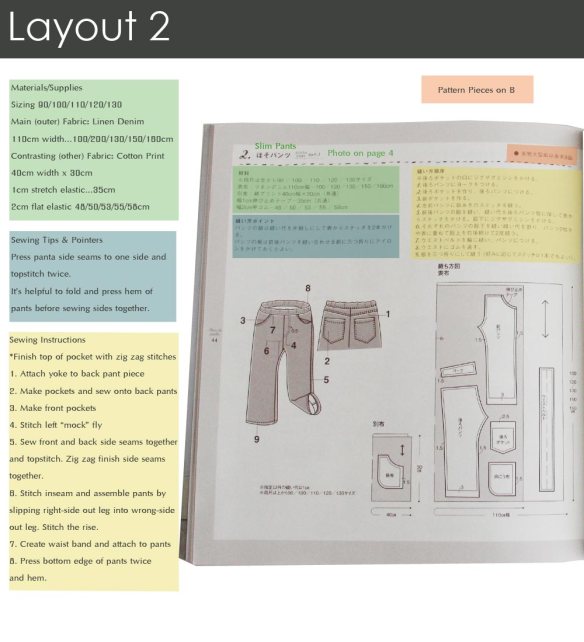
layout2jsbs-polkadrops-mainichi[1] [2]

layout3jsbs-asunnyspot[1]

layout4jsbs-tsukiori[1] [2]

layout5jsbs-mano[1] [2]

layout6jsbs-happyhomemade[1] [2]

There you have it, whew! Did you make it through? Was this helpful? Please feel free to contact me with any questions you may have. Sewing with Japanese patterns, though seemingly labor intensive, is incredibly rewarding. The designs are simple yet stylish and fit very, very well. I sew almost exclusively from Japanese Sewing Books and love them more and more and I hope you will too!

Thanks so much for having me Cherie!

***

Isn’t Sanae incredible!?  And she’s sewn up TWO new outfits to share with you guys over on her blog, so head over there to check them out!
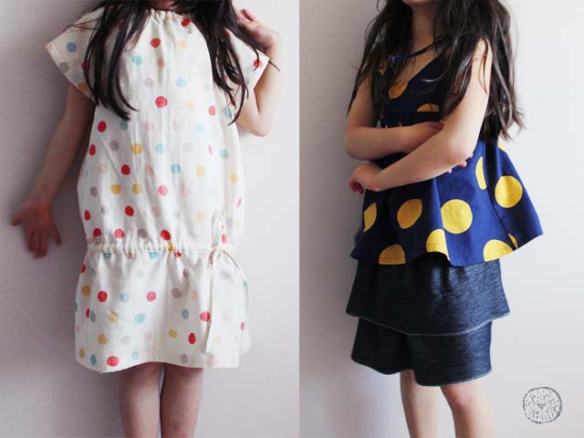
sanae-teaser-imageAnd I’m betting you’ll stay awhile to browse through all of the other gorgeous things you’ll find over there.
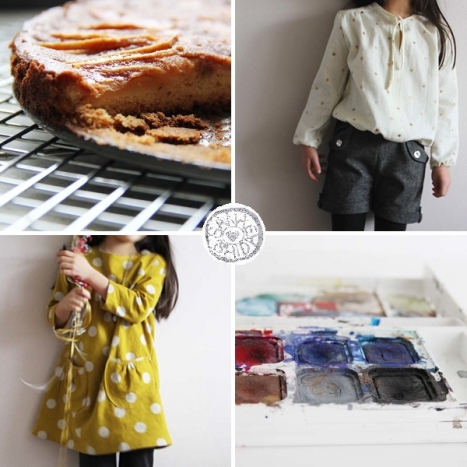
Sanae_collage

Tomorrow, we’ll be tackling how to find the pattern pieces you need on the pattern sheets and adding seam allowance.  You won’t want to miss it!
JSBS_button500

you & mie is an Amazon affiliate.  I will earn a small commission for Amazon purchases made through links provided in this post.

Japanese Sewing Book Series with skirt as top

JSBS_button_KristinIt’s finally here!  It’s Day ONE of the Japanese Sewing Book Series!  I hope you’re as pumped as I am.  Today we are going to be covering some of the basics that you need to know before you even buy a book!  And my first guest is none other than the amazing Kristin of skirt as top.  Honestly, I could probably go on and on for days gushing about this girl – she really is an amazing person!

It’s hard to believe it was only a little over a year ago that she sent me that first email to congratulate me on my first guest post (how sweet is that!?) – and now, a year and literally hundreds of emails and texts later, I’m so honored to call her one of my very good friends.  She’s clearly got amazing sewing skills and impeccable taste – just check out this springtime ayashe, her washi dress (still my favorite), and her doily foldover clutch.  She is also a truly creative and original artist.  You know you’re not going to see something that’s already been done on Kristin’s blog.  For me, her sweet tartan junebug remix and sunshine dress really stood out to me as incredibly unique.

She’s always coming up with awesome new ideas and has great perspective – she’s my favorite person to brainstorm with.  Honestly, there is rarely a project that I haven’t consulted her on.  She is the co-creator and co-host of the ridiculously amazing, hilarious, and creative, not to mention, my favorite series, film petit.  I mean, if you haven’t been following film petit, I really have no clue where you’ve been – you NEED to check it out.  AND on top of all this, Kristin is really just a sweet, generous, humble and fun person.  And today she’s going to walk us through some of the super basic steps that will get us started with Japanese sewing books.  I’m honored to have her here as a guest!

***

Hi, You & Mie readers!  I am really looking forward to learning more about Japanese pattern books this week, and knowing about this series has motivated me to pull my books out again and be inspired!  I don’t speak Japanese at all (just a few phrases my husband taught me – he took it in high school and college), but I just love the aesthetic and sewing methods in Japanese pattern books SO much.  They’re simple but beautiful and I think the generally loose-fitting styles look really great on kids (this is one of my personal favorites).

I’m going to cover three topics today:

  • Where to buy Japanese pattern books
  • Sizing of the pattens / how to determine your child’s size
  • Basic structure of the books

japanese pattern books - the basicsWhere to Buy:

This was a big mystery to me when I first saw people blogging about Japanese pattern books a couple years ago – they weren’t sold in fabric stores or regular bookstores, so at a certain point I went on a hunt to find them.   Fortunately, Portland has an Asian grocery store called Uwajimaya that just so happens to have a bookstore in the back – it carries a HUGE selection of pattern books and it’s where I’ve gotten most of mine.  The actual bookstore is called Kinokuniya, and they have seven locations in the US .  They also take orders online (though their site is a bit difficult to navigate).  If you’re lucky enough to live near one, go check it out!  Really cool to see so many books all lined up and thumb through each pattern.
japanese pattern books - the basics

Amazon is also a great resource for the more common books – just search “japanese pattern books” and check out the titles.

You can also browse etsy – a seller named pomadour24 has a wide selection with good photos of the insides of each book, which is very helpful – you want to know you’ll sew at least a couple of the patterns before investing in the whole book, I think, since they tend to be a little on the pricey side, no matter where you get them.

For this post, I chose to make a project from Carefree Clothes for Girls by Junko Okawa, since it’s probably the most easy to find and accessible of the Japanese pattern books.  The style, format, and construction techniques are similar to what you’ll see in most Japanese pattern books, but it’s been translated into English (and inches), so it’s a really good one to start with.  If, even after this series, you’re dying to sew a Japanese pattern but are still intimidated by the language barrier, give Carefree Clothes for Girls a try!

japanese pattern books - the basicsThere are actually free PDF pattern pieces (no instructions) from Carefree Clothes for Girls here and a couple free full projects from book here if you want to see what you’ll be working with.

Sizing:

Before you buy your chosen pattern book, there’s something else you should note – and I think this probably applies more to purchasing them in person versus online, since you can see a pretty good description online – Japanese pattern books (like many other patterns) come in a limited range of sizes per book!  The size range is typically indicated on the front cover, and kid sizes are listed in centimeters (more on that later).

japanese pattern books - the basicsI bought most of my Japanese pattern books when my daughter was 2, and once I got them home I realized the sizes started at 4 (100 cm).  I tried to resize a few back then, but it’s so much easier to sew for her now that she is growing into the proper size!

japanese pattern books - the basicsSo be careful of that.

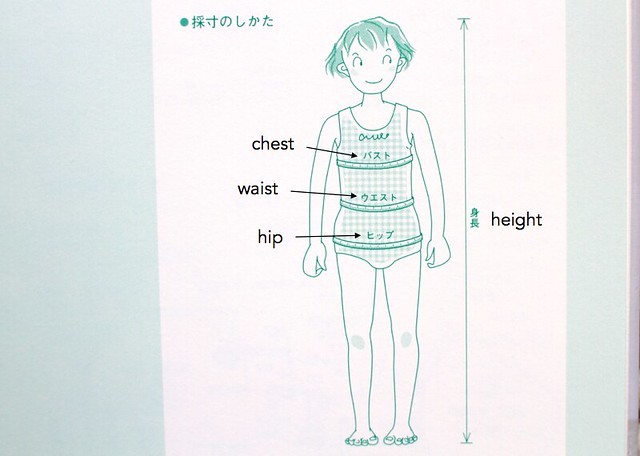
Sizing is typically in centimeters, since, you know, most of the world uses the metric system.  The primary size driver is height, and 100/110/120/130 seems to be a common range.  Some books are better than others about including chest, waist, and hip measurements as well, and Happy Homemade Vol. 2 even has a cute little chart for you (English labels are mine):

japanese pattern books - the basics

I put together a chart with some conversions and included the Japanese characters to help you guide your pattern size selection based on your child’s measurements –  as with all sewing patterns, it’s best to use your child’s measurements rather than age to determine sizing, and though I noticed the chest/waist/hip measurements correlated to the same height size in all three of the books I looked at, there could be some variation.  But hopefully this gives you a general idea what to look for – you can see how the Japanese characters in the chart below match the drawing above.

japanese pattern books - the basics

(Japanese characters from the dictionary of Japanese sewing terms at this indispensable site)

If you’re curious, here are some baby sizes:

  • 50 : newborn
  • 60 : 3-6 months
  • 70 : 6-12 months
  • 80 : 12-18 months

Japanese sizing seems to run a little smaller than American sizing in general. For instance, I usually sew a size 3 for my petite almost-five-year-old daughter in most American patterns, but I sewed a 4 for this project and it fits her perfectly. She wears a 5 in store-bought clothes.

Basic Book Structure:

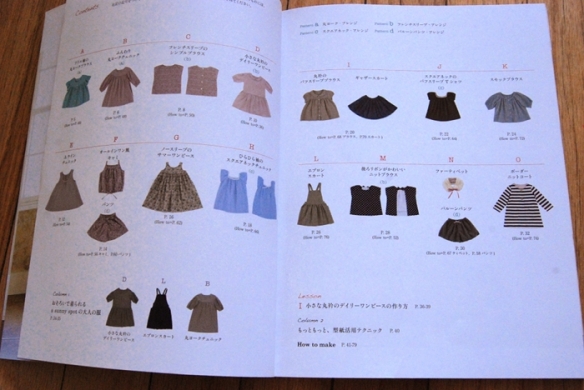
Every Japanese sewing book I’ve seen starts with pages of beautifully photographed outfits, with letters/numbers/names associated with each photo.  Once you’ve browsed through the eye candy at the beginning, you get to a section usually titled “how to make” which is where the size chart and instructions begin.

japanese pattern books - the basicsFor the Apron in Carefree clothes for girls, the photo is on page 10 but the instructions are on page 45.  The instructions guide you to pattern B on page 1 of the pattern insert, which looks like this:

japanese pattern books - the basics

And how to make heads or tails of that spiderweb will be covered in the next few days by future guests!

Please add any stores, resources, and sizing tips you may have to the comments, and if you’d like to see the project I made from Carefree Clothes for Girls, visit skirt as top today!

japanese pattern books - the basics

Thanks, Cherie!

***

Thank YOU, Kristin!  While you’re over at skirt as top, be sure to check out all of her amazing and inspirational projects!

Kristin_collageAnd stop by tomorrow for a really great post about decoding all that essential information found at the top of each instruction page.  It’s the part that usually makes me sigh and close the book before I even get started.  But not after tomorrow!

*The Miss Matatabi Giveaway winners have been announced HERE.  Are you one of the two lucky winners!?  Thank you to all who entered.*

JSBS_button500

you & mie is an Amazon affiliate.  I will earn a small commission for Amazon purchases made through links provided in this post.
A Simple Blouse from a sunny spot

SimpleBlouse1The second garment I made from a Japanese sewing book is this simple blouse from a sunny spot 女の子のまいにちの服 (Every day clothes for girls), same book I used for this top.

SimpleBlouse2

asunnyspot7asunnyspot6It’s called “Simple Blouse” and it really is exactly that.  I picked it, once again, because of it’s super simple construction.  I was still looking for something with directions so straightforward that I could figure it out by diagram only.

asunnyspot8This top certainly fits the bill.  It’s just a front and two back pieces with sleeves built in (so separate sleeves to sew in).  The neckline is finished with bias and there is a simple folded button placket and that’s it!

SimpleBlouse3I didn’t realize this earlier, but looking at these pictures, the top looks, dare I say, almost hospital gownish!?

SimpleBlouse4But in a cute way, right!?  😛  If you were to make this top, I might recommend a cute print, like the small floral pictured in the book, and steer clear of solids.  Especially anything white or minty, to avoid the whole hospital gown thing . . .

Since I made these first two tops from Japanese patterns months ago, I’ve tried a more slightly more complicated pattern (with success!) which I hope to share with you soon.  And after my wonderful guests share their knowledge with us next week during the Japanese Sewing Book Series, I know I’ll be pumping out garments from Japanese sewing books like crazy!  I can’t wait!

SimpleBlouse5She’s starting to get a hang of this peace sign thing!

Again, if you’re interested in purchasing this book, you can find it on Amazon, Etsy, or Kinokuniya.

If you haven’t entered the Miss Matatabi Giveaway, make sure to do so by Sunday at noon PST!

And the series starts on MONDAY!  Be sure to come back each day next week for Japanese sewing book tips, translations, and inspiration from my amazing and talented guests Kristin, Sanae, Meg, Frances, and Robin.

JSBS_button500

you & mie is an Amazon affiliate.  I will earn a small commissions for Amazon purchases made through links provided in this post.

A-Line Tunic from A Sunny Spot

ALineTunic1I made my very first sewing project from a Japanese sewing book back in August from the book a sunny spot 女の子のまいにちの服 (Every day clothes for girls).

asunnyspot1When I was in Japan over the summer, I picked up a couple of pattern books including this one.  It has a lot of simple but cute, very feminine outfits for little girls.  If you’d like to see more pictures from the book, Japanese Sewing Books has a thorough book review here.

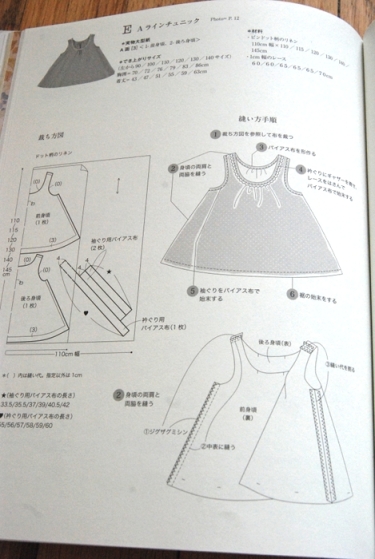
asunnyspot2When I decided to sew up my first project, I picked the cute “A-line tunic” because it is adorable but also a super simple sew.  Even though I couldn’t understand the Japanese directions, I could easily tell how it was constructed by looking at the diagrams.

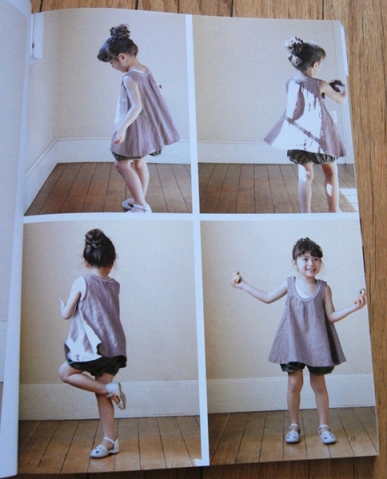
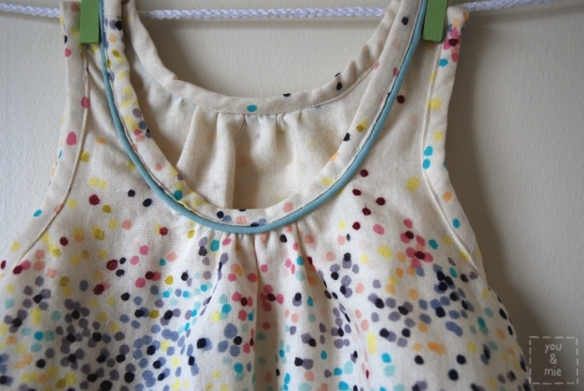
asunnyspot3asunnyspot4It is just two pieces (front and back) plus bias for the neck and arm holes.  Add some gathers and lace or piping along the neckline and you’ve got a sweet and twirly little tunic.  I highly recommend this as a starting project for newbies to Japanese patterns!

asunnyspot5Of course, I didn’t realize at the time that the book’s smallest pattern size was still too big for Yuki.  Oops.

ALineTunic2I used this double gauze Nani Iro Melody Sketch that I picked up in Japan and it is probably one of my favorite fabrics ever!!  I think it’s so puuuurty.  It’s from an older line, so it’s harder to find, but it looks like there is still some available here.  Double gauze is really lightweight, so it hangs really nicely and it’s a perfect top for warm weather.

ALineTunic4Well it’s finally starting to fit her and I think it’s one of our favorite tops now.

ALineTunic5ALineTunic3Again, it was definitely a manageable project for a first timer.  The hardest part for me was finding the pattern pieces I needed on the pattern sheet.  If you’re interested in purchasing this book, you can find it on Amazon, Etsy, or Kinokuniya.

I have one more top that I’ve made from this book to share with you later this week.  But until then, I wanted to make sure you all knew about this great resource for sewing from Japanese sewing books.  It’s called Japanese Sewing Books!  You really should check out her site for a dictionary of sewing terms, help with understanding patterns, plus translations, book reviews, free patterns and sew alongs.  It really is a fantastic starting point if you’re a beginner to Japanese patterns and between that site and the Japanese Sewing Book Series here next week, you’ll hopefully be ready to tackle those patterns with confidence!

I’ve loved seeing all the projects that you guys have sewn up from Japanese sewing books.  Please keep sharing your links with me – they are very inspirational!  Until next time!

you & mie is an Amazon affiliate.  I will earn a small commission for Amazon purchases made through links provided in this post.
Miss Matatabi GIVEAWAY! {CLOSED}

**The winners are . . .
Delia, who will receive 1 yard of the Nani Iro Painting Check and
Carolina, who will receive 1 yard of Candy Party Paint Splatter!

Congrats to the winners (you should have received an email from me)
and thank you to all who entered!**

The Japanese Sewing Book Series starts next week, but let’s get the fun started a little early with a giveaway, shall we??

And what better to sew up some Japanese patterns with than some gorgeous Japanese fabric!? Today’s fantastic giveaway is from the Miss Matatabi fabric shop.

Miss Matatabi is an online fabric shop that sells Japanese fabric. When my local fabric store stopped carrying nani iro fabrics, I needed a new supplier (yeah, it’s kinda like a drug). Rae had mentioned Miss Matatabi in one of her posts and since I trust Rae, I checked it out and never went anywhere else for Japanese fabrics. The shop is run by Frances, an Australian who now lives in Japan and has a deep love and a keen eye for beautiful fabrics. She is such a fun and sweet person, and I’m lucky to now call her my friend! She’s also one of my guests for the series next week 🙂

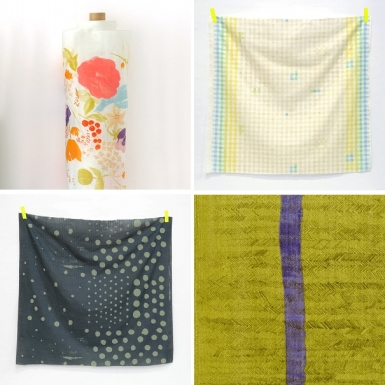
Her shop carries the new 2013 nani IRO line. I seriously can’t even pick my favorites – I love them all. So here’s just a peek into her shop . . .

nani IRO 2013
naniirofavsRuby Star Sparkle by Melody MillerStamped by Ellen Luckett Baker
Not to mention Heather Ross, nani IRO prints from older lines, a sale section and other fantastic Japanese fabrics . . .
fabfavsYou really should just head over there and check out all the wonderful goodness that Frances has stocked her shop with.

She also has her own blog where she shares shop updates and some of the beautiful things she sews with the fabric from her shop (perfect for ideas and inspiration) and has a pinterest board called miss matatabi & me, where you can share projects that YOU have made with fabric from her shop!

And today, Frances has generously offered an amazing prize to TWO winners!

One winner will win 1 yard of this summery Nani Iro Painting Check in black and grey:

And another winner will win 1 yard of this super fun Candy Party Paint Splatter KNIT fabric!

Wanna win??

Giveaway details:
– giveaway will be open until Sunday, March 24th 12pm PST
– winners will be chosen at random and will be announced on Monday, March 25th
– open to international readers
– S&H is included

TO ENTER: {CLOSED}
There are four ways you can enter. You can choose any method of entering and if you do all of them, you’ll be entered four times! Make sure to leave a separate comment for each entry!
– follow Miss Matatabi on Pinterest and leave a comment telling me you do so
– follow Miss Matatabi on Instagram and leave a comment telling me you do so
– follow Miss Matatabi on Facebook and leave a comment telling me you do so
– follow you & mie on Facebook and leave a comment telling me you do so

Good luck and be sure to join us for the series next week!!

JSBS_button500