Oliver + S Spring Pattern Preview: Roller Skate Dress

*UPDATE – The Roller Skate Dress + Tunic pattern is now available on the Oliver + S site!  It is available as a paper pattern or PDF pattern.  Head over there to get your copy!*

So I haven’t been blogging much recently, but I’ve been busy with some really exciting projects that I’ll be announcing within the next few weeks (including my first blog series)!

The first of those projects was the opportunity to share with you a new Oliver + S spring pattern that has yet to be released!  If you sew kid’s clothes, you’ve surely heard of Oliver + S patterns.  And if you’ve heard of them, I’m sure you’re a big fan AND know that they are releasing two new patterns within the next week!  So when Liesl (the creative mastermind behind Oliver + S) asked Kristin to sew up the new patterns to share with readers and customers and Kristin asked me and Jessica if WE wanted to sew them with her – I’m pretty sure I shrieked.  You would too, wouldn’t you??

roller skate dress + tunic rolling tour
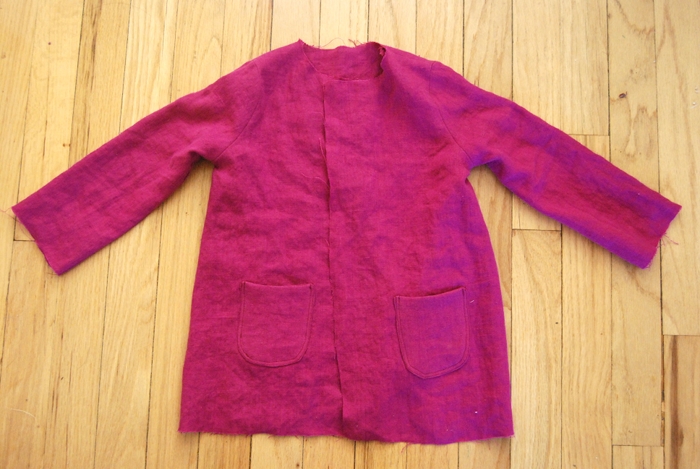
And so I present to you, the last stop on the Oliver + S Roller Skate Dress + Tunic Rolling Tour!  The Roller Skate Dress + Tunic is one of 2 new patterns being released for the spring line.  It is a simple and adorable addition to any spring wardrobe and is a pattern I can imagine sewing up over and over again in different variations.  The pattern comes with 4 views or styles.  View A is a dress and you can see Kristin’s sweet floral version here.  View B is a dress with a visible yoke and I think this version that Liesl made is particularly cute.  Jessica made a reversible version of View C, which is a tunic (totally loving the gorgeous tribal print she used).

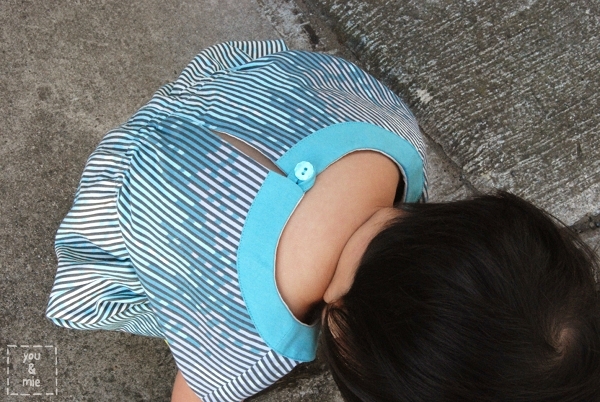
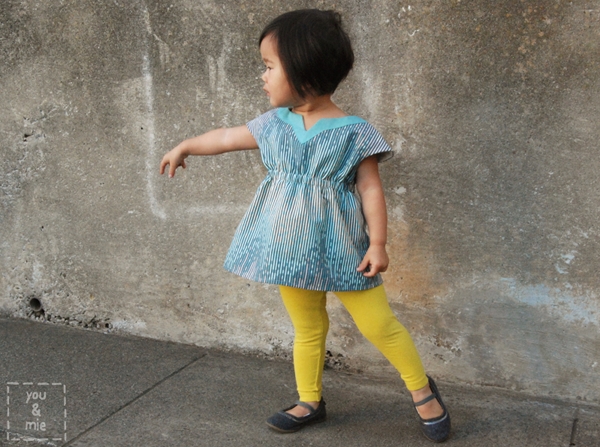
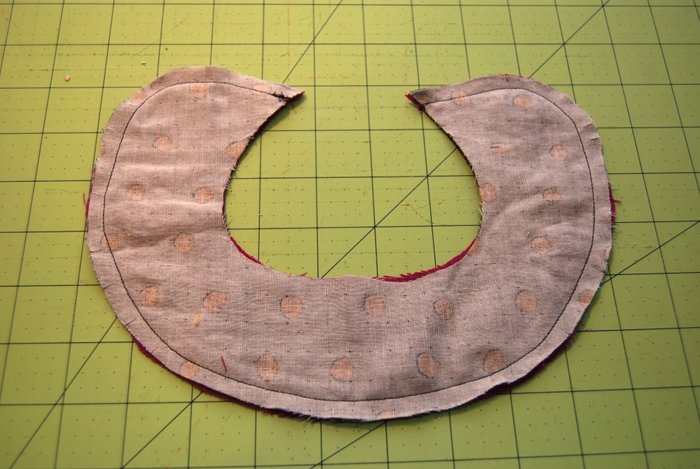
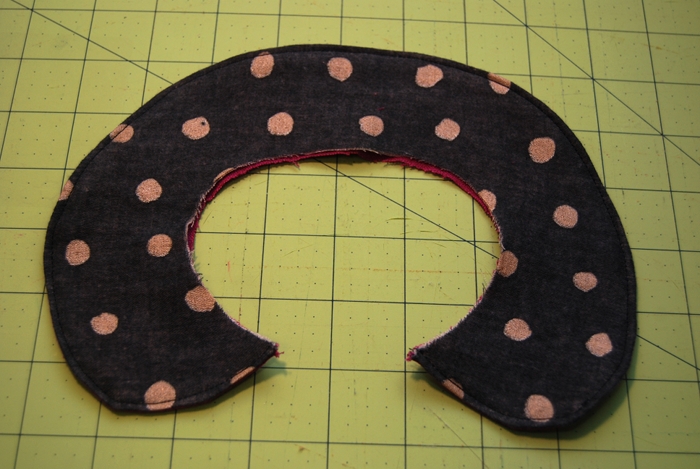
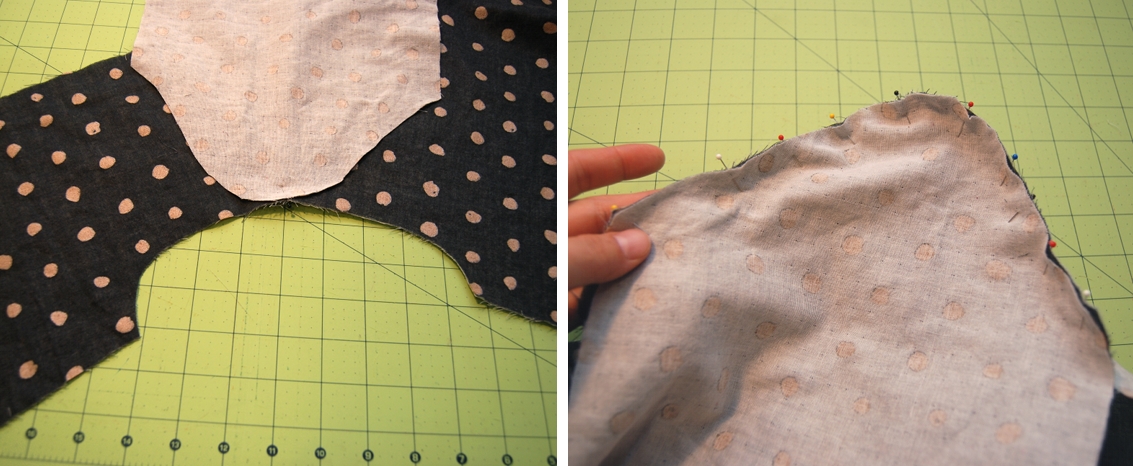
And I made View D, a tunic with the visible yoke in contrasting fabric!

RollerSkate2

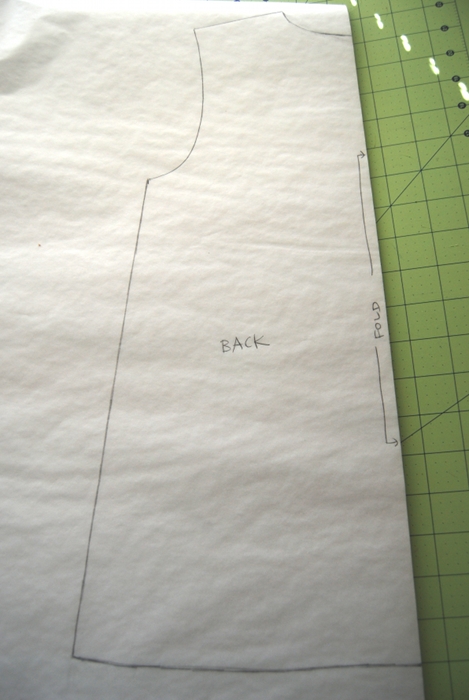
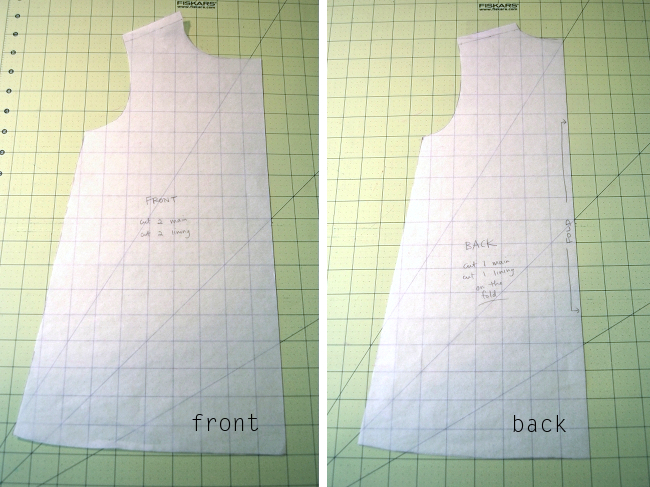
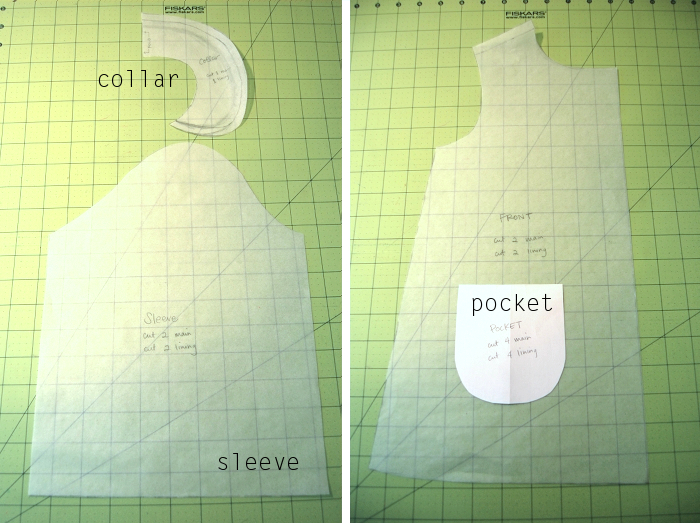
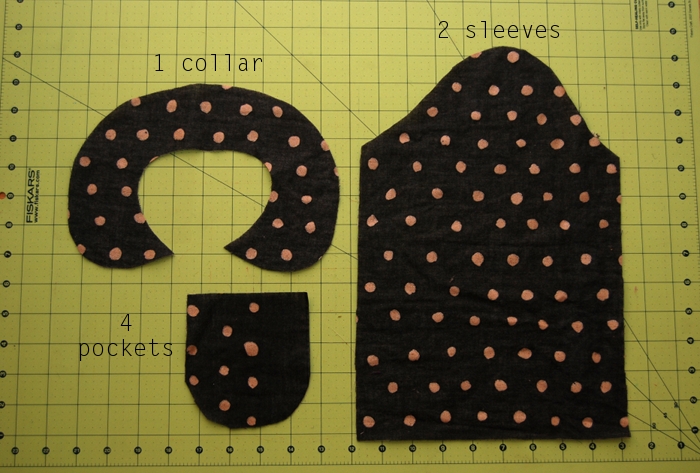
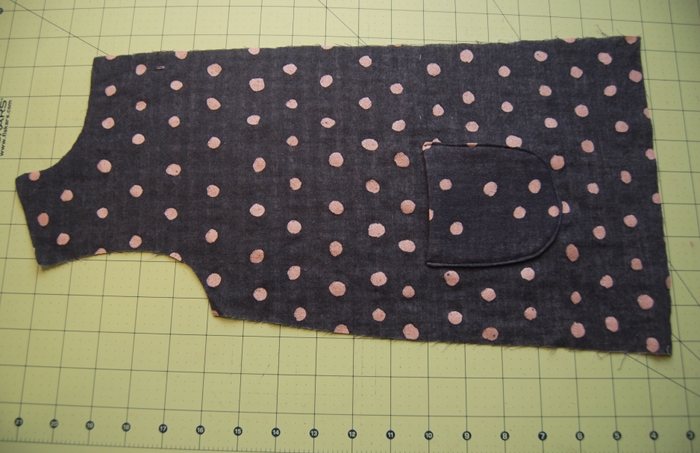
This pattern is really a simple and fast sew, but produces a stylish and professional looking top or dress, which is my favorite kind of pattern!  It’s fully lined, has faux cap sleeves and an elastic waistband for shape and comfort.

RollerSkate4
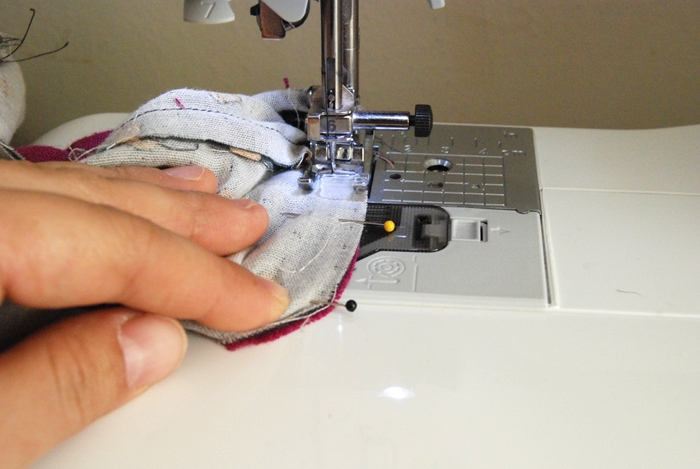
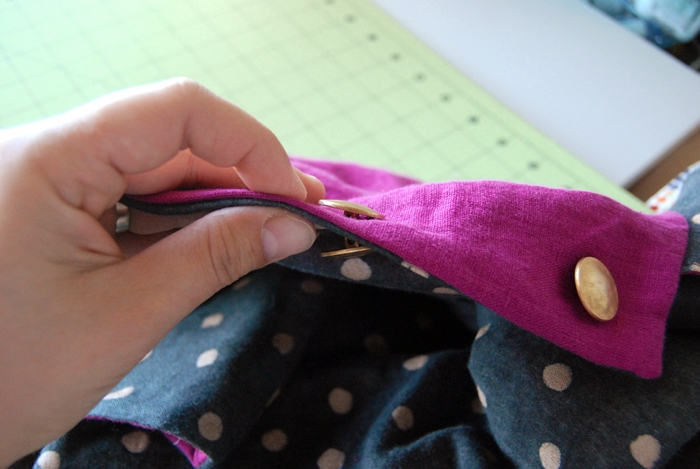
It closes in the back with a simple button and button loop (no zippers or button holes!), so that makes this pattern appropriate for beginners.

I love the optional visible yoke – it adds a nice finishing touch.  My V notch on the neckline got a little deep because the first time I sewed it, it was crooked, so I had to make it bigger to even it out.  My advice if you do the notched neckline is to really take your time with it.  If it’s off even by a little, it’ll be very noticeable!

RollerSkate1I made it in 2T and it fits my daughter perfectly.  I was a little confused by the chest measurement listed for the finished garment because it seemed way too big, but I realized that that’s the measurement before you add the elastic.  So just go with the body measurements table (or whatever size you normally sew with O+S patterns) and you’ll be good!  This style is very forgiving in fit.

This pattern delivers all the wonderful things you’ve come to expect from an Oliver + S pattern.  It’s professional and beautiful, with great diagrams and directions.  There is so much useful sewing information in each pattern that you always come away feeling like you’ve taken a class or learned at least one new sewing technique.

RollerSkate3I used this really cool fabric by Tula Pink called Sea Stripes from the Sea Water line.  I picked it up from one of my favorite Bay Area fabric stores, Stonemountain and Daughter.  I was drawn to the creative print and bought a bunch, not knowing what I was going to do with it.  I really love it with this simple pattern though!

And seriously, this pattern has so many possibilities.  When trying to decide what fabric to use, I picked out a huge stack from my own stash that I thought would look great as a Roller Skate tunic.  The hard part was choosing which one to go with.  But the good news is you really will sew this pattern over and over again – it’s just a great staple to have in your collection.

In other news, Yuki has started to explore new modeling poses.  In this one, I’m pretty sure she’s channeling Em’s dancing spirit.

RollerSkate5(I did not prompt her to do this – she just started doing it on her own!)

And I don’t even know what this pose is about, but hey – I’ll take it!

RollerSkate6So there it is, the Roller Skate Tunic (View D).  The pattern will be available through the Oliver + S website starting tomorrow.  I bet you already have something perfect for this little dress or top already in your stash, so you’ll be able to get started right away!

If you haven’t already, stop by skirt as top and a little gray to see their awesome versions of this pattern!

Thank you, Liesl and Kristin, for letting me sew this incredible new pattern to share with everyone!

Next up, is the Pinwheel Tunic + Slip Dress!

Reversible Spring Coat Tutorial

I’m re-posting this Reversible Spring Coat tutorial that was originally up on iCandy Handmade for their Basic Bodice Series.  The premise of the series was that if you have a great bodice pattern and some ideas for mixing it up, you can pretty much make anything!

ReversibleCoatSo I decided to take a basic dress bodice and turn into a reversible coat!

It’s going to take a bit of pattern altering, of course, but I’ll walk you through it and it’ll be pretty simple!

ReversibleCoat2

And the finished product will be a sweet and practical coat for your little one!  I used 2 lightweight fabrics (nani iro double gauze and linen) to make a spring coat since I know the weather will be warming up soon.

You’ll need:

  • 2 fabrics (yardage will depend on what size coat you’re making)
  • 4 buttons (or as many as you desire, just be sure they are the same size and you have enough for both sides of the coat)
  • interfacing (optional)
  • bodice pattern
  • sleeve pattern (or draft your own)
  • tracing paper
  • ruler

I started out with Made by Rae’s Geranium Dress pattern for my bodice because it’s the pattern I’ve been using for dresses recently, but you can use pretty much any basic bodice pattern.  I went up one size because this is outerwear and I want it to fit over clothes, so instead of 2T which my daughter usually wears, I cut out the 3T size bodice pattern.

Basic Bodice Coat1The original pattern has the front bodice piece cut on the fold and a button placket in the back, but we want our button placket in the front and will cut our back piece on the fold.  So, the first step is to cut the extra off the back bodice.  Place the front bodice pattern on top of the back bodice pattern lining up the bottom of the armhole and bodice.  Mark the fold line onto the back pattern and cut on the line.

Basic Bodice Coat2Depending on your bodice pattern, you may want to lower the bottom of the armhole.  I trimmed off a bit starting from half an inch down.

Basic Bodice Coat3On your tracing paper, line up the straight edge of your back pattern piece with the edge of your paper and trace the shoulder seam and armhole.  I raised the neckline so it hit about an inch higher at the fold line.

Basic Bodice Coat4From the bottom of the armhole, use a ruler to make an A-line shape for your coat.  You can make it whatever length you want.  The bottom hemline is slightly curved.

Basic Bodice Coat5For the front pattern piece, you’ll want to take another piece of tracing paper and tape it so it hangs over the straight edge of the back coat pattern by 1.5 inches (1/2 an inch for seam allowance and another 1 inch for the button placket).  Place the front bodice pattern to top so that the bottom of the armhole and the straight edge lines up with the back piece.  Trace the shoulder seam and armhole of the bodice pattern.  I brought the neckline up by about 1/2 an inch.

Basic Bodice Coat6Remove the bodice pattern and trace the side seam and bottom hemline from the back pattern piece.  Make sense?

Basic Bodice Coat7_1Here’s what my pattern pieces looked like.

Basic Bodice Coat8

You’ll also need to draft a sleeve, collar and pocket pattern.  For the sleeve, I actually used one that I already had.  To make sure it’d fit, I cut a muslin of the sleeve piece and after I sewed the front and back pieces together of the coat, I checked to see if it would fit in the armhole, then adjusted the pattern as necessary.  If you don’t have a pattern piece for a sleeve, you can find many tutorials for drafting your own with a simple web search.

For the collar, I used this tutorial by Vanessa of LBG Studio.  And for the pocket, I took a piece of paper, folded it in half and drew the basic shape that I wanted.  Be sure to add seam allowance!

Basic Bodice Coat9Basic Bodice Coat10

From Fabric A, you’ll need:
– 2 front pieces
– 1 back piece (cut on the fold)
– 1 collar piece
– 2 sleeves
– 4 pockets

And from Fabric B, you’ll need the exact same thing.

Now we get to the sewing part!

Basic Bodice Coat11

*If you are using super thin or flimsy fabric, you may want to fuse interfacing to one or both of the collar pieces to add more structure.  I did not.*

Place your collar pieces down (1 from Fabric A and 1 from Fabric B) with right sides together.  Pin and sew the outer edge.  Clip rounded edges to reduce bulk when you flip the collar right side out.

Basic Bodice Coat12Flip right side out and press flat.  Top stitch around the outer edge, if desired.

Basic Bodice Coat13Place two pocket pieces together (right sides together) and pin.  Sew around the edge, leaving a 1 inch opening.  I like to sew along the opening as well because it helps flip the seam allowance in when you turn the pocket right side out.

Basic Bodice Coat14

Flip the pocket right side out, press flat and sew onto one of the front coat pieces.  Stitch close to the curved edge of the pocket, back stitching several times at the tops of the pocket to reinforce the corners (don’t sew the pocket closed!)  Repeat with the other 2 pocket pieces for Fabric A.

*Again, if your fabrics are really thin, you can add a strip of interfacing to the front coat pieces where your buttonholes and buttons will be.  Cut two strips of fusible interfacing 1 inch wide.  The length will depend on how many buttons and where you will place them.  Fuse them to the wrong side of your front bodice pieces 1/2 an inch from the edge.  I skipped this step too.*

Basic Bodice Coat15Pin and sew shoulder seams.  Press them open.

Basic Bodice Coat16Open up the coat at the shoulder seam, right side up.  Find the center of the sleeve and pin that to the shoulder seam, right sides together.  Continue pinning the sleeve to the armhole carefully.  Sew and press seam.  Repeat with other sleeve.

Basic Bodice Coat17Line up the side seams and the bottom of the sleeve, pin and sew (right sides together).  Repeat with the other sleeve and side seam.  Turn coat right side out and press.

Basic Bodice Coat18Take your prepared collar and line up the center with the center of the back of the coat.  You want the right sides of Fabric A to be facing up for both the collar and the coat when you lay them on top of each other like this.  Pin the inner edge of the collar to the neckline of the coat.  Baste the collar to the coat.

Basic Bodice Coat19Repeat all of the steps with Fabric B (except for basting the collar).

Basic Bodice Coat20To attach the two coats, lay Fabric A coat down, right side up.

Basic Bodice Coat21_1Lay the Fabric B coat on top, right sides together.  Sleeves should be on the inside.  Pin the entire outer edge and sew together leaving about a 6-8″ opening along the bottom.

Basic Bodice Coat22Pull the sleeves out.

Basic Bodice Coat23Take one of the sleeves and fold it out (towards the wrong side) by about 1.5 inches.  Slide it inside the other sleeve, line up the bottom seams of the sleeves and pin the ends of the sleeves together.

Basic Bodice Coat24

Sew the sleeves together along the pinned edge.  Go slowly and untwist the coat to your left as you go along.  Repeat with other sleeves.

Flip the coat right side out through the opening in the bottom.  You’re almost done!!  Press all the edges of the coat out.  Hand sew the opening shut using a slip stitch.  If you want, you can top stitch along the entire outer edge of the coat.

Basic Bodice Coat25

Sew your buttonholes where desired and attach your buttons.  You’ll want to either use the same buttons on both sides or at least use the same size buttons.  I sewed buttons to both sides of the coat at the same time using one thread.

You’re done!

ReversibleCoat1Now your kiddo has two stylish coats in one!

ReversibleCoat3ReversibleCoat4

I hope you guys have fun with your bodice patterns and are realizing all the endless possibilities a great pattern has.  If you sew up a reversible coat using this tutorial (or any from this site), I’d love it if you shared it with us in the you & mie flickr pool!

Thanks for stopping by 🙂

Sweetheart Dress Pattern Winners!

Thank you to all of you who entered the Sweetheart Dress Pattern Giveaway!

Sweetheart7Remember, if you didn’t win, you can still hop on over and buy the pattern now!  The awesome part about PDF patterns is you can download it, print it and start sewing immediately!  Just enough time to whip one up for your little Valentine for Valentine’s Day!

But THREE of you are lucky enough to receive the pattern for free from Shannon!

And the winners are . . .

replicatethendeviate
Lynn D in NC
huisei

Congrats!  I’ve sent your contact info to Shannon and she’ll be emailing you the pattern directly.  Have fun with your pattern and I’d love to see your finished dresses!

Sorry you can’t all be winners, but you CAN all sew this adorable Sweetheart Dress.  Click here to buy the pattern!

Happy sewing!

I am an affiliate of Go To Patterns.

Sweetheart Bubble Dress and GIVEAWAY {closed}

Sweetheart5Sweetheart7The Sweetheart Dress is a pattern I’ve had my eye on for a long time, and what better time to sew one up than just in time for Valentine’s Day!?  What, you may ask, is so “sweetheart” about this dress?

Sweetheart6Well what is NOT sweetheart about this dress?  It’s seriously adorable from the front and then BAM! – that heart cutout in the back is just pure sweetness!

The Sweetheart Dress pattern is designed by the super kind and talented Shannon of luvinthemommyhood.  If you ever go around her blog, you know that she is such a warm person and not only does she sew, but she’s a crazy amazing knitter too!

This pattern is a relatively quick sew, probably appropriate for an intermediate beginner.  It is a PDF pattern, so you can download it to your computer and print it out at home.  The pattern has very few pieces to cut and none that have to be taped together, so that made things even simpler and quicker!

Sweetheart1The way Shannon instructs you to construct the bodice was completely new to me.  I like learning new and different ways to do things.  Though I have to say, I had some trouble getting my arm holes top stitched nicely and looking clean.  It’s probably my least favorite part of the dress (I know you probably can’t tell from here, but if you looked close up, you’d see some slightly wonky stitching).

Sweetheart2

There are a couple of modifications I made to the pattern.  The most obvious change was making it into a bubble dress!  I know bubble hems have been popular for a long time now, but I never really had any desire to make one until I saw this dress by An of StraightGrain (she has a free pattern for a bubble skirt)!  After I saw the Sweetheart Dress pattern and picked the fabric, it seemed like it was just begging to be a bubble dress!  I’ll explain more about how I did it below.

The other things I did differently was to sew the skirt to the outside of the bodice with piping and then I hand stitched the bodice lining to the inside of the dress.  I just knew that with the double gauze fabric, it would probably look cleaner without the extra top stitched line.

Sweetheart3For the closure at the back of the dress, instead of doing a button with a loop, I hand stitched hook & eye closures to the inside of the dress.  Great idea, in theory.  It looks nice, but because the back of the dress is so open, it moves around a bit and the closures kept coming undone.  Soooo, probably don’t try that one folks.  I ended up adding a fabric covered button and button loop the way Shannon instructs (after these pictures were taken) – which looks just as nice.  Shoulda just listened in the first place . . .

EDIT!  Veronica from SewVery said that she used hook closures and it worked beautifully!  You can see her dress here.  Maybe I should have just used some pliers to close up the hooks a little.

Sweetheart4So to make my Sweetheart Dress into a bubble dress, I used An’s tutorial for reference.  You’ll want to cut your main skirt piece exactly the way the Sweetheart Dress pattern instructs you to.  Then you’ll need to cut a lining skirt piece.

bubblelining2(like my awesome graphic?)

Basically, I cut 2 isosceles trapezoids with the following measurements.  The bottom of the skirt lining was 10 inches less than my main skirt pieces.  So since my main skirt piece was 29″ wide, the base of my skirt lining was 19 inches.  The height was just one inch less than the height of the my main skirt.  The main skirt piece was 15″, so my lining piece was 14″.  The width at the top, is the same as your bodice piece, so use that for reference.  Here’s what my lining pieces looked like:

bubblelining(disclaimer: these measurements worked for me, but I do not guarantee that this formula will work for other sizes.  sorry!)

Once you have your pieces, sew up the dress using Shannon’s directions for the bodice and An’s directions for the bubble skirt.  Pretty easy modification – super cute results!

Sweetheart10I made this dress in size 2T.  It fits wonderfully when on, but the bodice is a bit snug getting her into it.  Because of the design of the dress, I’m not sure how you can open up the bodice any deeper.  Maybe place the heart cutout lower?  Otherwise, it looks great on.

The fabric I used is Nani Iro Pon Pocho.  It is double gauze and I loooooooooove it.  I picked it up during my trip to Japan over the summer.  I still have quite a bit left, so I’m excited to use it again.  Doesn’t it just kinda make the dress?  The only thing that I’m a little baffled by is that after washing and drying the dress, everything just looked flat and smushed (look at the very first and second photos up top – see the difference?)  Is this normal?  Does it have to do with the fabric?  Any way to get it to fluff back up??

ANYWAYS.  This dress is perfect for Valentine’s Day which is coming up SOON.  And not just that, but it’s an adorable party dress, so I’m sure your little one could get plenty of use out of it all through spring and summer.

Sweetheart8If you’re ready to buy the pattern and sew it up right now, head over here to purchase the Sweetheart Dress.

OR if you want to try and win a copy of this pattern for FREE, Shannon is so generously offering the Sweetheart Dress pattern to THREE lucky winners.

TO ENTER: {GIVEAWAY CLOSED – find out if you’re a winner here}

  • Leave a comment on this post.  You can leave a comment about anything, but if want a prompt, how about:  Who do you want to sew this dress for and what kind of fabric will you use?
  • One entry per person.
  • Winner will be picked at random.
  • Open to US and International residents.
  • Giveaway will be open until Sunday, February 10 at 11:59pm PST. Winners will be announced on Monday, February 11.

So go ahead and buy your fabric this weekend, then come back on Monday to see if you’re one of the winners!

Sweetheart9Wheeeee!

This pattern was given to me for this review.  All opinions are my own.
I am an affiliate of Go To Patterns.

A Winter White Project

Hello!  Today I’m over at Kojo Designs sharing a project for their Winter Whites series that they are co-hosting with Delia of Delia Creates.  These ladies also host of one of my favorite series, Color Your Summer, and as a companion, they came up with a series to celebrate wintery whites and neutrals.

featherpillow

photo(25)So check out my tutorial for a Metallic Feather Pillow and how to carve your own stamps and print them on fabric.

Be sure to check out all the Winter White wonderfulness that has been going on at Delia Creates as well 🙂

And my question for you is . . .

featherstampsNow that I have these three hand carved feather stamps, what what WHAT should I do with them next?!  They can be used on fabric or paper.  I can imagine linen napkins, maybe some article of clothing?  Wall art?  What would you want to see these images on?