Geranium in Eyelet

Another Made by Rae pattern is heeeeere!  I cannot tell you how much I love all of the patterns by Rae that I’ve tried so far and this new one is no exception.  It’s called the Geranium Dress and it is an adorable dress pattern for sizes 0-3 mo. to 5T.  I feel like this is a really amazing must-have dress pattern for your collection.

Geranium2

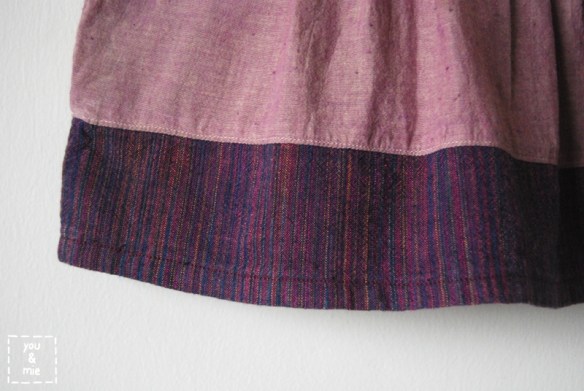
I was lucky enough to be able to test this pattern and decided to use this grayish-lilac eyelet that I’ve had in my stash for awhile from Fabrix (I got it for cheap!).  I lined it with a plum fabric and I love love looove the way it came out!

Geranium1

My favorite part is all the variations that are included in the pattern so you can construct the perfect dress or tunic for your little one.  You can get a little look here at all the options.

There are 3 sleeve options, 3 neckline options, 2 skirt options, 2 length options, and an optional patch pocket.  With this one pattern you can make a million variations!

For my first Geranium, I chose a notched neckline with flutter sleeves, a gathered skirt and in dress length.  It’s my favorite combo right now, but a mini-Washi dress is hard to resist too!

Geranium4

Geranium5

The pattern is of extremely high quality, which is what I’ve come to love about and expect from Rae.  It’s well written with great diagrams and photos and extremely helpful hints.  The dress is a pretty fast and simple sew, and yet it yields gorgeous results, which in my opinion, is really the best kind of pattern.

Geranium3Sewing with eyelet was a fun new challenge for me.  It really wasn’t too difficult at all, but of course, required a few extra steps.  For one, you’ll need more lining fabric than what the pattern calls for since you’ll have to line the entire skirt and I also double lined the bodice.  After cutting out a lining piece for every eyelet piece, I basted them together along the edges and then sewed as directed.  Because of all the stitching on the eyelet material, plus the lining fabric, it can get a bit thick in places, so just be aware of that and take it slow.  One thing I had to do differently was instead of double folding for the hem and skirt seam, I just finished the edges with my serger and sewed it down.  In the end, it was probably easier 🙂

Geranium7

If you’re not yet convinced that you need this pattern, go check out the Geranium Dress Flickr Pool or all the tester versions in this post.  Then head over HERE to buy the pattern.  And hey, you still have 24 hours to whip up that last minute holiday dress, right?!  😉

Speaking of which – are you all done with your holiday sewing?  I’ve gotten a few things checked off my list, but still have a few left to go, some of which will be sewn after Christmas!  Better late than never, right?

Well, I may pop in over the next 2 weeks, buuuuut I might not. 🙂   So until next time, please take care, stay safe and enjoy a beautiful and wonderful holiday season with those you love!

Happy Holidays everyone!

(Faux) Leather Accent Foldover Clutch

Last month, Kristin shared a tutorial for a foldover doily clutch that was so super cute and seemed like the perfect gift for the upcoming holiday season.  Then I saw Vanessa‘s hand stamped foldover clutch with a block of vegan suede which was damn near perfection.  Which made me think of Delia‘s lil leather shoes that she’d make out of thrifted belts and purses.  Basically I just steal other people’s ideas and mix them all together into something a little different, because that’s how I came up with my go to Christmas gift for this year, the . . .

Foldover Clutches1 triangle_clutch1

I basically took Kristin’s tutorial and added faux-leather to the bottom.  For the large triangle clutch, I hand stamped my own fabric.  So there are a bunch of ways you can mix it up, or you can go with the original doily clutch just as it is – regardless, the tutorial is FANTASTIC.  Really simple, very clear and well written and so cute and practical – I highly recommend it.

So I started by going to the thrift store and looking for some cheap purses in great colors and with enough material to cut into rectangles for the bottom of these clutches.  If you are going with faux-leather, you can pick one up for just a couple bucks.

NaniIro Clutch

For this clutch, I busted out some Nani Iro Little Letter Flannel in sage green that I bought from Miss Matatabi because it matched soooo perfectly with this light brown leather I found.  I actually used the zipper from the original purse as well, which is why it matches so perfectly!  And I decided to go a little fun and funky with a tassel zipper pull 😛  The lining is a Japanese double sided gray and white fabric that I used in Yuki’s nursery.  These materials just came together so beautifully and I love the combo so much it really hurt to give this clutch away!  But it’s headed to someone who I know will appreciate it, so that makes me happy.

Anyways, I’m going to give you some tips that I learned about sewing with leather and show you how to remix Kristin’s foldover clutch to make a leather accented clutch.  It’s easy!

Leather sewing tips:
– Look for leather that is not too thick or hard (it’s obviously harder to sew with and your seams won’t press flat)
– Use a denim or leather needle – you’ll need something heavy duty that will hold up sewing two layers of leather
– Lengthen your stitch (so as to not perforate the leather)

Also, when choosing your fabrics, pick something in similar weight to your leather.  If you’re using a thick heavy leather, don’t use a flimsy fabric – it just won’t work.  You can use canvas or duckcloth, or add interfacing to your fabric.  Likewise, if your leather/faux leather material is very thin, a regular cotton will probably be perfect.

Alright, let’s get started!  If you’re using an old purse, carefully cut out the largest panels of material possible.  Also feel free to cut and save any other hardware you might want to keep (zippers, buckles, etc).

Leather3The rectangles of fabric in the original tutorial are 10×12 inches, so you’ll want to cut your leather 10 inches wide.  The height will depend on how large you want your leather block to be (and how much you have).  Be sure to add 1/2 an inch for seam allowance to the height.  Cut 2.

Leather4To figure out the size of your coordinating fabric for the outside of the clutch, you’ll want to take 13 and subtract the height of your leather piece.  That number will be the height and your width will be 10 inches.  The reason for this is that you want your finished piece to be 12 inches and you’ll need 1/2 an inch on each piece for seam allowance.  So for example, if I cut my leather piece at 10 inches by 4.5 inches, my fabric will need to be 10 inches by 8.5 inches (because 4.5 + 8.5 = 13).

Leather5Cut your lining fabric according to the tutorial directions.  You should have 2 of everything.

Sew your leather to your outer fabric by placing them right sides together, holding them in place with paper clips or binder clips (you don’t want to/won’t be able to pin the leather).  Sew them together with a 1/2 inch seam allowance.

Leather6

Press your seam flat (but be careful pressing the leather – use a low heat and test it out on a scrap piece of leather first).

Leather7

From here you can follow the original tutorial exactly!  The only part that is a little different is when you are sewing the front and back together, you’ll have to take some extra steps  switching your needle and thread colors.  I like to sew the leather first and then the regular fabric.  If your leather is pretty thick, you may want to round your bottom corners instead of trying to make them square.

Leather8Be sure to clip your corners.

Leather9And that’s it.  Kristin’s tutorial will walk you through the rest!

Maya Clutch

triangle_clutch2

The hand stamped version required an extra few steps, but was totally worth it.  I carved a simple triangle shape and used fabric paint to make a fun pattern on canvas.

trianglestamp(testing on paper)

trianglestamp2Once it’s dried and set, you can cut and assemble as instructed above!

triangle_clutch5

I had so much fun sewing these up these last couple of weeks and even more fun watching friends receive them.  It’s been a big hit, so if you’re looking for a last minute gift to sew up for someone stylish and special, definitely go check out Kristin’s foldover clutch tutorial.  You won’t regret it!

So are you still working on some last minute gifts or other holiday projects or are you all done?  Truth is, I’m so behind that I know I’ll be working past Christmas.  Better late than never right? 😛

Guest Post: Flashback Friday

So now that I’m back to blogging, the first thing I wanted to share with you was that I was a guest over at Sew Much Ado last Friday for her super fun series, Flashback Friday!

In this series, Abby invites guests to take a look back and share stories from their past either about how they started sewing, maybe a cherished family heirloom, relative who inspired them to sew, or even an epic sewing fail from the past.

So if you want to hear my story, see a pictures of Princess Cherie or my high school prom pic, plus some of my first few dresses I made for Yuki, go on over to Sew Much Ado.  I personally love reading these posts and can’t wait to hear more stories from my favorite bloggers in weeks to come.

Later this week I hope to share some handmade gifts and a dress that’d be perfect for the holidays, if you’re still looking for some last minute sewing inspiration 🙂

Personal Thoughts

*My sincere apologies for my earlier typo with the name of the school.  My oversight is embarrassing, but my message remains the same.*

I’m assuming you’ve all heard about the horrific shooting at Sandy Hook Elementary School in Connecticut that took place last Friday morning.  I am still struggling to process all of my emotions around the incident and really don’t have the adequate words to express my thoughts.  As a mother and an educator, this tragedy hits very close to home and I feel like anything I say is an understatement:  I am heart broken.  I am confused.  I am afraid.  I am angry.  I can’t even imagine the pain and hurt the families of the victims are experiencing.  Multiplied by a million.  I feel like we haven’t been hit by something this hard in a very very long time.

I’m sure you’ve read a hundred reports about and reactions to the incident, much more eloquent than mine, so I’m not going to say much more than this:  As we send our most loving and uplifting thoughts to all of the people of the Newtown community who are suffering the loss of loved ones, I truly truly hope that we, as a nation, can move forward from here – not just move past this – but forward, in a positive direction.  I’m sure we all agree that we can’t let this sort of thing continue to happen – something needs to change.  We may all have different ideas for how to make these changes, but as long as we are talking about it and not ignoring it, and making sure our government hears us, I think we can start to move forward, towards some real change at an institutional level.  So during this healing time, as we come together as a country to mourn those lost and uplift a community in need, I hope we can spark some brave conversations about what we can do to create a healthier and safer world for everyone.

Thank you for allowing me to release some personal thoughts that have been swirling around in my head and my heart for the last few days.  I felt like I couldn’t go on blogging as usual without acknowledging both this tragedy and my struggle with it in some small way.  So besides remembering to appreciate life every single day, even in all of it’s messiness, I plan to resume regular blogging this week in the spirit of moving forward.  It’s important for us to continue living life and enjoying the little things and as a sewist and blogger who celebrates children and parenting regularly here on the blog, I hope that I can continue sharing small things to brighten your day.  My friend, Kristin, said it so well that “what follows on this blog will be posted in an attempt to raise spirits, share joy, bring smiles, and give peace.  as always.”

With love . . .

Peppermint Bark

So here’s another holiday post from last year, an easy treat to whip up for all those teachers, co-workers, neighbors, friends and family in your life.  It’s super simple and super yummy.  I apologize for the icky photos though.  😛

I used to get really excited about baking for the holidays. I would try and make 3-4 different kinds of cookies and bring them to work and give them away as gifts. But since time is scarce these days, I’ve let go of my ambitious baking goals and I just made one treat.  While this recipe is pretty simple, I should add that the total time it takes to make is quite long, but only because of the chill time required for each layer.  I like it because I can work on other projects (or cleaning the mess) while the chocolate is chilling.

Anyways, here’s what you’ll need to make some delicious peppermint bark:

White chocolate (2 bags), dark chocolate (1 bag), candy canes, heavy cream, peppermint extract.

1. Break candy canes into small pieces (I used the bottom of a glass bottle).

2. Line a baking sheet or glass dish with foil or parchment paper (I used a 9×13 dish, but I wish I had used something larger so the layers were thinner).

3. Melt one bag of white chocolate chips using the double boiler technique.

4. Spread half of the white chocolate onto the lined pan and sprinkle with some of the candy cane pieces. Refrigerate for about 15 minutes.

5. Melt dark chocolate in a pot with 6 tablespoons of heavy cream and a teaspoon of peppermint extract.

6. Spread all of the dark chocolate over the first layer and sprinkle with some candy cane pieces. Refrigerate for 30 minutes (this layer took awhile to harden).

7. Melt the second bag of white chocolate chips and spread over the last layer. Sprinkle more candy cane pieces on top and refrigerate again for 30-45 minutes.

8. Make sure the bark is thoroughly chilled and hardened before cutting. The first time I tried to cut mine, the dark chocolate layer was still a little soft, so the bark started coming apart in pieces. I threw it back in the refrigerator for awhile and the second time it cut much better. Remove bark from pan and foil and cut into small pieces.

9. Enjoy!! These taste best when they are fresh, so give them away/devour them immediately (don’t worry, it won’t be difficult).

As if the bark wasn’t enough of a treat, I made myself a little peppermint hot cocoa with leftover stuff to reward myself for all my hard work.

After cutting apart all that bark, I was left with lots of chocolate and peppermint shavings and pieces on my cutting board. I also didn’t use all the candy cane that I had crushed, so I had a stroke of genius!

I swear, this hot cocoa was so rich and creamy, it was like something from Starbucks, but even better!

I just threw some of the bark shavings into the bottom of the cup with the hot cocoa powder and added hot water. Make sure to stir it well so the chocolate and candy pieces melt. I rolled a marshmallow in the candy cane pieces and threw it on top! If I hadn’t been so tired, I could have whipped up some of that leftover whipping cream too, but that would have been tooooo indulgent 😉

I know that making hot cocoa mixes is a popular gift idea around the winter time and if you pretty this up a little, it could be a great variation!

Any holiday baking for you?

Here’s to a delicious holiday season!!

Washi Washi Washi Giveaway WINNER!

Winner winner chicken dinner!  We have a giveaway winner.  Is it you?  The answer is below.

But first of all, I just wanted to thank all of you for entering the giveaway.  It was my first ever and I know that I have Sew, Mama, Sew to thank for all of the traffic, but it was really fun and I hope to do more of them in the future!  I REALLY enjoyed reading what everyone is looking forward to.  I thought it was a random and simple question to put out there, but I found that reading all of your responses made me realize just how much I was looking forward to this holiday season too!

So without further ado, the winner of the Washi Washi Washi Gift Set (as determined by the Random Number Generator) is . . . Picture 14

WashiTrioWinnerBETH!  Who said, “this is the first year we have a “real” electric train going around the tree, and I am looking forward to watching the little guy play with it!”

Beth, I’ve sent you an email, so please get back to me so I can send you your prize!

To the rest of you, I’m really sorry I can’t give you all a prize – I know you probably all deserve it.  But like I said, I hope to do more giveaways in the near future, so come back and try again next time!

Thanks for stopping by, whether you’re a regular or a first timer – I appreciate you all.  Have a great weekend!

Maggie Mae Tunic and a GIVEAWAY!

I’m really excited to be the next stop on the Very Go To Christmas pattern tour!  Go To Patterns really is the place to go if you’re looking for fun and classic patterns.  They carry patterns for everything from clothing and gift bags to quilts and stuffed animals from a variety of great designers.  Andrea is the mastermind behind the pattern shop and the blog, The Train to Crazy, and she’s created a really amazing collection of must-have patterns.  It’s definitely worth checking out.

maggiemae1I chose the Maggie Mae Tunic by Shwin & Shwin to review because it’s been on my to do list for a very long time.  I actually purchased this pattern before KCWC in the fall, but never got around to making it until now.  I wish I hadn’t waited though because I. Love. This. Tunic. maggiemae5I just think it’s adorable and I’ve thought so since I first saw the pattern come out.  I love the colorblocking, the curved pieced bodice, the little cap sleeves, the pleats – I love how stylish it is, but still so appropriate for kids (Shwin & Shwin has a knack for designing kids patterns that balance style and practicality). And it really can be made for any occasion – from casual playwear to special occasion – depending on the fabric you choose.  I used this gorgeous Kaffe Fasset woven ikat and shot cotton that I picked up at Stonemountain & Daughter in Berkeley. sneakpeek maggiemae3 The Maggie Mae can be made as a tunic or a dress (the version I made is the tunic) and comes with inseam pockets and buttons in the back. maggiemae4 This project is a good intermediate beginner pattern.  The construction is fairly simple even with the curved bodice piecing.  You’ll have to do some pleating and of course buttonholes, but if are comfortable with those things, you can sew one of these up in a snap. Despite that, this project was a little bit of a nightmare for me to sew up (at no fault of the pattern – purely my own stupidity).  I just wanted to share the story with you so you know that I have really bad sewing days too.  Because this pattern is pretty simple, I was excited to get it done quickly.  Well I was finishing an edge with my serger, which I’m still learning how to use, when a corner of the bodice was gobbled up into the serger with the slicing blade on, so SNIP!  Off goes a small corner of the bodice. 😦 Then, it literally took me forever to get my pleats looking good – centered, evenly sized and spaced.  Unfortunately, there are no pleat markings on the pattern, so you have to figure it out yourself and I don’t know why it took me so long – but I must have pleated, pinned, basted and torn them out 5 times before I got it just right. When I was just about done, I accidentally hemmed the tunic up in a thread that stood out a lot more than I expected and I didn’t like it.  As I was tearing the hem out with a seam ripper to do over, I tore a small hole in the front of the dress at the hem line.  WTF – is this project trying to kill me!?  Have you ever had a project like that?  Where everything goes wrong?  And to top it all off, I had meant to make this a dress and didn’t realize until I put it on my daughter and her booty was hanging out the bottom that I had used the tunic measurements instead!!!  Haha, seriously, I was having issues that day.  BUT, despite all that, I still looooooove the way it came out.  So all of that to say, even if you’re a complete knuckle head like me, you can still make this adorable top/dress (just make sure you’re reading the appropriate measurements off the chart depending on whether you want to make a skirt or a tunic). maggiemae6 I made the size 2T for my 2 year old and it fits her pretty well.  The only thing that I would change if I make it again (and I’m sure I will), is to lengthen the top bodice piece just a little bit to make the armhole a little roomier.  It fits her just perfectly, if not a little snug there.  Otherwise, the sizing seemed just right. maggiemae2 I love that there are sooooooo many possibilities with this dress depending on what coordinating fabrics you choose.  I’m already dreaming up combinations for the next one.  What colors/prints would you choose? Well lucky for you, you have a chance to win an amazing giveaway prize and trust me, you’re gonna want to win this. {CLOSED}

Enter to win a shopping spree at GoToPatterns.com and Sew Fine Fabric!

Go To Patterns PDF sewing patterns 

THREE WINNERS!

Go To Patterns sewing pattern giveaway

Click here to enter the giveaway via Rafflecopter!

Go check out the rest of the Very Go To Christmas posts here:

Handmade Therapy Nov. 29th a pretty cool life. Nov 29th Sew Much Ado Nov. 30th Simple Simon and Co Dec. 1st One Little Minute Dec. 1st The Cottage Home Dec. 2nd Sew country chick Dec. 2nd Nap Time Crafters Dec. 3rd A Little Gray Dec. 3rd skirt as top Dec. 4th you & mie Dec. 5th Boy, Oh Boy, Oh Boy! Dec. 5th Me Sew crazy Dec. 6th see kate sew Dec. 6th Delia Creates Dec. 7th

And what Yuki photoshoot could be complete without one of these pics!?

maggiemae_peek2

Haha – I love this kid.  I hope you’re all enjoying getting ready for the holidays.  Please go check out Go To Patterns – I’m pretty sure you’ll find so many things you love.  And be sure to enter the Washi Giveaway here (ends Friday, December 7th at 5pm PST).

Thanks, as always, for stopping by and I hope you’re all having a great week 🙂

Washi, Washi, Washi GIVEAWAY! {closed}

(This giveaway is now closed)

WashiTrioGiveaway

It’s Giveaway Day on Sew, Mama, Sew! What better opportunity for me to host my first giveaway ever! I’m really excited to share this little package I’ve put together for one lucky reader. It’s a Washi Trio Set of some goodies I’ve been hoarding 🙂

First up is good ol’ washi tape:
WashiTape6 rolls of washi tape that I picked up from Japan this summer. 3 rolls are Lotta Jansdotter!

Next in the package is this AWWWWWESOME washi stamp:
WashiStampSeriously – how cool is this? (Don’t worry, I didn’t use the giveaway stamp – I bought one for myself too :)) I picked this stamp up in Japan also, and the image is like a piece of polka dot washi tape. La-la-loooove!

And what Washi set would be complete without some Washi fabric?
WashiFabricThis Washi fabric by Rashida Coleman Hale in charcoal is gooooorgeous and also discontinued, so it’s getting harder and harder to find! Here’s a 1/2 yard for your stash – perfect for any small project.

That’s it – Washi, Washi, Washi for one of you!

WashiTrioGiveaway2

TO ENTER: (CLOSED)

  • Leave a comment on this post telling me what you are most looking forward to this holiday season (it can be anything!). One entry per person. Please leave your email address so I can contact you if you’re the winner!
  • Winner will be picked at random.
  • Open to US and International residents.
  • Giveaway will be open until Friday, December 7 at 5pm PST. Winner will be announced on Sunday, December 9.

https://i0.wp.com/www.sewmamasew.com/blog2/miscimages/giveawayday2012.jpg

And be sure to head over to Sew, Mama, Sew to check out all the other fantastic giveaways going on!

As always, I appreciate you stopping by. If this is your first time here, take a look around and maybe you’ll see something you like 😉 Have fun and good luck!

A Very Go To Christmas (Pattern Tour)

Andrea, of The Train to Crazy and the Go To Pattern Shop, is hosting a blog tour of some of the fantastic Go To patterns available in her shop this week and I get to be a part of it!  These patterns come from amazing designers and are really great staples to have in your pattern collection.  The tour started on Thursday and will continue every day through next Friday so be sure to follow along to check out these awesome patterns perfect for sewing up some holiday outfits and gifts.  Not to mention a FANTASTIC giveaway!

http://thetraintocrazy.typepad.com/.a/6a00e55379bee88833017d3e53dd9b970c-800wi

Here’s the line up!

Handmade Therapy Nov. 29th
a pretty cool life. Nov 29th
Sew Much Ado Nov. 30th
Simple Simon and Co Dec. 1st
One Little Minute
Dec. 1st
The Cottage Home Dec. 2nd
Sew country chick Dec. 2nd
Nap Time Crafters Dec. 3rd
A Little Gray Dec. 3rd
skirt as top Dec. 4th
you & mie Dec. 5th
Boy, Oh Boy, Oh Boy! Dec. 5th
Me Sew crazy Dec. 6th
see kate sew Dec. 6th
Delia Creates Dec. 7th

The tour has already started so you can check out the first 5 blogs to see their Go To creations AND get in on the giveaway action 🙂

In related news, I’ve recently signed on as a Go To Patterns affiliate, which means that if you click on any of the links I have to the Go To Pattern shop AND make a purchase, I will receive a small commission.  I have used several of the patterns in the shop myself and have had great experiences with them.  I also adore and trust Andrea, who runs the shop, and I know that she has high standards of quality and great taste, which is why I am excited to be promoting Go To Patterns.  Take a look at some of the stuff they have to offer (you can click on any of the links I’ve provided here or the new button in the sidebar of my homepage under “Affiliate Links”) – you won’t be disappointed!

http://thetraintocrazy.typepad.com/.a/6a00e55379bee88833017d3e42715a970c-800wi

And be sure to stop back in on Wednesday, when I’ll be sharing my version of the Maggie Mae Tunic by Shwin & Shwin.  Here’s a sneak peek . . .

sneakpeek

Haha, I’m such a tease!  Have a great weekend!

Knock it off!

Have you been following along the awesome Knock It Off series hosted by Heidi of Elegance & Elephants?  She’s got a whole month’s worth of guests sharing tutorials for great knock off projects inspired by store bought clothes and accessories.  Who doesn’t love a good knock off?  As people who sew clothes, we are constantly looking at items online, in the store and on people on the street thinking, “I bet I could make that” and figuring out exactly how to recreate the look for less money.

Well today I’m over at Elegance & Elephants sharing a tutorial for a quilted jacket inspired by this Mini Boden jacket.  And I’m reeeeally excited about this project!

I love it because it’s practical but super cute and once you learn how to construct the jacket, you can change it up and infuse your own style (something that store bought items often lack).  The pattern itself is unisex and it’s reversible!!  Whaaat!?  I know, it’s crazy.

So pop on over to Elegance & Elephants to see the full tutorial.  While you’re over there check out the rest of the knock off projects – they are fantastic!  And if you use this tutorial (or any you & mie tutorial), remember to add your photos to the flickr group because I really love seeing your creations!

Oh and quick shout out and thank you to Kristin who helped me pick this project out of the millions of knock off ideas I had floating in my mind.  She rocks.