Colour Pop Top Knock-off {tutorial}

ColourPopTop2

Knock if Off is a series hosted by the fabulous Heidi of Elegance & Elephants and is one of my favorites.  Knock offs are awesome – we all do it – see something at the store and think, “I can make that!”  That’s why so many of us sew in the first place!  The series is already going strong, and you can check out projects from the last 2 weeks here!

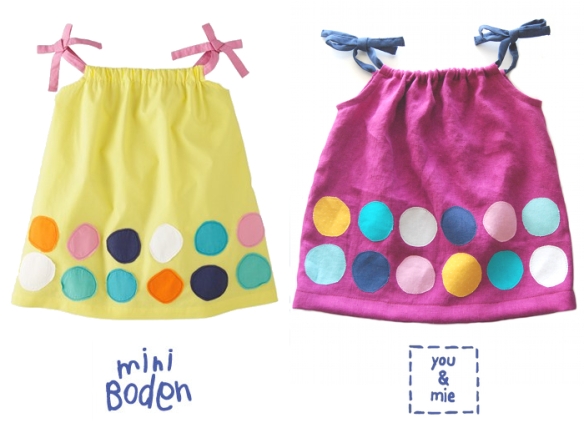
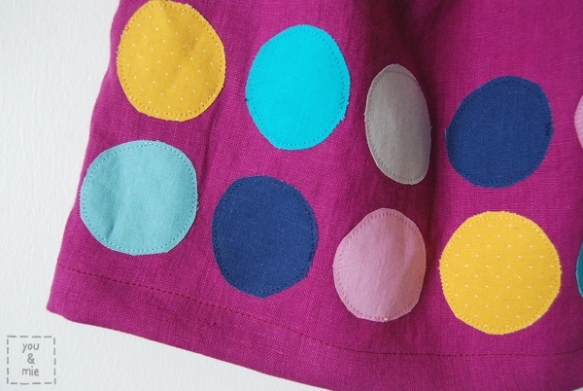
For my project, I recreated this Applique Colour Pop Top from Mini Boden.

ColourPopTop1

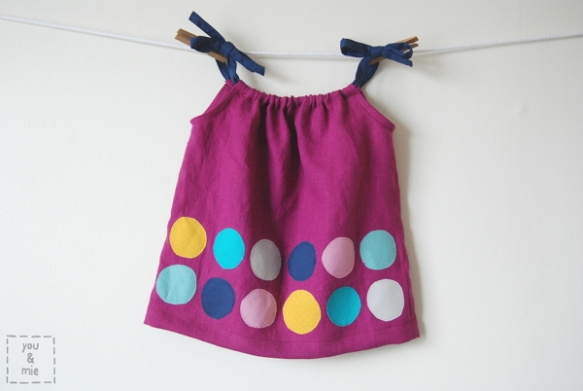
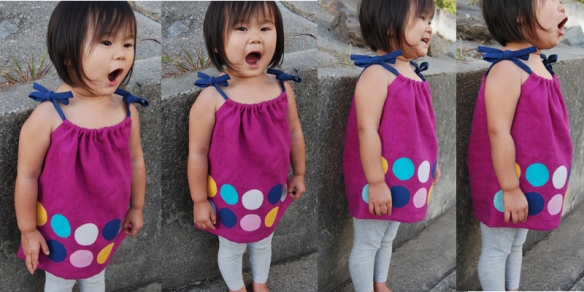
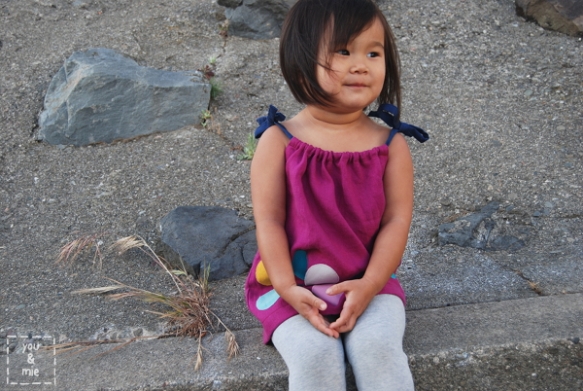
It’s a perfect top for summer and really simple to make.  Plus you can customize it with whatever applique you want!  It doesn’t take much fabric and is great for showcasing scraps of cute fabric.  I actually think this is the perfect project to make from an old t-shirt if you have one laying around, and that makes the project even simpler!  Anyways, versatile top, simple to sew, and great for the upcoming summer months – makes a perfect top to knock off!

ColourPopTop19

ColourPopTop22

Fun right?  I’m going to show you how to make your own!

Here’s what you’ll need:

  • Fabric (I think anything light to medium weight is fine – linen, cotton, knits, etc. and amount will depend on what size you’re making, but for most kids, 1/2 yard will be plenty).
  • Scraps of fabric for applique
  • Strips of fabric for shoulder ties, or store bought bias tape if you’re looking to skip some steps 🙂
  • Paper backed (double sided) fusible web (I use Pellon 805 Wonder-Under)
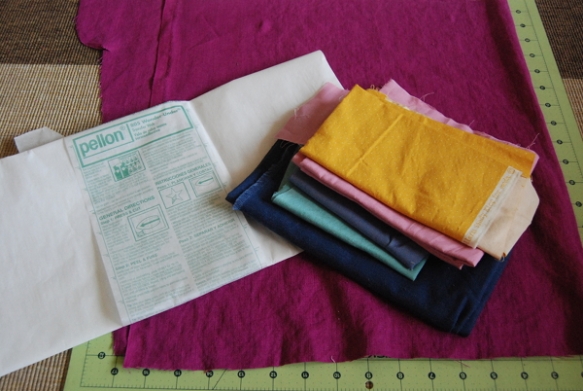
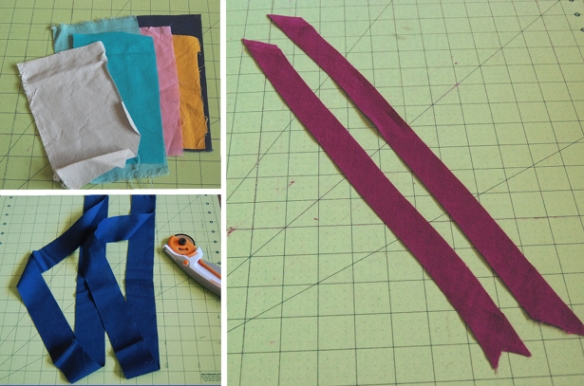
ColourPopTop3I’m still trying to work through my stash and not buy new fabric, so I dug through stash for all the solid cottons I could find.  Ended up using some leftover linen from this coat and a bunch of scraps from various projects.  The yellow fabric is actually polka dotted because I couldn’t find any solid yellow 🙂

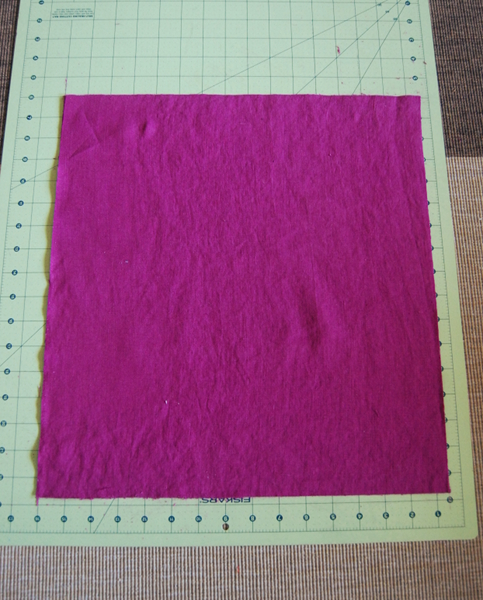
To cut your main fabric, find a top that fits your kid well – a loose fit tunic is probably best.  Measure the width of the bottom.  Add one inch for seam allowance and that will be the width of your fabric.
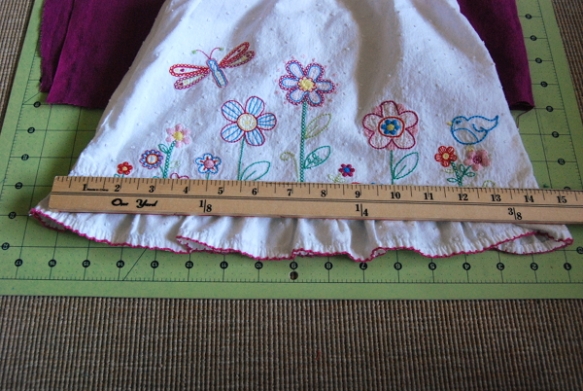
ColourPopTop4For the length of the fabric, I used the same tunic to measure the general length.  The top of your fabric will be folded over twice to create a casing, so add that to your measurement and know that this will hit at the top of the chest (not shoulders).  Also remember to add about 1.5 inches for hemming the bottom.  You need two of these rectangles – one for the front and one for the back.

ColourPopTop5

Fold one of the pieces in half lengthwise to cut out the armholes.  I just eyeballed this, but draw and cut a curve in the top corner (not on the fold).  The top inch and a half will become the casing, so this should be a straight line down before it curves.
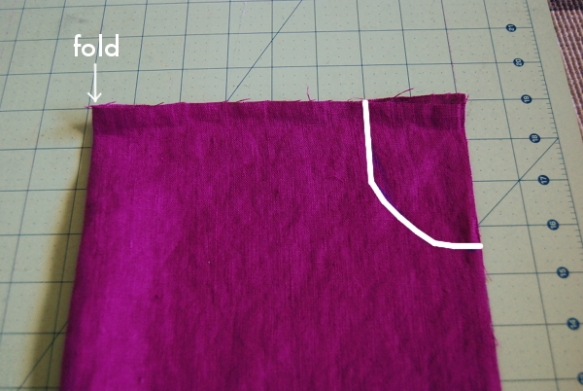
ColourPopTop6When you open up your piece, it should look like this.
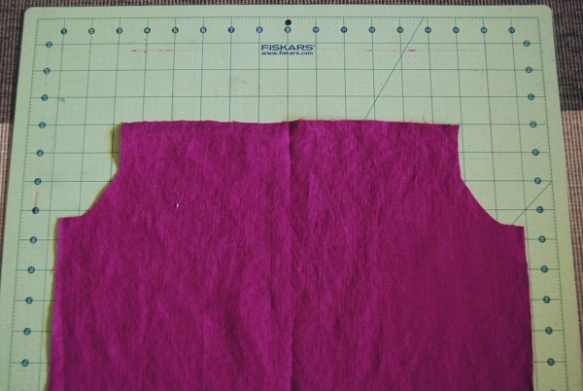
ColourPopTop7For simplicity sake, I decided to make the front and back of the shirt the exact same, so using the cut piece, trace the same curve on the 2nd rectangle.

You will also need to cut two strips of fabric on the bias for finishing your armholes.  I cut my strips at 1 inch by about 12 inches or so (and had a lot extra).  You’ll need your scraps of fabric for the applique.  I had 6 colors and 2 circles of each and my circles were about 2-2.5 inches, so I cut little rectangles that would fit two circles on them.  You’ll also need fabric for straps.  If you’re using pre-made bias tape, you can skip this step, otherwise, cut 2 strips of fabric that are 2 inches wide and 30ish inches long (does not need to be on the bias).  Again, mine ended up being longer than necessary, but you can always trim them later.

ColourPopTop8

Now let’s get started with the applique!  Be sure to follow the directions for your particular fusible web.  Cut your fusible web into rectangles slightly smaller than your fabric scraps.  With the Pellon Wonder-Under, there is a papery side and a rough/web side.  The rough side will be ironed down to the wrong side of your fabric.  Repeat with all the fabric scraps.
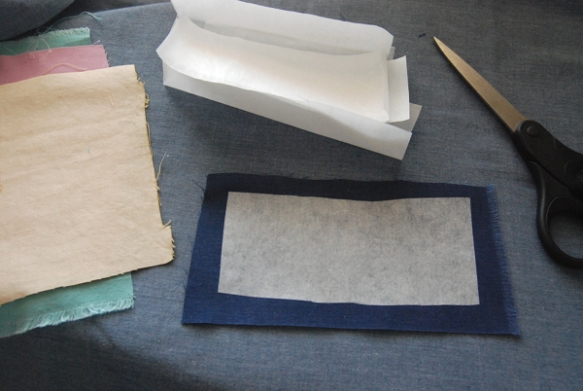
ColourPopTop9You can easily draw on the papery surface of the fusible web, so sketch your shape out (or just start cutting if you’re feeling daring!)
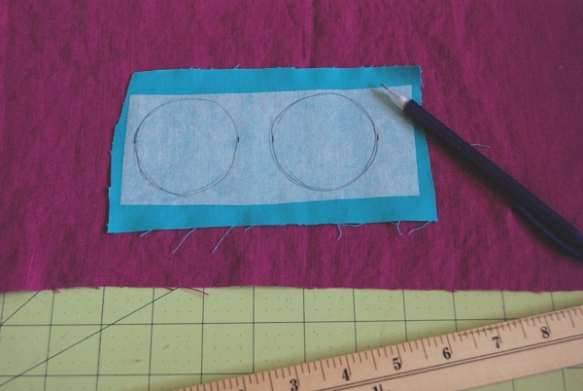
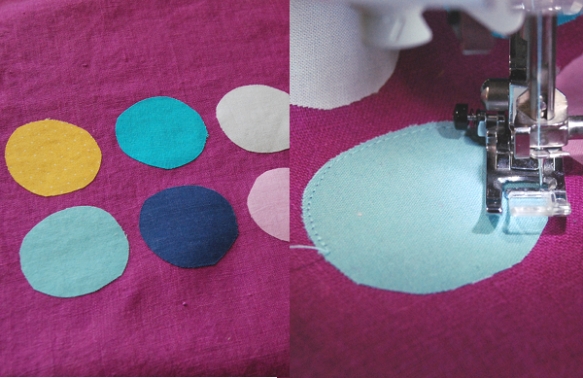
ColourPopTop10Cut out your circles and play around with placement on your fabric.  Be sure to leave 1/2 an inch on either side for seam allowance, plus room to hem the bottom as well.

ColourPopTop11Once you’ve got it just the way you want it, carefully peel off the paper backing and adhere the circles to your main fabric with your iron.  Be sure to read the directions of your fusible web first!  Wonder-Under requires a damp cloth between the applique and the iron.  Once you’ve got all your circles fused on, top stitch around the edge of the circle with coordinating thread.  Take your time, rounded edges are always tricky – but if they aren’t perfect, no worries!  It just adds character! 🙂
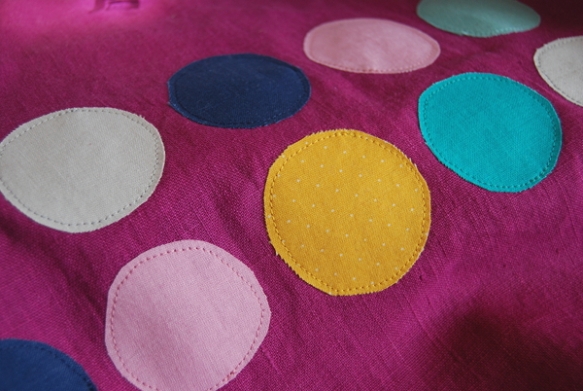
ColourPopTop12Repeat with all the circles.

ColourPopTop13Fun!  Now we need to construct the top.  Lay the front and back pieces with right sides together and pin the side.  Sew up the side seams with a 1/2 inch seam allowance.  Finish the raw edges with a serger, zig zag stitch or pinking shears, if desired.

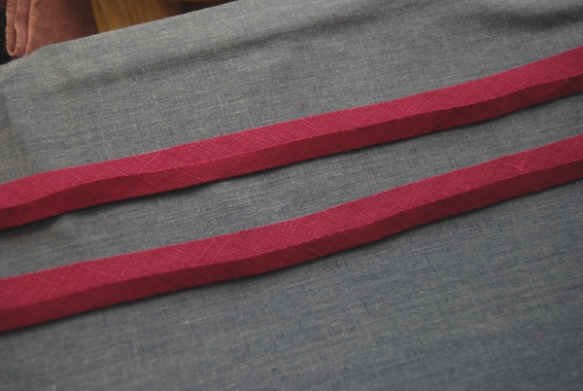
ColourPopTop14Press the seam open.  To finish the armholes, take your bias strips and press one edge in about 3/8 inch towards the wrong side.  Repeat with the other strip.

ColourPopTop15

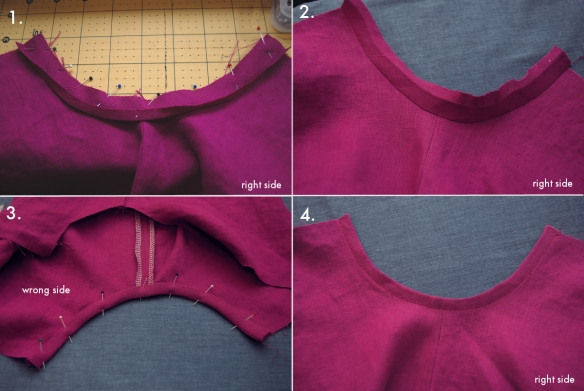
To finish the armholes (click on the picture below for a larger view):
1. Pin the bias tape along the edge of the armhole (right sides together).  Raw edges should be aligned (not the folded edge).
2. Sew along the edge of the armhole with a 1/4 inch seam allowance and then press the bias tape up.
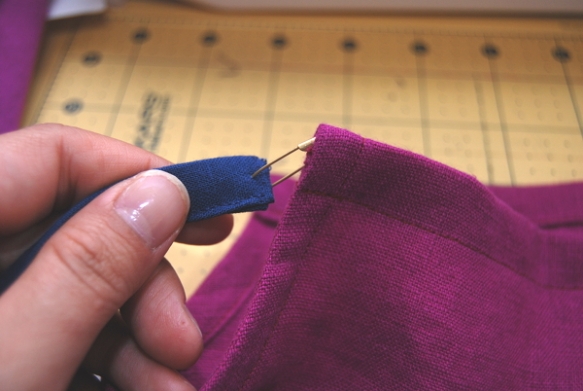
3. Flip to the wrong side and fold the bias tape twice, once along the previously pressed crease and then again to encase the raw edge.  Pin and sew along the edge of the bias tape fold.
4. Trim an excess bias tape, press flat and you should have a beautifully finished armhole! Repeat with the other side.
ColourPopTop16Once you have your armholes finished, we can finish the front and back neckline.  Fold the front edge down about 3/4 inch towards the wrong side and press.  Fold down another 3/4 inch, press and pin.  Sew along the edge to create a casing (leave the two ends open).
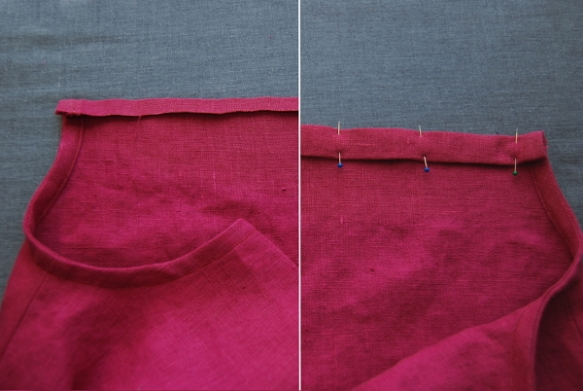
ColourPopTop17Repeat with the back.  To create your ties, fold your strips lengthwise, wrong sides together and press.  Fold the two edges in towards the center fold (folding your strip into fourths) and press.  For the ends, unfold the strip and tuck the end in about half an inch.  Fold it back up so you’ve got a nice clean end.  Then top stitch around all open edges.  If you’re using pre-made bias tape, you can just skip right to the top stitching step.
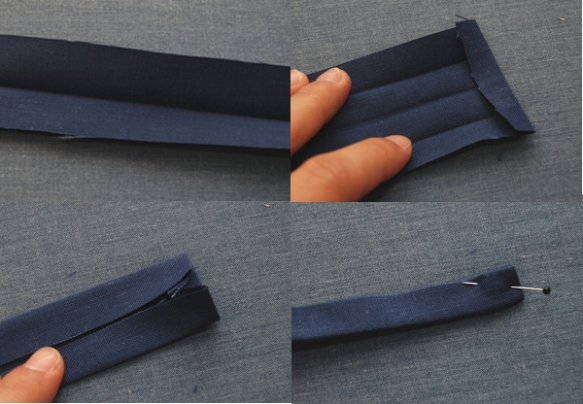
ColourPopTop18I went ahead and eyeballed the tie length, but ended up shortening them after I put them in the top.  So, if you want to top stitch everything but the last few inches, you can finish that part after you’ve measured out the exact length that you want.

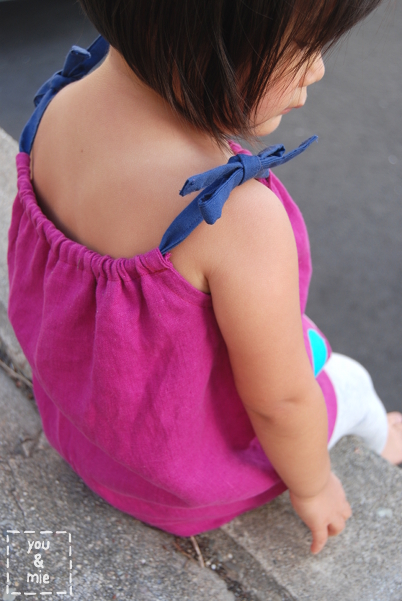
Using a safety pin, thread one tie through the casing on the front of the top, and the other tie through the back casing.  Tie them (and trim and finish edges if necessary).

ColourPopTop 25

Then hem the bottom to the desired length by folding and pressing the bottom edge twice towards the wrong side and stitching close to the folded edge.

Done!

ColourPopTop19

ColourPopTop20

Now you know how to make a simple and fun summer top!  And think of all the endless applique possibilities!

If you make a top using this tutorial, please add it to the you & mie flickr group!  I LOVE seeing your creations!

OR if you’ve made your own knock off project, be sure to add it to the Knock It Off Flickr Group.  And don’t miss out on the rest of the series over on Elegance and Elephants!

So before I go, I couldn’t not share how goofy my kid is, but for some strange reason during this photo shoot, Yuki decided to sing “Doe A Deer” from the Sound of Music at the top of her lungs on repeat.  Oh how I wish these photos captured sound . . .

ColourPopTop23I love her . . .

ColourPopTop 24Have a wonderful weekend everyone!

Tutorial: Braided Beach Maxi

Here’s another summer addition for your wardrobe and you can make one for your little one too!  This was for Melly’s Sews’ 30 Days of Sundresses series.

________________________________________________________________

Children’s clothing is kinda my thing, so I naturally started brainstorming lots of cute summer frocks for little ones.  But for some reason I landed on an idea for a women’s sundress and I couldn’t get it out of my mind!  So, enter my beautiful little sister who is modeling for you the Braided Beach Maxi Dress!

The best thing about this is that it is super simple with very little sewing!  It’s made of knit and has a few unfinished edges which makes it very casual and perfect for a bathing suit cover-up.  I got this knit for $2.39 a yard, so it was very affordable too!

And just in case you were really hoping for something for your little one, don’t fret!

Yup, I couldn’t resist.  After the first one, whipping up a mini version was a breeze!  The tutorial is for the adult maxi version, but you can alter this to fit just about anyone!

So here’s what you’ll need:
– 2.5-3 yards of knit fabric
– 1/4 or 1/2 inch wide elastic for the waist
Sewing essentials

I used a plain white knit to make the dresses and then dyed them afterwards.  This tutorial will not include instructions for dyeing, but if you’re interested I’m sure there are tons of resources online.  Otherwise, use any solid or patterned knit fabric and you’ll be done even faster 🙂

To make your front pattern piece, grab a knit (stretchy) camisole, fold it in half down the front and trace the neckline and armhole.  From the armpit, draw the side of your pattern into an A-line shape.  You want the dress to fit nicely around the chest and then widen from there.  I only drew the top part of the pattern, but keep in mind that the dress will extend far past the bottom of this pattern.

To draw the back pattern piece, lay your front piece down on paper and trace it from the armpit (tiny yellow star) down the side and across the bottom.  Trace along the other side (marked “fold”) stopping about 2 inches from the top of the pattern.  Remove the top pattern piece and draw a curved line to connect the sides.

Now, if I were to make this dress over again, I’d want the braided straps to be thicker, so I’d make this next measurement bigger.  But for the sake of this tutorial, I’ll just describe it the way I did it and you can make adjustments accordingly.

Measure 1.5 inches in from the “fold” line of your pattern and make a mark.

Extend both the “fold” line and the mark that is 1.5 inches in a few inches.  This is going to become the braided racerback and straps.

Your pattern pieces should look like this when cut out.  Keep in mind that when you cut your fabric, it will extend past the bottom edges of the pattern and for the back piece, the strip coming off the top will also be much longer (see the red arrows).  I made my patterns like this to save paper, but don’t cut your fabric like this or you’ll have something very very different!

To cut the front piece of the dress, fold your fabric in half lengthwise.  Measure the desired length of the dress from just below your armpit and add a few inches.  Place your pattern on your fabric accordingly.  From the bottom of the pattern to the bottom of the fabric I just cut in a subtle curve getting wider and wider towards the bottom (I tend to “just wing it” A LOT.  Thank goodness knit is so forgiving!).

To cut your back piece, fold your fabric in half lengthwise and place your front piece on top.  Now you can’t see it in this picture, but my fabric extends for another yard above.  THIS IS VERY IMPORTANT!  You’ll need all that extra fabric above the pattern piece to cut your strap material.

Now trace the entire side of the dress from the bottom up to the armpit (red line).

Remove the front dress piece and place your back pattern piece lining up
with the armpit.  (You like how many times I’ve had to use the word
armpit in the tutorial??  I probably should have said “bottom of the
armhole” or something.  Ooops, oh well).

Trace the pattern along the curved edge and up the straight line, then use a ruler to extend the line all the way to the edge of your fabric, keeping it 1.5 inches from the folded edge the whole way.  I had a little less than a yard, but I wish I had had more.  The longer you have, the more you can do with the straps later.

The hard part is over!  Now it’s the fun part 🙂

Open up your front and back pieces and place them right sides together lined up at the armpits.  Pin along the side of the dresses and sew.

Now find where the smallest part of your waist it (you may need to hold the dress up to your body or try it on) and mark a line 2 inches below that on both sides of the dress (wrong side is still out).

Cut your elastic to your waist measurement.  Overlap the ends of the elastic by 1/2 an inch and sew them together to create a loop.

Slide the dress through the elastic loop and pin the elastic to the dress on the sides.  The dress will be wider than the dress, so you’ll have the pull the elastic as you so.  Go slowly and make sure the elastic right on top of the line that you drew.

Right side out:

Now take the long strip of fabric coming out of the back of the dress and cut it into three even strips.  Mine was originally 3 inches wide, so I cut it into three 1″ wide strips.  Braid the strips for about 2.5 inches.

Then, cut those strips in half, so you now have 6 strips.  Take three strips and braid them all the way to the end, then tie a knot to secure the braid.  Make another braid with the other three strips and you should have a nice braided Y like below.

Flip the dress over to the front and making sure the straps are not twisted, pin them to the front of the dress.  Sew the strap to the front of the dress.  Go back and forth a few times to make sure they are secured firmly to the dress.

This is optional, but since my knit was so stretchy, I decided to bring the neckline in a bit with some gathers.  Using your longest straight stitch, sew along the edge of the neckline without back stitching at either end.  Pull one of the threads to gather the fabric for a few inches in the middle.

Pin your excess braids along the neckline of the dress and do a quick whipstitch to attach it.  Make sure to catch only the back of the braid so the stitching does not show in the front.  For the adult version, I brought the braids to the center and overlapped them.

For the kid version, I had more braid to work with so I brought one side all the way to the other and tied a bow.  I’m sure there are many options for what you can do with the neckline here!

Now just trim the bottom to the desired length.  I left the bottom unfinished, but you can hem it if you want.  The armhole/back of the dress is also an unfinished raw edge.  I like the casual look (and the fact that it requires less work).  But if you want a more finished look, you can attach bias tape from the front along the armhole and then work the extra fabric into the braid.

You’re done!!!  Now throw this baby on and go frolic in the waves!

I really hope you guys give this a try!  Doesn’t it look fun?  If you do make a Braided Beach Maxi Dress, please add it to the you & mie flickr pool so I can see your awesome creations!

Before I go, I just wanted to say a big thank you to my sister for being my lovely model!

Take it easy, everyone!  Happy summer and happy sewing!

Guest Post for Sum Sum Summertime!

Another summery post for you, today at this heArt of mine.  Amy is hosting a fun summer series with everything from food and fashion to gift ideas and artwork.

I’m sharing a really simple and fast summery accessory.  It’s a rectangle vest with a twist!

It can be worn as a vest, a wrap, a bathing suit cover-up, etc. – it’s quite versatile!

So hop on over to this heArt of mine for the short and sweet tutorial.

(Told you we’d be doing a bit of blog hopping this month.  Hope you stick with me through all the traveling :))

Vintage Inspired Plaid Summer Tank

I barely had any time to work on a signature look for Project Run & Play this week, but I wanted to submit something.  So I made this top that was inspired by the Vintage May series that Skirt as Top and Craftiness is not Optional is hosting.  I’m not sure what decade this is from, but it reminds me of something my mom wore, so my guess is 60s or 70s?  Maybe even 50s?  What do you think? (I don’t know my fashion eras at all!)

It is a refashion from this pretty hideous blazer thing I picked up at the thrift store.  I’m not sure what was going on with the blazer (it had three huge pockets on the front and shoulder pads too!), but I loved the purple plaid fabric.

Do you recognize the pattern?  It’s a remix of the Oliver + S Jump Rope Dress pattern! When I was making Yuki’s Jump Rope Dress, I noticed after the first few steps that without sleeves or a skirt, it made a pretty cute top!  So that’s pretty much what I did.

First I had to pick the pockets off the jacket and then cut out the front pieces, back piece and sleeves.  I didn’t have two pieces large enough for the front and back of the shirt, so the back of the tank top is actually pieced together (you can see the seam running down the middle in the next picture).

I cut the 2T size pattern, lengthening the shirt and followed the directions exactly for the placket and collar.  I shortened the shoulder length (though I could have gone even shorter) and cut the arm hole a little larger.  I used homemade bias tape to finish the arm holes and hemmed the shirt so it’s curved up on the sides.  I added a little pocket on the chest made from one of the original pockets that I had picked off.

I love it!

So for my “signature look,” I paired this shirt with the chambray shorts I made during KCWC.

I thought the outfit was a little simple and so I wanted to make an accessory to “dress it up” a little.  It looked good in my head . . .

I whipped up a little felt flower belt, which I really like.  Just not with this outfit.

But I’m sure you’ll be seeing it around again.  Juuuust not with this outfit.

So that’s it!  Simple.  Summery.  Vintagey.  All the things I’m feeling right now.

Is it just me or did that season of PR&P just fly by!?

Signature Look for PR&P

It’s done!  Finally!  I finished my outfit for the Project Run & Play Sew Along.  The theme was Signature Look.  Like every other week, I thought and brainstormed and mulled for a loooong time and then finally made a decision and ended up cramming in late night sewing sessions just to BARELY get it done in time.  I’m a procrastinator, through and through.  I think THAT’S my signature style!

But really, I think this outfit captures a lot of my signature styles.  Most of my children’s clothes is inspired by adult clothing.  I tend to like clothes that doesn’t look like it’s for kids, but is still totally wearable and appropriate for little tykes.  I like to make clothes for Yuki that I would wear myself.  I think my style leans towards classic, simple, and modern, but can also be soft and feminine.

I decided on three pieces: pants, a top and a light pullover.  Although it’s still on the chilly side here in San Francisco, in my head, I’m in spring mode.  I’m ready for warm weather and wanted to make something for a day at the beach.

We totally lucked out with AMAZING weather today for our photo shoot.  It was perfect for a day at the beach and I had so much fun taking a ton of pictures.  Get ready for a photo overload!!

I’ll start with the top.  Besides some issues with the fit, I really like how it came out.  I was inspired by the fabric.  I had this GORGEOUS double gauze fabric by Nani Iro that I bought awhile back and when I noticed it in my stash I thought it’d be perfect for a spring/summer top.  Double gauze is amazing fabric.  It’s super soft and light and breathable.  It’s meant to help you keep cool in hot weather.  If you ever see some at the store, please buy it and make something beautiful with it.  It’s pricey, but so worth it!!  I can’t find a link to any of this particular fabric online, but just do a search for “double gauze nani iro” and you’ll see some of the stuff I’m talking about.

Anyways, back to the top . . . I just threw in some fun elements like the pintucks and the keyhole in the back to add a little interest to an otherwise simple piece.  I wanted it to look soft and clean so I made sure to have no visible stitches.  It was a fun challenge and I like the finished look.

The second piece is the pullover.  I actually LOVE the way this came out.  I don’t think I’d change anything about it.  I used a cotton/linen blend and wanted to make something to wear in the spring/summer as a cover up when it gets chilly or to put on over a bathing suit.

I decided to line the hood with linen stamped with stars.  Yuki is OBSESSED with stars right now, it’s her favorite word and every time she sees the shape or anything that vaguely resembles it she says, “staaa!  STAA!”  I think it’s awesome because I LOVE stars and had a slight obsession with them myself when I was in high school/college.

So I carved up 2 star stamps and mixed some fabric paint to match the pants fabric and stamped it randomly on some white linen.  I cut out one of the extra stars and appliqued it to the pocket.

I don’t really know what to say about the rest.  I like the loose fit and the star and stitching details.  I can imagine Yuki wearing this a lot.

As for the pants, they came out ok and I love the color, but the fit is not perfect.  They are a little too skinny and might be better in a knit fabric so they don’t feel so tight or restrict movement.  I did have a lot of fun with the details on these though, like the pocket stitching and the faux fly.

Super HIGH rise for that diaper booty 🙂

High rise pants provide full diaper coverage!

And that’s it!  The three pieces that make up my “signature look.”  I’ve had a ton of fun sewing along with Project Run & Play for the last 7 weeks and will probably talk more about that later, but it feels good to be done with my final outfit.  I hope you like it!

Here are my bloopers from today’s shoot.

Ewwww!

And I can’t even tell you what’s going on in this photo sequence, but this is her new favorite move.

Our little yogi/dancer 🙂

I just have to say a huge THANK YOU to Hideko and Yuki for being such big helpers and super troopers through, not only this photo shoot, but the whole Project Run and Play season.

And thanks to you for stopping by and checking out my sewn creations week after week!

Sew & Tell: Yuki’s Dresses

For some of you who have been following my sewing adventures for awhile, this post may be old news.  But in an effort to archive some of my older projects, I’m going to post it anyways.  Over the summer, I got on a dress sewing kick.  I suddenly had ideas for simple dresses and wanted to see if I could make them for my daughter, Yuki.  I based them off of dresses I’d seen, or something similar that Yuki already owned, but I didn’t use a pattern so it was really trial and error sewing.  I learned A LOT from each of these projects.  So here they are and some of the lessons I’ve learned.

Dress #1: Earl Grey Summer Dress (Hideko named this one!)

I had actually bought this fabric to make my friends M&M some cloth napkins for their home.

I had some left over, so I decided to use it for a simple (and a little sophisticated) dress for Yuki.  (I love how little fabric you need to make baby clothes!!)

Lesson #1: Make sure armholes are big enough.  I had to squeeze her arms through from even the first time she tried it on, so she didn’t get to wear it very much.

Dress #2: Sailing Dress

I based this dress off of the popular elastic waist skirts and dresses I’ve seen around.  I topped it with a stretchy striped knit.

Lesson #2: Be sure to measure your model before you cut and sew.  The first time I put together the skirt part of the dress it was WAAAAAAY too big for Yuki.  Instead of taking it apart to fix it, I decided to just sew it up in the back.  But this meant having 3 seams instead of 2 or even 1.  And the side seams were not even on the side anymore, they were pulled towards the back.  Sloppy, sloppy, sloppy.  Luckily, you can only tell if you look real close.

Lesson #3:  Knits are great if you know how to sew them.  If you sew regular stitches on a stretchy material, it will either look bad, lose all of it’s stretchiness, or both.  I had originally made this dress with a normal neckline in front and back, thinking it would just stretch over her head.  But it did not stretch after I had sewn it.  So it would not fit over her head.  So I had to cut the back open and do more sloppy stitching and add a button.

Dress #3: Neapolitan Wrap Dress

Yuki had another wrap dress that we loved her in, so I thought I’d try and make her another one.  The colors on this fabric remind me of neapolitan ice cream.  Yummm!

Lesson #4:  I don’t actually know what the lesson is here.  All I know if that the dress doesn’t fit her too well on the top.  I guess I just need to try things on Yuki as I sew instead of finishing the dress and then realizing that it doesn’t fit.  The problem is, I only sew when she is asleep.

Dress #4: Birthday Dress

I wanted to make Yuki a special dress for her birthday.  When I went to the fabric store I saw this beautiful material with the most precious print and soft feel.  The shop owner told me it was double gauze from Japan.  When I came home I read all about it here.  It. is. dreamy.  It’s really the only word I can think of to describe it.  When I washed and dried it, it had gotten even softer!

Anyways, I’m not really one to dress my daughter in pink dresses with a bow, but I could not help it.  I used a style very similar to the Earl Grey Summer Dress, but used a zipper in the back instead of buttons and added a waistband (that ended up being covered by the ribbon) AND made sure there was more room in the bodice to put the dress on easily (no more too small armholes)!

Lesson #5: Every time you make a mistake, make sure you learn how to avoid it next time.

This 4th dress was by far the easiest and least mistake ridden dress.  I’m happy to say that I have learned so much about sewing and dress making from these projects and I’m very excited to make more!  And I have some lovely polka dot double gauze waiting to be sewn up!