A Handmade Costume at The Train to Crazy

Oy, the first cold of the season has hit our household already.  Between that, craziness at work, and personal projects up the wazoo, blogging is being held up again.  But today I’m sharing a project that not only isn’t old, but is actually early!  I’m guest posting for The Train To Crazy’s Handmade Costume series in preparation for Halloween!

I LOVE Halloween and I love making costumes.  Unfortunately, Yuki does not like wearing them.  She’s old enough now to fight back and take things off if she doesn’t like it.  So this costume wasn’t a win for us – but maybe it will be for your little one?  At least it was super simple, was made from materials I already had at home, and was really fun to make!  Presenting . . .

So head on over to The Train to Crazy to see the full tutorial.  And if you click on the button below, it’ll take you to the series page where there are links to all of the projects that have been shared so far.  The series goes on for another month, so if you’re looking for Halloween costume inspiration, be sure to check back often!

Thanks for checking in and have a great weekend!

Crayon Booklet Party Favors

So before I go back in time to share some of my summer (and pre-summer – eek!) projects, here’s one that I just finished last week.  My daughter recently turned two and we threw a casual little park get-together for some of her kiddo friends and their parents.  Around the same time that I was planning her party, I stumbled upon small + friendly’s new-sew crayon wrap tutorial.  I thought it was genius!  What a simple project to make and perfect for parents of toddlers to whip out at restaurants or whenever they need to distract their little one.  I decided I wanted to make them as part of the party favor for Yuki’s birthday party!

But could I keep it simple?  Could I keep it no-sew?  Nooooooooo . . . obviously not.  I had to go and make it all difficult for myself.  Hah!  Well actually, though did make a few changes and add a few steps, it was still a super simple project and I was able to whip up 17 of these crayon booklets pretty quickly.  AND I had all the materials I needed already in my stash (except for the crayons), so that was a big plus!

So here’s how I used Carla’s tutorial and made my own lil version.  You’ll need:

Felt (I used a wool felt for the outside and acrylic for the inside because that is what I had on hand)
Velcro
Exacto knife
Crayons & paper
Sewing essentials

First, Carla mentions in her tutorial that if you want to thicken your felt to wash it in hot water, put it in the dryer until almost dry and then iron.  My yellow felt was wool, so I decided to give it a try.  But something went terribly wrong!  After washing it, I noticed that the felt was totally coming off in clumps.  It was pilling and crazy-uneven-fuzzy all over and definitely not any thicker.  I threw it in the dryer anyways, but it looked the same when it came out.  I didn’t really take a picture of what it looked like right out of the dryer and after ironing, but here’s what it looked like after I picked off a lot of the loose felt (that ball of fuzz is all the stuff I picked off by hand).

Wool felt isn’t cheap, so I wasn’t about to abandon it.  I just picked off as much as I could and smoothed the rest down with my hands and in the end, I don’t think you can tell at all on the finished product.  It definitely wasn’t any thicker though and I have no clue what I did wrong.  Any ideas?  Has this happened to you?

Ok anyways, I wanted the booklets to fit into these little metal buckets I had bought from the dollar bin at Target, so I had to size mine down.  The size of my unfolded booklet was 5.25 x 7.5 inches.  I added a little tab to my template for the velcro closure.  The original tutorial/pattern has more info about the size and spacing of the slits.  Mine had four pairs of slits for the crayons on the left side and two 2.75 inch slits for the paper on the right.  So here’s what my template looked like:

Using your blade, cut through the lines on your paper template.  Cut a 5.25 x 7.5 inch rectangle from your inner felt.  Lay the template on top and mark the lines using chalk or a disappearing ink pen.  Cut those with your blade.  Using your template as a guide, cut another rectangle WITH the closure tab from your outer felt.

On your outer felt, feel free to add an applique or any other decorations.  Sew one side of the velcro to the tab and the other to the opposite side of the cover about a 1/4 inch away from the edge.

Pin the two layers of felt together with wrong sides together.  Make sure that when you open up the booklet the crayons slits are on the left and the paper slits are on the upper right.

Sew around the edge in a rectangle.

Your booklet is done!  Now to add the goodies . . .

Cut your paper into fourths along the long edge of the paper.  Each strip should be 2.75 inches wide.  Stack the 4 strips and fold them in half.

Slide your crayons in on the left and your paper through the top slit and back out the bottom slit on the right.  The most fun I had was picking out the color combos for the 4 crayons 🙂

And you’re done!  Pretty simple, right?

Now go make 16 more 😉

Thanks to Carla for the fabulous inspiration and tutorial!  I’ve stashed one of these in our diaper bag and I imagine I’ll be whipping it out quite often.

What kinds of “distractions” do you keep on hand to keep your child entertained?  My sister-in-law was the one who taught me to ALWAYS have paper and writing utensils on hand (for any age kid).  And you know what she carries in her purse and has entertained children for loooong periods of time?  A balloon!  Deflated, of course.  Serious (long lasting) fun can be had with a simple balloon.  Genius.

Happy sewing and have a great weekend!!

YOU & mie

I’m baaaaaack!

I went almost an entire month without sewing – CAN YOU BELIEVE IT!?

Summer vacation is officially over and the craziness of back-to-school is upon us.  I had such an amazing summer break and I’ve loved all the time I spent with my family, but a part of me (a small part) is looking forward to the regular schedule of the school year.  Already in the last week I knocked a good 4 projects off my to do list.  Feels gooooood!

I have so many things to catch up on, so over the next few weeks, you’ll probably see a mix of older projects that I never got a chance to post here and current/new projects.  A little bit of late summer and fall mixed together.  I hope you don’t mind.

But while I get myself organized and back in the game, I thought I’d take a moment to share some of the fun creations that have been popping up in the you & mie flickr pool.  If you’ve ever used a tutorial from this blog, or have been inspired to try out a project you’ve seen here, I’d love to see what you’ve made.  Sign up for a free flickr account and add it to the pool!  Every so often I’ll feature some of your awesome creations here.

So thank you to this first group of ladies for sharing pictures of their work.  It makes me soooo happy to see people actually using my tutorials.  Makes the time and work worth it!!
First, there are a few Summer Breeze Tops:

GolfingJulie made this adorable yellow top for her toddler.

037Carol made FOUR tops for her granddaughters for the 4th of July.  She said the pleated placket reminded her of the US flag – how creative is that??

And Tina made this top for herself, adding bust and back darts for a fitted women’s top!

Next there are a couple of Asymmetrical Circle Tops:

044Eleanor made this adorable citrus-y circle top . . .

Asymetrical Circle DressAnd Megzan182 added this sweet photo to the pool of her Asymmetrical Circle Top.  Love that fabric and that smile!!

And lastly we have a few circle skirts from the Reversible Circle Skirt tutorial and these were all created by Mary Jo of All This For Them!

Reversible Circle Skirt ~ side 1Reversible Circle Skirt ~ side 2

First is a reversible skirt, with the cloud applique on one side and Dora on the other.  My daughter would love this!

Two Layers Circle Skirt

Twirly Teacups SkirtThe next two are double layered circle skirts.  Mary Jo used the Reversible Circle Skirt tutorial to make the waistband, but kept the two layers separate.  I love the contrasting fabrics and the wide color bands at the bottom!

A HUGE thank you to these ladies for letting me share their beautiful work with you!  I really do love to see what you guys come up with, so don’t forget to add photos of your you & mie inspired projects to the pool too!

Hope you all have been doing well.  Can’t wait to catch up with you!

My Best Friend at Sew Together

Hello!  I took an unexpected break from the blog and sewing (I haven’t sewed a stitch in over two weeks – yikes)!  It’s officially back to school time over here and that is one of the busiest times of the year for me.  I’m itching to get back to sewing and blogging (I have sooo many projects lined up), but it might be another week or so before I get my head back above water.  How about you?  Is this a crazy time of the year?

But I did want to tell you about a series that is going on right now on the Sew Together blog.  Caroline and Maryanne have invited some bloggers to share about their best sewing friend – “a pattern, a tool, a technique, a blog, a hint or a person who inspires you to sew.”

Head over there to get a peek at my sewing/crafting space and find out what I consider to be my best sewing friends . . . I certainly couldn’t do it without them!!

While you’re over there, you should also check out the guests they’ve already had and continue checking back over the next couple of weeks for some fantastic bloggers sharing about their best friends every few days.

I also just wanted to take a moment to thank all of you readers for always supporting me and giving me inspiration!  You make blogging so much fun!  I’ll be back as soon as possible to share some fun stuff I’ve been working on and some of the things I’ve got on my to do list.  Thanks for stopping by!  Happy sewing!

Washi in Blue

*UPDATE!!! The Washi Dress pattern has been released. Find all the information you need here. GO NOW. You won’t be sorry!*

Did you hear?? It’s WASHI WEEK! What’s Washi Week you ask? Well, the fabulous Rae, from Made by Rae, has an awesome new pattern coming out this week called the Washi Dress and she’s posting a bunch of different versions all week. Ever since she posted photos of the original Washi dress, people have been going CRAZY asking for a pattern and waiting (not so patiently) for Rae to produce a pattern. Well, ladies and gents, it’s finally arriving and it is soooooooooo worth the wait.

I was extremely lucky to be a part of Rae’s pattern testing group and I got to try out the original pattern. There have been many adjustments and improvements made since I tried the test pattern, but even in its draft form, the pattern was phenomenal.

The dress is super cute, simple yet stylish, and very flattering. It has a fitted bodice with a pleated a-line skirt, pockets and a unique cut-out scoop neckline. Shirring in the back assures a perfect and comfortable fit and makes it so you do not need a zipper or button closure. Genius!!! When I saw how professional Rae’s versions looked and considering how intimidating sewing women’s clothing is to me, I thought this pattern would be complicated. But it was surprisingly very simple to sew up!! Rae has labeled this pattern for intermediate sewers, but I think ambitious beginners should certainly give this a try. The trickiest part for me was learning the shirring technique. The rest was a breeze!

The pattern is extremely well written with clear instructions and awesome diagrams. Rae is extremely thorough in her explanations and really goes beyond regular directions to try and help with tips, suggestions and troubleshooting. There is a whole section in there about getting the best fit which I think will be very helpful for people who are new to sewing adult clothing (like me!).

I would definitely suggest making a muslin (Rae talks about it in the directions). This is one of those steps that I always skip, because I don’t like wasting the time or fabric. But coming from someone who hates doing it, JUST DO IT!! This pattern is pretty darn amazing, but no pattern can fit every woman in all our different shapes and sizes. I used some fabric from an old sheet and made a muslin using the front bodice piece and the back piece cut just below the shirring lines. This way I could practice a few lines of shirring and make sure the bust darts and shoulders fit well. Rae offers suggestions for adjustments if you find it necessary. I would have been devastated if I finished the entire dress only to find out it didn’t fit.

The one thing that I screwed up on my dress is the cut out at the neckline – it’s a bit puckered. I was rushing too much when I sewed it together (I’m sorry, I was really excited!) and couldn’t press out the wrinkles. Luckily, my fabric is dark and it’s not too noticeable. But I would recommend taking your time when you sew around the cut out, making sure your cut out is symmetrical and when you flip the facing in, that all your fabric lays nice and flat (this will probably all make a lot more sense when you are making your own).

I don’t have any specifics about this fabric, except that I bought it on my recent trip to Japan at Tomato. It is a navy blue border fabric with eyelet at the bottom and embroidered flowers all over. The print is kind of a funky mix of whimsical shapes resembling clouds, petals and pebbles. It was kind of a random pick when I was shopping and I thought I might make myself a skirt or something. But right after I got back from Japan, the opportunity to test this pattern came up and I immediately thought this fabric would be perfect. And luckily I had JUST enough fabric to do it. It turned out to be a really practical choice for me – neutral and simple, with a little bit of fun.

The Washi can be made as a dress or a tunic, and with cap sleeves or sleeveless. I’m already dreaming up different versions of Washis for me and ways to remix the pattern as well. I can assure you, there are more Washis in my future. Near future, I hope!

Overall, I really can’t say enough good things about this pattern. As someone who does not normally sew for women or from patterns, this one really gave me the confidence to do both. Now I’m psyched to sew more for myself! It’s a very quick and simple sew with impressive results – I bet you’ll get so many compliments when people find out that you made the dress yourself! And it’s a really flattering style for pretty much every body type. I love how it skims right over my tummy and hips. Serious WIN.

You can’t go wrong with Washi. It’s my new motto.

Oh and to see more Washi inspiration, check out Kristin’s awesome Washi, Emmmy Lizzzy’s THREE Washis, and the official Washi Dress flickr pool. I’m telling you, that pool is about to blow up with fabulous Washis.

Ok, ok. Now you can go. 😉

Tutorial: Sunburst Picnic Blanket

Hello!  Thanks for “traveling” with me to Japan last week :P.  I’m still officially on summer vacation, so although I have lots of things to show you, it’s going to take me awhile to get organized and back to blogging.  So here’s another guest post I did for Delia and Kojo‘s FANTASTIC series, Color Your Summer.  This is their 2nd year doing this series, I absolutely love it, and I hope they do it every summer from now until forever.  I can’t even tell you how thrilled I was when Delia asked me to be a part of this series.  Check out all the projects from this summer in this handy round up.

The project is a foldable picnic blanket, and if you get started now, yours can still get tons of use before summer is over and throughout the fall.  And if you do make a picnic blanket inspired by this post or using this tutorial, I’d love it if you added it to the you & mie flickr pool!!

_________________________________________________________________________

When I think of summer, I think of picnics.  When the sun is out, I guarantee that my family will be out at the beach or park with some food and drink to soak up the beautiful weather.  It’s one of my absolute favorite activities.  So this summer I wanted to create a new picnic blanket to celebrate the start of picnic season.

In the past we’ve had a few store bought picnic blankets that we loved for their portability, but they weren’t well made and would start to rip or fall apart after a year.  I wanted to create something that was sturdy and easy to carry around, but had the look and feel of a homemade quilt.  So I made, what I call, the Sunburst Picnic Blanket.

It is a quilted blanket with a duck cloth bottom.  It folds up nicely and is secured with velcro and has a handle for easy carrying.

The design and colors just scream “summer” to me, but of course can be changed to any color(s) or quilt design.  Or if you’re not into quilting at all, you can make the picnic blanket with one piece of fabric for the top.

Here’s what you’ll need:

(My finished blanket size is approximately 55 x 59 inches so these estimates are based on that)
Duck cloth (2 yards)
– Lots of yellow fabric (I had 7 different fabrics, each about a yard)
– Batting (not too thick)
– Bias tape (about 7 yards)
– 1″ wide Velcro (about 12 inches)
– 1″ wide twill tape or other strap material (about 24 inches)
– Coordinating threads
– Denim needle (use any time you are sewing the duck cloth)

First be sure to wash, dry and iron all of your fabrics.  One reader mentioned that duck cloth shrinks even with the slightest amount of wetness, so don’t skip this step!!

Cut your duck cloth slightly larger than your desired blanket.  Then we need to make a pattern for the quilt top.

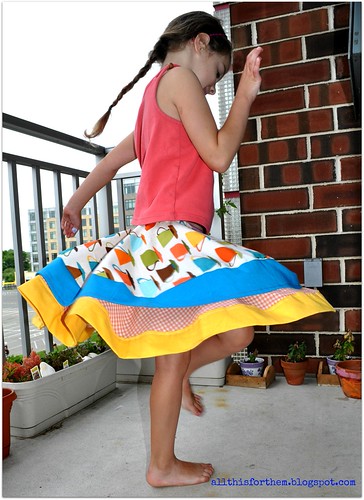
As I was deciding the best way to create the design I had in my head, I realized that it strongly resembled Kristin’s Sunshine Dress!  I LOVE this dress, so I’m thinking I was subconsciously inspired by it and lucky for me, Kristin made a tutorial for piecing together the color blocked pieces.  I basically followed her tutorial for creating the pattern pieces and cutting the fabric.  I’ll show you the basics of what I did for the quilt, but you really should check out her tutorial and one of the most gorgeous little dresses ever.

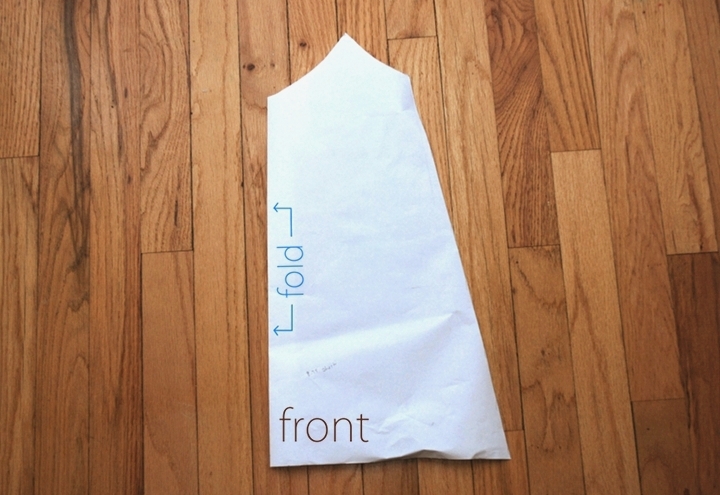
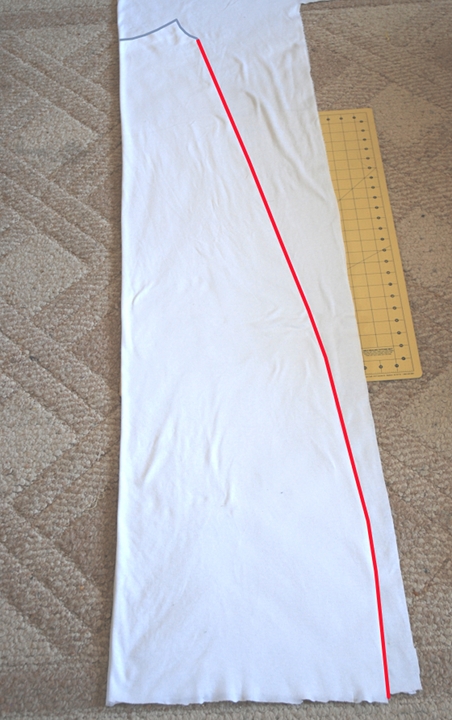
I had a piece of butcher paper the exact width of my blanket, so I used that to make my pattern.  I started by making the pattern for the top half of the quilt, but I wanted the epicenter of the rays to be off center, so I made the top ever so slightly longer than the bottom.  I picked a spot off to one side where I wanted my rays to shoot out from and I started drawing lines to the outside edge of the paper.  I made 7 rays since I had 7 different yellow fabrics.  Then I labeled them so I could piece them back together after they were cut (awesome advice from Kristin).

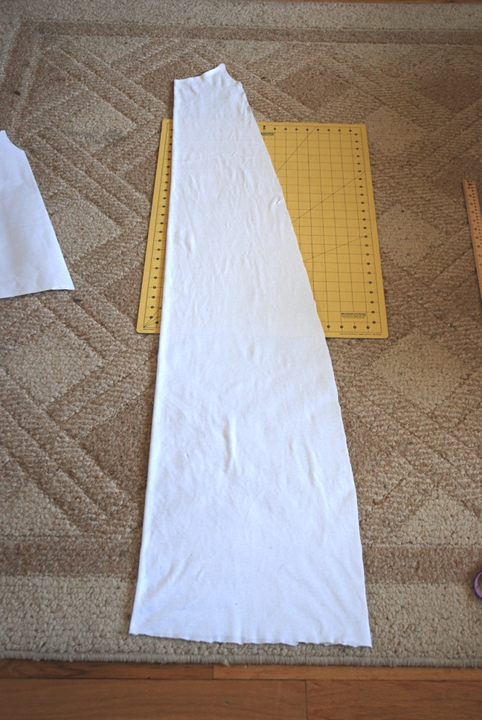
Then I cut the pattern pieces out and traced them onto my fabric.  Remember that if you want your finished quilt to look exactly like the pattern you drew, you’ll need to put the pattern right side up on the right side of your fabric OR flip your pattern over and trace onto the wrong side of the fabric.  When you trace your pattern onto your fabric add 1/2 an inch for seam allowance along each of the long edges.

I found it easiest to only cut out the pieces as I was ready to sew them.  So I cut out pieces 1 and 2, and sewed those together.  Then I cut piece 3 and sewed that to piece 2 and so on.  That way I didn’t mix up the pieces or get confused about which piece or which side to sew next.

When you sew the pieces together use a 1/2 inch seam allowance and always start from the point.  Try to line up all the points as carefully as possible so it looks sharp.

After you sew each piece on, press and trim extra seam allowance off.  There is going to be a lot of fabric gathering at the center point, so you’ll want to remove what you can.

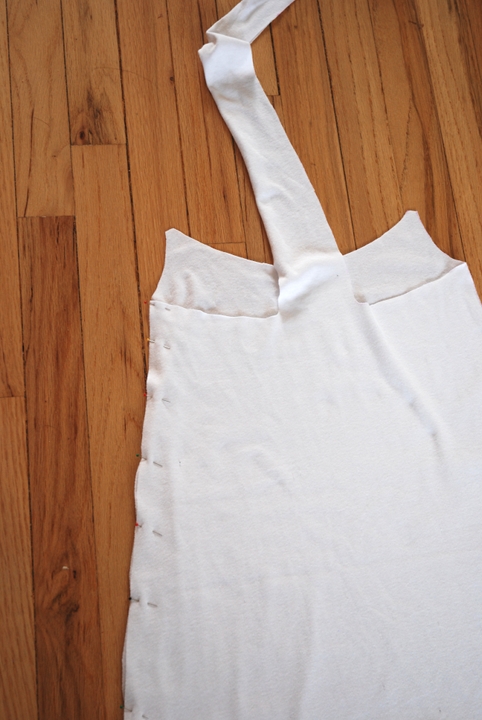
When you sew all the pieces of the top half, it should look something like this.

Trim the extra fabric at the point, if you haven’t already.

For the bottom half, I simply flipped the pattern over.  By laying the top part of your quilt and the pattern pieces on top of your cut duck cloth, you can see the finished length of the quilt and trim the pattern pieces since the top part of the quilt is longer than the bottom.

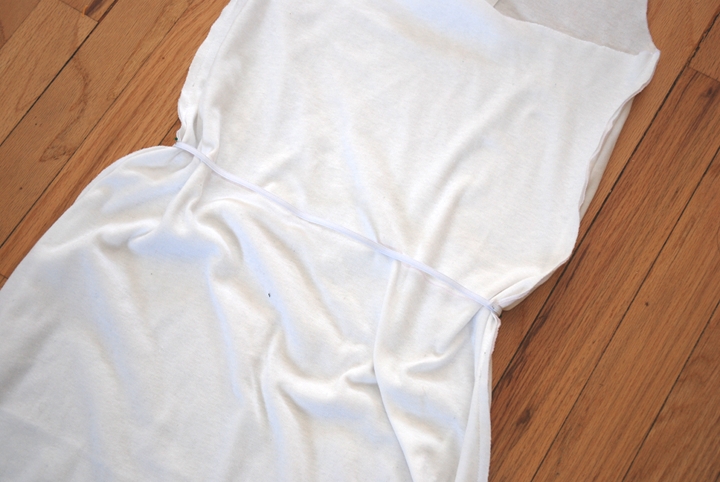
Repeat the same steps to create the bottom portion of your quilt top.  When you’re done, lay the bottom part on the top part, right sides together, and making sure the all points come together exactly in one spot.  Since your top and bottom are mirror images of each other, the rays should line up.  Pin the pieces together and sew them together using a 1/2 inch seam allowance.

Press the seam open.  There will be a lot of fabric coming together at the center point so it’ll be tough to press open, but just do your best and it’ll look fine.   Your quilt top is done!!

Layer your duck cloth, batting and quilt top and trim the sides so they are straight.

Baste the 3 layers together so they don’t shift while quilting.  I use the safety pin method.

Quilt the three layers however you’d like.  I quilted each “ray” about 1 cm on the inside of the seam creating large V shapes, using a walking foot.

Since none of the V’s reached the center of the quilt and that was where it was the thickest, I decided to freehand quilt a little star in the center.  You can’t see it from the top, but SURPRISE . . .

There it is on the bottom!

Now on to the closure flap (the piece of fabric with the handle and the velcro – I don’t know what else to call it).  First measure the width of your quilt.  Then divide that by 5.  My quilt is 55″ wide, so my closure flap is 11 inches wide.  You’ll need to cut a piece of duck cloth and coordinating fabric that is the width that you just calculated by about 11 inches.  So I had a square.

Use something circular to round 2 of the corners.  The edge with the rounded corners is going to be referred to as the bottom of the flap.

Baste or pin the two layers together so they don’t shift while completing the next few steps.

Take your twill tape and sew it onto the fabric side (not duck cloth side) along the width about 4 inches down from the top of the flap (the edge without the rounded edges).

Take another piece of twill tape and fold it under 1/2 an inch.  About 1.5 inches from the edge, pin the twill tape down.

To make sure the handle is firmly secured, sew in a square and add an X between the corners.  Go over each line several times.

Do the same thing on the other side except add an extra 1/2 inch of strap before you cut, so the handle stands up a bit.

On the duck cloth side of the flap, attach the soft side of the velcro 1/2 an inch above the edge with the rounded corners.  Trim the velcro to match the rounded corners.

Finish the edges with bias tape.

Line up the center of the flap with the center of the top edge of the quilt.  Pin them together with the handle side of the flap facing the duck cloth side of the quilt.

At this point I decided to round the 4 corners of my quilt as well (no dealing with mitered corners!!).  Finish the quilt with bias tape.

We’re almost done!  All we have to do is add the other side of the velcro to be able to close up the quilt.

First we have to fold up the quilt and here’s how:

1. Lay the quilt out flat, with the flap out at the top.

2. Fold the two sides in till the edges line up with the edges of the flap.

3. Fold the sides in again so they line up with the flap.

4. Fold it in half.

5. Fold it in half again.

6. Fold it in half one more time and pull the flap down.

Mark the placement of the velcro.

Then unfold the quilt and sew the scratchy side of the velcro according to your markings and you’re done!!

Grab some family and friends, some food, drinks, games or books and head out into the sun!

And in case you want to see how to fold up your new picnic blanket again, I made my first gif ever!

Hope you get some good picnicking in this summer and fall!  Please let me know if you have any questions or need me to clarify anything.  I love to hear from you!
By they way, what’s your favorite summer activity?

Summer Journal #3 – Hokkaido

Happy Friday!

So a couple of days ago, I posted photos from the first half of our adventures in Japan.  Today I have pictures from the second half of our trip.

After spending a few days in Tokyo doing some shopping, sightseeing, getting together with family, and going to a festival, we hopped on a plane to Hokkaido, the northernmost island of Japan.  Hideko’s father was from a small town there, so we went to his hometown and were joined by more family and together we visited his grave (ohakamairi).

After that, we did some sightseeing and went to an onsen (hot spring hotel) where we basically hung out in pajamas for two days taking hot baths in natural spring water and eating lots of food.  Awesome huh?

On the road again

Yuki took almost all her naps on us while we were traveling (on buses or trains).  She was literally a HOT MESS.  Ugh.

SUSHI!

Ohakamairi

Hokkaido miso ramen

This was the sweetest, juiciest, most delicious melon I’ve EVER HAD.  Each melon costs $38.

Showa-shinzan

Cool light fixtures in our hotel.

Our room

Our monkey

Super cold river!!

And then we were finally on our way back home.

Flying into Narita

And after hours and hours and hours of traveling, we arrived safely back in San Francisco.  It was a great trip, but it felt sooooo good to be home.

I wish I could have taken pictures of the gorgeous hot springs, especially the ones outside (think HOT natural bath surrounded by beautiful trees and mountainside), but that would have been pretty awkward (did I mentioned that everyone is completely nekkid in the baths??)

Anyways, thanks for coming along with me on my little Japan recap.  Although we had a ton of fun and everything went as smoothly as we could have hoped for, it certainly was not easy.  We had plenty of meltdowns (and not just the baby), jet lag totally kicked our butts and we resorted to all sorts of things we never thought we’d do just to get through the day.  We learned a lot about traveling with a toddler and I’ll try to share some of those things soon.

And I promise that I’ll get back to sewing posts eventually.  I just don’t know when.  🙂

Have a great weekend, wherever you are!!

All images are copyright protected.  Please do not use without permission.  Feel free to contact me if you have any questions.  THANK YOU!

Summer Journal #2 – Tokyo!

A couple of weeks ago we took a family trip to Japan for Hideko’s father’s 15 year memorial.  It was a very quick 9 day trip and it flew by in a flash.  We spent a few days in Tokyo with Hideko’s immediate family (8 of us, total) and then flew up to Hokkaido to visit Hideko’s father’s hometown (where we were joined by some of his immediate family – at this point we became a group of 14) and then we spent 2 days at a natural hot spring hotel.

It was an amazing trip, but let me tell you, traveling with a toddler is not easy!  I don’t think I’ve ever been so tired, meltdowns were had by all, and we’re STILL trying to recover from jetlag.  Luckily, we had a lot of advice from you guys about traveling with a toddler (which I plan to do a post about at a later date), but we also had family with us at all times and that was a HUGE lifesaver.

Usually when I travel I’m a total shutterbug, but having a little one to chase after really held me back.  I think I only busted out my DSLR on 2 days.  Thank goodness for phone cameras!  As I was posting the pictures, I realized there were too many for one post and my poor computer was struggling to keep up with me.  So here are some photos from the first half of our trip in Tokyo.  Most of the photos are iPhone pics that have been “instagrammed.”  Hope you enjoy!

Cousins waiting at the airport before our 10+ hour flight to Japan

Sensoji Temple in Asakusa

Tokyo train

Yuki wearing her new jinbei before her first Japanese festival

Tanabata Festival in Hiratsuka

Wishes

Parade of dancers

Watching from the sidelines with her new friend

Breakfast

Taxis (they wait in line at stations and people wait in a line too, so everyone gets a cab in the order that they came)

Some gorgeous Nani Iro fabric that I bought in Nippori.

I read about Justine’s fabric shopping trip here and got some advice from the very awesome Novita of verypurpleperson about where to fabric shop in Tokyo.  Unfortunately I had VERY little time, so I only got to go to one (huge) store.  I wish I could have spend the whole day there, but it was cool to check out the “Textile Town” – it was somewhere I’d never been before!  I did get a few more fabrics besides this, but you’ll have to wait and see those come out in various projects since I didn’t photograph them.  What do you think I should make with these??  The bottom one is a super soft knit and the top two are a super soft double gauze.  I can’t imagine cutting into any of them!!!

Harajuku

Oh, how I LOVE convenience stores in Japan.  They are just so freakin’ fantastic (and yes, I took a bite of that bread before I took the picture).

The view from 52 floors up.

Haneda Airport.  And we’re off to Hokkaido!!

Stop by (hopefully) later this week for the rest of our adventures in Japan 🙂

All images are copyright protected.  Please do not use without permission.  Feel free to contact me if you have any questions.  THANK YOU!

Shorts on the Line!

It’s week three of the Shorts on the Line series!  Aren’t shorts the perfect summer staple for everyone’s wardrobe?  They’ve had some fantastic inspiration, tutorials and pattern reviews for boys, girls and women’s shorts over the last 2 weeks.  Check out the week 1 and week 2 recaps.

Today I’m doing a pattern review for Figgy’s Banyan shorts over on Designs by Sessa!

I like how these classic shorts turned out and will definitely make more (and the pants version too)!  It’s awesome the pattern fits up to size 8/9, so this pattern will last me a loooong time.  And you know I love me a unisex pattern!  Go check out all the deets here.

Tutorial: Braided Beach Maxi

Here’s another summer addition for your wardrobe and you can make one for your little one too!  This was for Melly’s Sews’ 30 Days of Sundresses series.

________________________________________________________________

Children’s clothing is kinda my thing, so I naturally started brainstorming lots of cute summer frocks for little ones.  But for some reason I landed on an idea for a women’s sundress and I couldn’t get it out of my mind!  So, enter my beautiful little sister who is modeling for you the Braided Beach Maxi Dress!

The best thing about this is that it is super simple with very little sewing!  It’s made of knit and has a few unfinished edges which makes it very casual and perfect for a bathing suit cover-up.  I got this knit for $2.39 a yard, so it was very affordable too!

And just in case you were really hoping for something for your little one, don’t fret!

Yup, I couldn’t resist.  After the first one, whipping up a mini version was a breeze!  The tutorial is for the adult maxi version, but you can alter this to fit just about anyone!

So here’s what you’ll need:
– 2.5-3 yards of knit fabric
– 1/4 or 1/2 inch wide elastic for the waist
Sewing essentials

I used a plain white knit to make the dresses and then dyed them afterwards.  This tutorial will not include instructions for dyeing, but if you’re interested I’m sure there are tons of resources online.  Otherwise, use any solid or patterned knit fabric and you’ll be done even faster 🙂

To make your front pattern piece, grab a knit (stretchy) camisole, fold it in half down the front and trace the neckline and armhole.  From the armpit, draw the side of your pattern into an A-line shape.  You want the dress to fit nicely around the chest and then widen from there.  I only drew the top part of the pattern, but keep in mind that the dress will extend far past the bottom of this pattern.

To draw the back pattern piece, lay your front piece down on paper and trace it from the armpit (tiny yellow star) down the side and across the bottom.  Trace along the other side (marked “fold”) stopping about 2 inches from the top of the pattern.  Remove the top pattern piece and draw a curved line to connect the sides.

Now, if I were to make this dress over again, I’d want the braided straps to be thicker, so I’d make this next measurement bigger.  But for the sake of this tutorial, I’ll just describe it the way I did it and you can make adjustments accordingly.

Measure 1.5 inches in from the “fold” line of your pattern and make a mark.

Extend both the “fold” line and the mark that is 1.5 inches in a few inches.  This is going to become the braided racerback and straps.

Your pattern pieces should look like this when cut out.  Keep in mind that when you cut your fabric, it will extend past the bottom edges of the pattern and for the back piece, the strip coming off the top will also be much longer (see the red arrows).  I made my patterns like this to save paper, but don’t cut your fabric like this or you’ll have something very very different!

To cut the front piece of the dress, fold your fabric in half lengthwise.  Measure the desired length of the dress from just below your armpit and add a few inches.  Place your pattern on your fabric accordingly.  From the bottom of the pattern to the bottom of the fabric I just cut in a subtle curve getting wider and wider towards the bottom (I tend to “just wing it” A LOT.  Thank goodness knit is so forgiving!).

To cut your back piece, fold your fabric in half lengthwise and place your front piece on top.  Now you can’t see it in this picture, but my fabric extends for another yard above.  THIS IS VERY IMPORTANT!  You’ll need all that extra fabric above the pattern piece to cut your strap material.

Now trace the entire side of the dress from the bottom up to the armpit (red line).

Remove the front dress piece and place your back pattern piece lining up
with the armpit.  (You like how many times I’ve had to use the word
armpit in the tutorial??  I probably should have said “bottom of the
armhole” or something.  Ooops, oh well).

Trace the pattern along the curved edge and up the straight line, then use a ruler to extend the line all the way to the edge of your fabric, keeping it 1.5 inches from the folded edge the whole way.  I had a little less than a yard, but I wish I had had more.  The longer you have, the more you can do with the straps later.

The hard part is over!  Now it’s the fun part 🙂

Open up your front and back pieces and place them right sides together lined up at the armpits.  Pin along the side of the dresses and sew.

Now find where the smallest part of your waist it (you may need to hold the dress up to your body or try it on) and mark a line 2 inches below that on both sides of the dress (wrong side is still out).

Cut your elastic to your waist measurement.  Overlap the ends of the elastic by 1/2 an inch and sew them together to create a loop.

Slide the dress through the elastic loop and pin the elastic to the dress on the sides.  The dress will be wider than the dress, so you’ll have the pull the elastic as you so.  Go slowly and make sure the elastic right on top of the line that you drew.

Right side out:

Now take the long strip of fabric coming out of the back of the dress and cut it into three even strips.  Mine was originally 3 inches wide, so I cut it into three 1″ wide strips.  Braid the strips for about 2.5 inches.

Then, cut those strips in half, so you now have 6 strips.  Take three strips and braid them all the way to the end, then tie a knot to secure the braid.  Make another braid with the other three strips and you should have a nice braided Y like below.

Flip the dress over to the front and making sure the straps are not twisted, pin them to the front of the dress.  Sew the strap to the front of the dress.  Go back and forth a few times to make sure they are secured firmly to the dress.

This is optional, but since my knit was so stretchy, I decided to bring the neckline in a bit with some gathers.  Using your longest straight stitch, sew along the edge of the neckline without back stitching at either end.  Pull one of the threads to gather the fabric for a few inches in the middle.

Pin your excess braids along the neckline of the dress and do a quick whipstitch to attach it.  Make sure to catch only the back of the braid so the stitching does not show in the front.  For the adult version, I brought the braids to the center and overlapped them.

For the kid version, I had more braid to work with so I brought one side all the way to the other and tied a bow.  I’m sure there are many options for what you can do with the neckline here!

Now just trim the bottom to the desired length.  I left the bottom unfinished, but you can hem it if you want.  The armhole/back of the dress is also an unfinished raw edge.  I like the casual look (and the fact that it requires less work).  But if you want a more finished look, you can attach bias tape from the front along the armhole and then work the extra fabric into the braid.

You’re done!!!  Now throw this baby on and go frolic in the waves!

I really hope you guys give this a try!  Doesn’t it look fun?  If you do make a Braided Beach Maxi Dress, please add it to the you & mie flickr pool so I can see your awesome creations!

Before I go, I just wanted to say a big thank you to my sister for being my lovely model!

Take it easy, everyone!  Happy summer and happy sewing!