Tutorial: Summer Breezes Top

I thought I’d bring some guest posts back to the blog, in case you didn’t catch them earlier.  This one was for Project Run & Play’s Flickr Friends series and it’s a great addition to any summer wardrobe.  I recently was sent a photo via my FB page by Tina who made one for herself!

________________________________________________________________

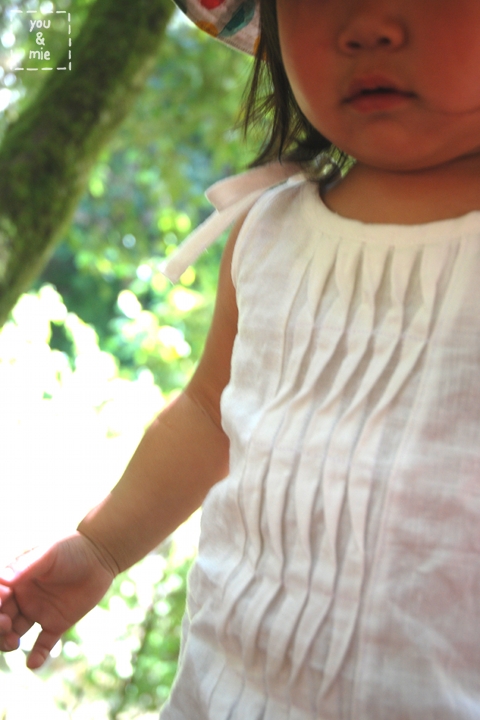
Summer weather is upon us and my daughter needs lots of warm weather tops for outdoor play this season.  I’m going to share a tutorial for my latest top, the Summer Breezes Top.

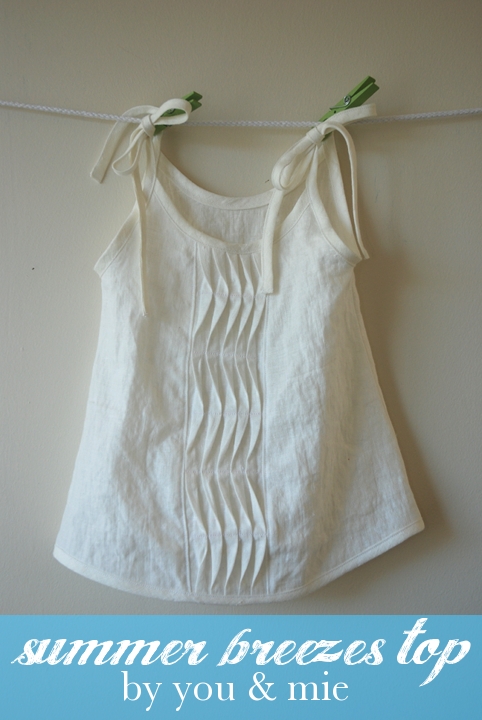
I saw a tank top in a store about a year ago that used this type of “wavy pleats” (as I like to call them).  I knew I wanted to copy the style, but wasn’t sure how I wanted to do it.  Recently, this technique started popping up around blogland and I decided it was time to share my take on it as well.  The waves created by the changing directions of the pleats reminded me of a summer’s breeze, hence the name of the top.

The top is made of white linen, which at the time seemed like the perfect simple breezy summer top.  But now I’m kicking myself wondering what I was thinking!  A white top for a messy, dirt-loving toddler made of linen, the most wrinkly fabric ever?  Awesome job, Cherie.  Nice.  So I’ll let you choose whatever is appropriate for your kiddo.

This top is finished off with bias tape, so feel free to make your own or use store-bought in either a matching or contrasting color/pattern.  Feel free to brighten it up with some colors!

Ok, let’s make one together!  Here’s what you’ll need:
– 3/4-1 yard of lightweight fabric
– A few yards of bias tape (store bought or homemade)
– Sewing essentials

First you have to make your pattern.  I have to admit, I don’t have an exact science for this, so I hope you can experiment with drafting your own.  To keep it simple, I made one pattern to use for both the front and back of the top.

I started with a straight vertical line which is the center fold of the pattern piece.  Then I used a top that fit my daughter and traced the neckline.  Mark the bottom of the arm hole and draw a curved line up to meet the neckline.  From the bottom of the armhole, draw a line (I flared mine out slightly for an A-line shape) that is the desired length of the top.  From there, draw a slight curve back to the vertical center line.  You will not need to add seam allowance to the neckline, armhole or bottom since we’ll be finishing these off with bias tape.  You will want to add seam allowance along the side seam.  And there’s your pattern!

Now we’ll make the pleated placket (I’m not really sure what else to call it).  Cut a rectangle out of your main fabric that is at least 8 inches wide and a couple inches longer than the length of your pattern.

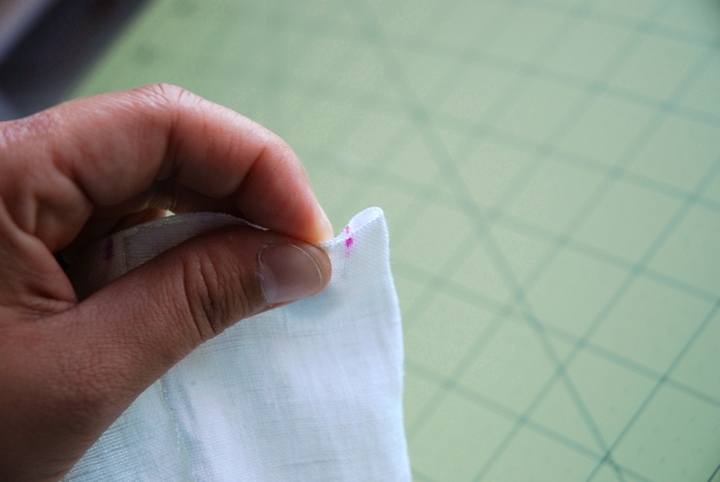
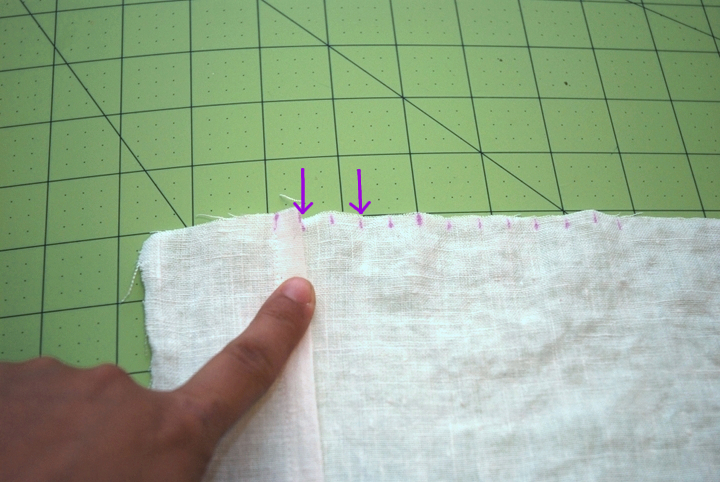
Find the center of your rectangle by folding it in half lengthwise and marking it.  I wanted my pleats to be 1 cm each, so I made 7 marks on either side of the center, each 1 cm apart.  Do the same on the bottom of the rectangle.

Starting from the left, make your pleats.  Folding your fabric with wrong sides together, the first and third marking should match up and the 2nd mark is where the fold is.

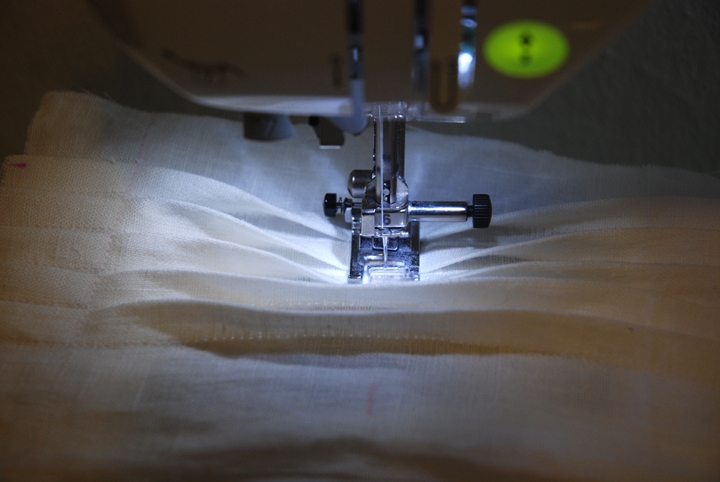
Press your fold and sew along the length of the fabric 1 cm from the folded edge.

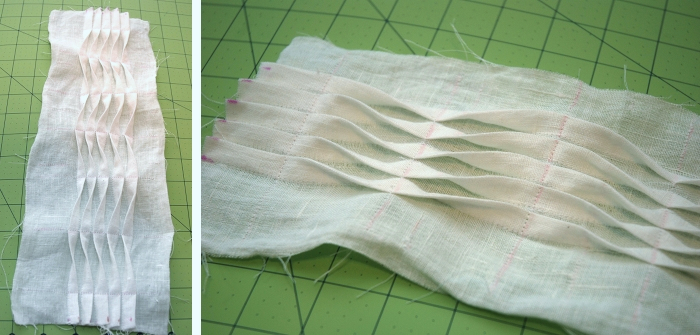
Press your pleat and fold it down toward the right.  Make your next pleat using the next three markings and continue until you have five pleats.

When they are all pressed down toward the right, they should look like this.

Sew a line across the top of the pleats about 1 inch down from the top.   Change the direction of your pleats by folding them towards the left.  Mark a line 2 inches down from your first line with chalk and sew.

Continue changing the direction and sewing down the pleats every 2 inches until you get to the bottom.

Cut out two pieces of fabric that are each larger than your pattern piece.  We’re going to attach the pleated placket before cutting out the pattern piece (less math).

Trim the edges of your placket piece to about 1/2 an inch on either side.  With right sides together, sew the placket to the edge of one piece of fabric, and then repeat with the other side.

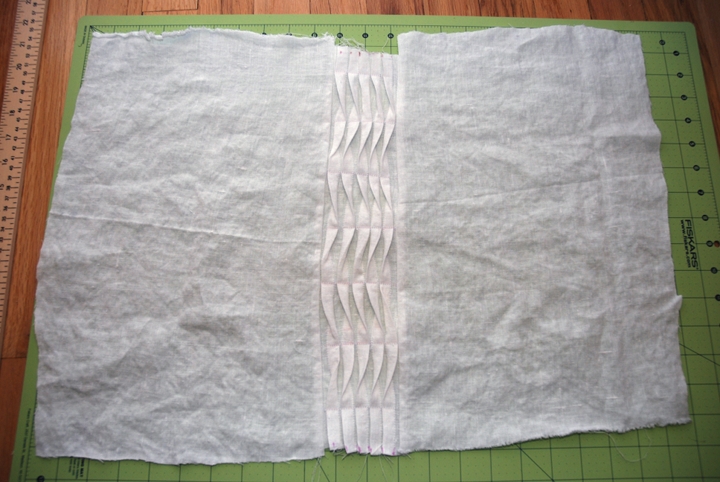
On the wrong side, trim the seam allowance to 1/4 inch and finish by serging or zig zag stitching.  Press away from the placket, then on the right side, top stitch along the edge of the placket.

Fold your fabric in half, making sure to fold right down the center of your pleated placket and trace your pattern piece.  Cut it out.  Cut out the back piece from a piece of fabric as well.

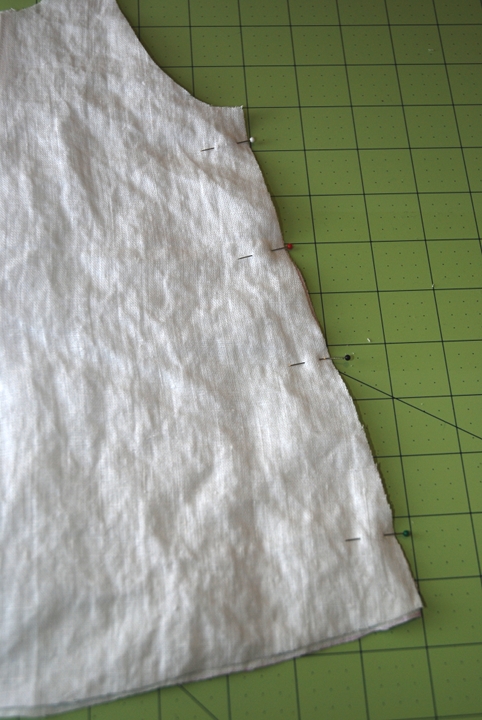
Pin the sides of the top, right sides together, sew, press and finish edge.  Repeat on other side.

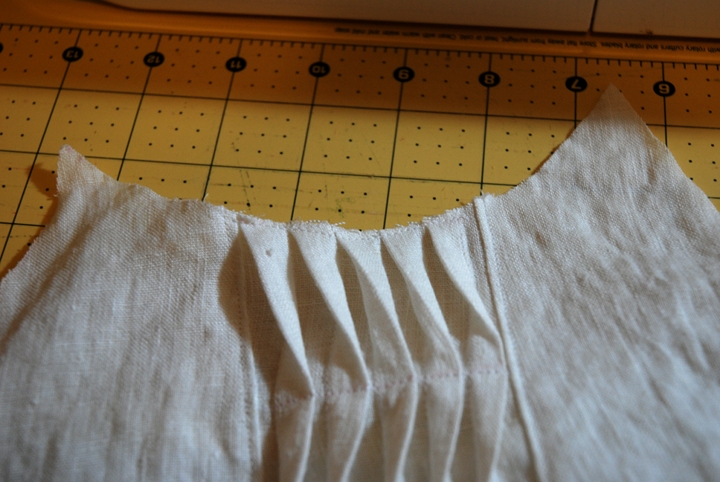
Baste the pleats along the neckline of the top to keep them folded in the correct direction.

Open up your bias tape and pin it along the edge of the neckline, right sides together.  Sew along the fold closest to the edge.

Fold the bias tape over the edge of the neckline, press and pin.  Make sure the edge of the bias tape is covering the stitching on the wrong side.

Top stitch just above the edge of the bias tape making sure to catch the edge on the wrong side.  Trim off the extra bias tape and repeat for the back.

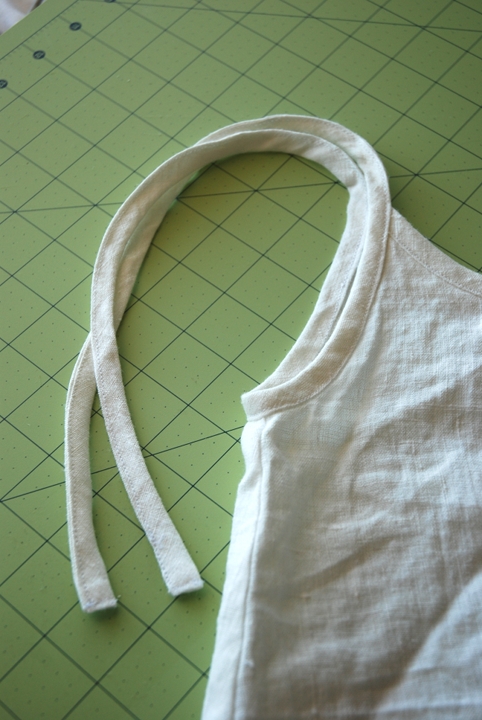
For the armholes and straps, we’ll do the same thing.  Leave about 12 inches of bias tape for the strap then start pinning the open tape to the edge of the armhole.  Measure another 12 inches of bias tape when you get to the other end of the armhole and cut.  Sew the bias tape along the armhole, fold the bias tape back up and when you get to end of the straps, fold it in about a 1/4 inch before folding it up.

Sew the ends of the straps closed, then top stitch along the edge of the bias tape closing up the straps and finishing the armhole.

For the bottom of the shirt, normally I’d just hem it by folding it up twice, but with all the extra pleated fabric, I thought it’d get too thick, so I finished it with bias tape as well.

Done!

I hope you enjoy some nice summer weather!

Summer Journal #1

Summer is in full swing and things are busier than ever – except this busy, is the GOOD kind of busy. So while I wish I could do it all – spend time with my family and sew and blog – my priorities are exactly in that order, so sewing has slowed down and blogging has almost stopped.

Meg at elsiemarley.com decided to start a summer journal through her blog and instagram and invited others to join in. During the summer months when kids are home from school, I guess projects and blogging takes a back seat for a lot of people. So she’s doing simple photo centered posts about what she and her family are up to – as she says, “a little window into our summer days.” I thought it’d be fun to share some fun family photos of mine, since I don’t have time to blog, but I’m addicted to Instagram.

So here are some pics from the last couple of weeks. I won’t explain each one, but the short version is – camping, a solo trip to LA to meet baby Logan and hang out with my dad, escaping the San Francisco fog, lots of family time and lots of fun!

Oh, and I wanted to say THANK YOU to all of you who responded to my This Summer post with suggestions for traveling with a toddler. I really really appreciate all the great ideas and encouraging words and I know that your advice will be invaluable when we travel. I’ll definitely let you know how it goes!!

Hope you are doing well! Enjoy the photos!

Happy summer to you!

Guest Post for Sum Sum Summertime!

Another summery post for you, today at this heArt of mine.  Amy is hosting a fun summer series with everything from food and fashion to gift ideas and artwork.

I’m sharing a really simple and fast summery accessory.  It’s a rectangle vest with a twist!

It can be worn as a vest, a wrap, a bathing suit cover-up, etc. – it’s quite versatile!

So hop on over to this heArt of mine for the short and sweet tutorial.

(Told you we’d be doing a bit of blog hopping this month.  Hope you stick with me through all the traveling :))

Guest Post for Color Your Summer II

Oooh, another guest post and today, it’s for Color Your Summer II, a series I LOVE and on one of my favorite blogs ever, Delia Creates. I feel very lucky to be a part of this fun series.

Today I’m sharing a foldable quilted picnic blanket that just screams, “SUMMER!”

Check out the full tutorial on Delia Creates and while you’re at it, you should take a look at all the colorful projects on both her site and at Kojo Designs.

Hope you have a colorful and sunny weekend!

This Summer

WOOHOOO!  I’m officially on summer break for the next month and a half and I’m. so. excited!  And while I thought that time off work would mean more time for sewing and crafting, I was terribly mistaken!  I seriously thought it would be a great time to catch up on neglected projects and tackle a few big ones that I’ve had on my list for awhile.  But somehow we’ve managed to completely fill the next month and a half with 4 trips (big and small), which means very very little sewing/blogging.  But I’m not complaining!  We have some awesome adventures lined up and you’ll be hearing all about them.

While we’re talking about traveling, one of the trips we’ll be taking is to Japan.  It’s a big family gathering for Hideko’s side of the family and a pretty short and tightly packed trip.  While we’re excited that we’ll get to bring Yuki to Japan, we’re also really nervous about traveling with an almost 2 year old.  The flights are about 10-11 hours, plus there will be shorter domestic flights and lots of train rides, etc.  So here is where I was hoping you all could help out.  What have your experiences been traveling with a toddler?  Any suggestions regarding long flights, jet lag, foreign places?  I know that you probably have some amazing ideas and since this will be our first time taking Yuki abroad, we could really use some help!

One thing I’ve heard is bringing lots of snacks for the plane and new toys/activities.  Since Yuki has become a huge eater, I think having an arsenal of never ending food will be key.  I’m going to be borrowing an iPad for the flights, which I’m hoping will be pretty intriguing to her.  Any must have apps for a 2 year old?  I’ve also started brainstorming some fun and engaging activities, games and toys for the plane, but I could certainly use more.

A specific concern that I have is that Yuki has recently started to YELL. REALLY LOUDLY.  Not necessarily when she’s upset (though she has her tantrums too) – she yells when she’s excited, or bored, and wants attention.  And when I tell her firmly that it is too loud and not ok, she does it even more.  And when I completely ignore her and try not to give her attention, she does it even more.  I’m particularly nervous about this because of the plane rides and being on the trains in Japan (where people are very quiet!).  Anyways, I realize this is a whole different issue, but I’d love to hear your thoughts on this as well.

So I apologize if the blog feels a bit empty in the coming weeks.  It’s not that I don’t love you – I’ll be thinking of you every step of the way!  Hehe 😛  I do have a few guest posts coming up still and I hope to be able to share some of my adventures and smaller projects with you.  I hope you have some fun things planned for your summer too!

Guest Posting at Melly Sews: 30 Days of Sundresses

Have you been following along the 30 Days of Sundresses on Melly Sews?  From June 1-30, there is a new sundress EVERY DAY, even Saturdays and Sundays.  That’s inspiration and tutorials for 30 different dresses!  For babies, kids and adults too.

Today I’m sharing my Braided Beach Maxi Dress modeled by my lovely sister.

It involves very little sewing and was so easy that I whipped up a matching one for Yuki!  But you’ll have to go over there if you want to see it 🙂

How are you doing?  Able to put it any beach time?  I am ITCHING for my summer vacation to start!!  Just one more week . . .

Guest Posting at Project Run & Play!

Doing a bit of blog hopping this week.  Today I’m over at Project Run & Play sharing my Summer Breezes Top.

The pleated placket was a fun and easy way to jazz up an otherwise very simple top.  Check out the full tutorial HERE.

It is really exciting to be sharing over on PR&P today because their sew-along was really what started it all for me, in a way.  They are having tutorials from sew-alongers all month and then skirt tutorials all next month, so go check it out!

Later this week I’ll be popping over on another great blog with another summery tutorial.  I hope you don’t mind traveling a bit with me 🙂

Every Little Thing Tunic

So back when I tested the Maxwell Shirt pattern by Shwin & Shwin, I also tested the Every Little Thing Dress/Tunic pattern.  I liked that it was a very simple and versatile pattern with potential for lots of remixes.  But as a tester, I stuck to the pattern for the first one.  I made size 12-18 month, which actually came out bigger than I was expecting – but it was a plus for me since it meant Yuki could wear it longer.

(I wish I could tell you about this fabric.  I love it.  I only had a tiny bit of it and I saved it forever waiting for the right project.  Then I realized that Yuki was getting so big that I wasn’t going to be able to do much with that tiny scrap.  I’m glad I finally used it.  If I find more info about the fabric, I’ll update this later)

*Update: So the owner of the fabric shop that I got this fabric at said that it is Alexander Henry, though she doesn’t remember the name or line.*

The top has a lined bodice with a slightly gathered skirt piece.  It can be made as a tunic or a dress and has instructions for pockets.  It also has a large bow on the front.

The bow adds something fun and funky to the tunic, but is not totally my style.  After I washed the top, the bow came out pretty wrinkly and I couldn’t figure out how to iron it out nicely, so I just picked it off and now Yuki wears it all the time without the bow.  I do think it looks a little plain, like it could use a little something to add interest, but for now I’m happy with it like this.

(Recognize these $1 sandals?)

It’s a great little top that I imagine she’ll wear all season long and even into the fall/winter with a long sleeved shirt underneath.

And it’s nice having a standard lined bodice pattern that I know will fit and I can use for lots of different things.  I made some adjustments for fit and shape and used it for the Double Ruffle Top and the red jumper for the Mei-chan outfit.

If you’re looking for a simple tunic or dress pattern, I would recommend this one.  It’s definitely something that you can use over and over again.  And learning how to make this kind of lined bodice with a button closure is very useful too.  The PDF pattern is available for download for sizes 6-9 months through 4T and you can get it HERE.

Happy summer sewing!  Can you believe it’s June already!??

Itty Bitty Doll Quilt

So while things seem to be pretty quiet here on the blog, I assure you, I’ve been very very busy.  I have 4 guest posts coming up in the month of June (FOUR!), and I’m feeling a bit stretched thin.  The good news is I’m SUPER EXCITED about all of the fun series coming up and I’m truly honored to be included in them (you can check out the buttons on the right – I’ll be adding another one soon :)).  But I do worry that I’m neglecting my own blog and personal projects too.  I hope you don’t feel neglected! 😉

So for the next few weeks, you’ll probably be getting a mix of some old projects that I never was able to share, a few new ones and guests posts here and there.  Then in July we’re off to JAPAN!!!  That’s right – Japan.  It’ll be a really short trip (one week) and with Hideko’s whole family (6 adults and 3 kids) and I’m both really excited and totally nervous (traveling with an almost 2 year old – eek!).  Anyways, I could go on and on about this, so I’ll dedicate a whole post to it some other time.

Ok, on to today’s project.  Sooooo . . . one evening at work, a co-worker leaves the building and then 2 minutes later comes back telling me that there is a doll crib out on the street that someone is dumping and that my daughter NEEDS it.  Really?  My daughter NEEDS it?  I’m quite sure my daughter NEEDS nothing – our tiny apartment is filled to the brim with toys and books and other things that no one actually needs.  And a doll crib?  Yeeeeah, I dunno about that (we tend to shy away from a lot of girly-girl things over here).  But I went to check it out anyways.

It was BIG.  But it was wooden, vintage-looking and kinda cute.  It had a drop side and came with a vinyl covered “mattress” and pillow.  I decided I would take it home and see what Yuki and Hideko thought.  I could always put it back on the street if we didn’t want to keep it.  But of course, Yuki loved it and after a good scrub down it joined all the rest of the stuff in her room.

I knew immediately that I wanted to make some bedding for it, but I didn’t want to buy any new fabric, so I put together a primary color based bedding set out of some flannel and cotton scraps.  I’m not IN LOVE with it, but it’s pretty cute and matches some of Yuki’s favorite dolls.  And since it’s so small and simple, I can always switch it up every so often if I want 🙂

I started with this flannel that I had, which is blue, red, yellow and green.  Then I went through my scraps and pulled out some coordinating cottons for the quilt.  I realized that I don’t have a ton of primary color fabrics!  My choices were limited.  But here’s what I came up with.

(I just realized that we had the pillow at the foot of the bed!  Oops!)

I made a regular ol’ pillow case and the “mattress” is covered in an envelope style cover.  I wanted to make a quilt for a  blanket, so this took a bit longer that the other pieces, but it was fun.  And it came together WAY faster than a real sized quilt – yay for instant gratification!

Now, I should just say that I am NOT a quilter.  I don’t know much about real quilting.  But I made this and so I thought I’d show you how I did it, though there may be better, more accurate or easier ways to do it.

The finished size is based on the size of the crib and is about 14×20 inches.  Based on this long and narrow shape, I decided on rows of squares – 5 x 7 (35 squares total) and each finished square is 2×2 inches.  You can decide how many rows/columns of squares you need based on the desired size and shape of your quilt.

First, I cut 35 3×3 inch squares.  I had 2 fabrics in each of the 4 colors, but you can have as many or as few different colors and fabrics as you want.  Lay them out in your desired grid.

Now I wanted the finished quilt to have a grid of colorful squares with a cream strip running between each row and column.  But I didn’t want to have to cut up a bunch of small cream strips and sew them in between each square.  So I came up with a “short cut” method that probably took just as much time. 😛

So I sewed together the columns first.  This was eventually going to be cut, so just basting them quickly with a 1/4 inch seam allowance was sufficient.  Press the seams open.

Then I cut 4 strips of cream cotton that were 1.5″ wide and as long as my columns.  I sewed the columns together with a 1/2 inch seam allowance inserting a cream strip in between each colored column.

Trim seams and press open.

Then I cut the rows apart.

And sewed them back together with a 1/4 seam allowance inserting a 1″ wide cream strip between each row.  Press.

Then I added a flannel cream colored border to each side.

I didn’t want to have to mess with quilt binding, so I just placed the quilt top and the flannel backing right sides together, added a layer of batting on top, sewed all the way around leaving an opening, trimmed the corners, turned it inside out and top stitched the entire edge.

For quilting, I just picked a few squares and sewed around the inside edge and then for some other squares I sewed around the outside of the square.  Random, I know.

But Yuki approves, so that’s all that matters!

Sleep tight!

Sleeveless Jump Rope Remix

I recently posted about this refashion/remix of the Jump Rope Dress (a pattern by Oliver + S).  Well I loved it so much that I made another one!

Yuki wore this shirt in my post for Vintage May yesterday too.

I made a few changes since the last one and I like it even better!  Except I’m still quite attached to the fabric from the first one.  But the fabric for this one was inspired by the Vintage May series going on over at Skirt as Top and Craftiness is not Optional. It was originally from my mom’s stash and she’s not even sure where she got it from – she said it might be from my grandmother’s stash!  Vintage for sure, either way.

So you’ll need to start out with the Oliver + S pattern for the Jump Rope Dress.  The pattern comes with two views, both super cute dresses.  I made View A recently and it was my first Oliver + S pattern.  Their patterns are great because you learn some really solid basics like in this case, how to make a button placket and a collar.  When I was putting the dress together, I noticed how cute it was without any sleeves.  So here’s an easy way to remix the pattern to make the perfect summer top.

You’ll need the pattern pieces for the collar, placket (2 pieces), and View B dress pieces, front and back.  Before your cut your fabric, we’re going to make some changes to the pattern.  We’re first going to adjust the armhole.  I took off about an inch from the shoulder.

Then we’re going to shorten it from a dress to a shirt (though this would make a mighty fine sleeveless dress too).  Make a new line about 1/2 an inch below your desired shirt length.  I used the bottom of the pattern to make a similar curve to the original.

Now you’re ready to cut out your pieces.  1 dress front, 1 dress back, the 2 placket pieces, and 2 collars.  You’re also going to need a rectangle for a pocket (mine was about 3.5 x 6 inches for a size 2T top) and 2 strips cut on the bias for finishing the armholes.

To prepare your pocket, fold the two sides and bottom in and press.

Fold the top down twice, press and top stitch.

Follow the Oliver + S directions for creating the placket.  Then attach the pocket to the shirt front by top stitching along the sides and bottom.  It’s always a good idea to do some extra stitching at the top corners for extra reinforcement.

Follow the pattern directions to sew the shirt front and back together at the shoulder and make and attach the collar.  With the shirt inside out (right sides together), sew up the sides of the shirt.

Prepare your bias tape by folding it in half lengthwise and ironing it.  Fold the two edges in to meet the center fold and press, creating fourths.

So I totally forgot to take pictures of the of the armhole finishing steps, but there are a ton of great tutorials out there, like this one.

Now just hem the button of the shirt, make some buttonholes and sew on your buttons and you’re done!!

It’s the perfect summer top!  I really like the A line shape of this top compared to the first one.  The only thing that I regret is that in an attempt to make the process faster I skipped the interfacing in the collar and placket.  I would NOT recommend it.  The collar is all limp and wimpy and the placket would look sharper with interfacing.  I learned my lesson.

I love having this basic pattern that I can remix in countless different ways.  Maybe a sleeveless dress?  Or a short sleeve shirt.  Or I can mix and match lots of different kinds of sleeves.  Or I can make it for a boy.  Ooh, or add a knit waistband!?

Oh dear.  I’m getting carried away, aren’t I?  Anyways, I hope you have fun remixing your Jump Rope Dress pattern!  And have a great loooooooooong weekend!