
My second make for Kids Clothes Week was a Charlie Dress for Yuki in some beautiful new nani IRO double gauze. I love it. I really do.

My second make for Kids Clothes Week was a Charlie Dress for Yuki in some beautiful new nani IRO double gauze. I love it. I really do.
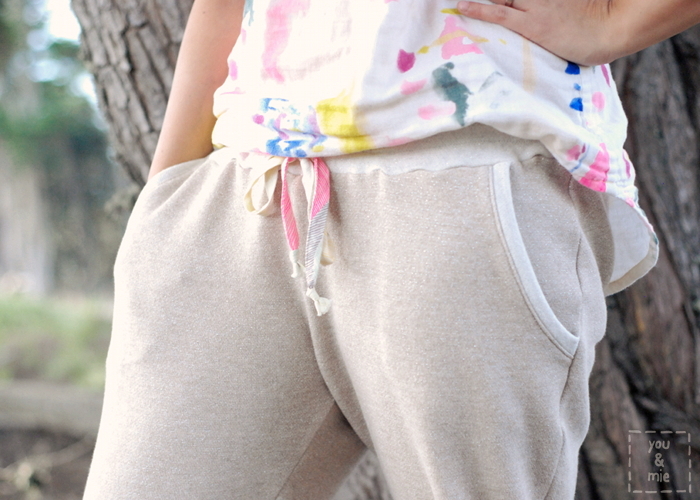
Hey! It’s Kids Clothes Week! It’s been awhile since I’ve fully jumped into Kids Clothes Week, but I was feeling motivated to make some new duds for the 4 year old. I had completely stopped making clothes for her at some point because she was rejecting all the stuff that I was making. But now she’s really into dresses, skirts and tank tops and all those things that I made 1-2 years ago! Lately, she’s been grabbing this skirt a lot (which makes me super happy), so I thought I should add another to the closet.

Hello!! I hope that, for those of you who celebrated, you had a wonderful Thanksgiving filled with friends, family, gratitude and food! I’ve been enjoying a bit of a break from sewing and blogging recently, but I’m here today with a long overdue Miss Matatabi Makers project!
Alright, so I know Halloween is over and people are already moving on to *gasp* Christmas!? But I’m behind as always and like to drag my feet as much as possible when it comes to all things, but especially the holiday season 😛
So I’m sharing this super last minute costume that I made for Kaya for Halloween! The Nightmare Moon costume I made Yuki took up pretty much aaaall my time the last couple of weeks, but somewhere in between I got it in my head that I wanted to make another costume for Kaya too. She already had a (slightly too short) Totoro costume, but I really only made that for the tutorial and I considered it a back up costume. I know, I’m crazy like that.


Phew! This Halloween costume has been in the works for, what feels like, fooorever. It’s ridiculous when I start thinking about just how much time (and money) I’ve spent on this kid’s Halloween costume! But it was such a fun challenge for me – I really love making Halloween costumes!! I get a lot of enjoyment out of trying to figure out ways to translate a picture or a character into something tangible, an outfit, or a costume. So here’s the back story . . . Continue reading
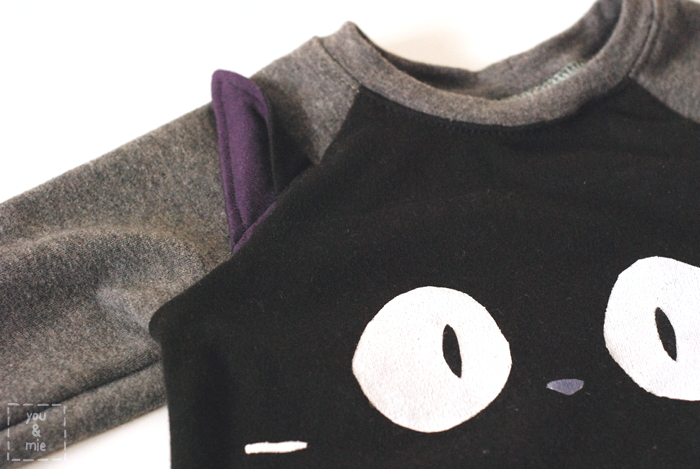
So so so much sewing going on over here! I wish there were more hours in the day so I could sew more! But who doesn’t right? I’m here with a post for Sew Geeky, a fantastically nerdy series hosted by Sew Chibi and Max California. Each month, they pick a theme and invite some people to sew along with them! In fact, everyone can sew along! Everyone is encouraged to celebrate their inner geekiness!
This month’s theme is Studio Ghibli. I jumped on this opportunity, because I’m a HUGE Ghibli fan. If you’re not familiar with Studio Ghibli movies, I urge you to go and look some up and watch them immediately. The director/writer/producer that is most strongly associated with Studio Ghibli is Hayao Miyazaki and he has created some of my favorite movies. He is the genius behind My Neighbor Totoro, Princess Mononoke, Spirited Away, Ponyo, Howl’s Moving Castle and many others. And Studio Ghibli has produced other amazing movies as well, like Grave of the Fireflies, Arrietty and Whisper of the Heart. Seriously, go watch them all now. Continue reading

A month ago, I talked about a bunch of clothes I had made a month before that, and well . . . I still haven’t blogged half of it. So two months later, but here are some dresses I made. 😛
The fabric may be familiar to you . . . it’s from Heather Ross’ Briar Rose Jersey Knits line. It came out about a year ago and it was all over the place at the time – I feel like everyone was making cute things with them! Strawberries! Knit fabric! Cute! But since I’m not one to follow the crowd (*cough* I’m actually just super lame), I decided to sew with this fabric when it’s not so popular and no longer available. Haha. Continue reading
Watermelon Week! All watermelon! All the time!
So yesterday I shared the watercolor watermelon invites that Yuki and I made for her party. But what would a watermelon party be without a special watermelon dress? I was having a hard time deciding between a color blocked dress that mimicked a watermelon slice like this one, or a solid fabric with watermelon printed all over like this one. I was leaning toward the color blocked dress since that seemed easier, but finally I just asked Yuki and she said, without hesitation, the all over print dress.

Besides the summery “Elsa” dress, I made 6 other garments for the girls before our trip to Florida and they are all MATCHING outfits (3 things for each girl)! Haha. Didn’t really think that I was the type to go all crazy with matching sibling outfits, but I can’t help it – it’s just too cute! I hadn’t made anything matching since their panda shirts, but Yuki really gets a kick out of it, and whenever she’s wearing her outfit, she usually wants Kaya to put on hers too.

Anyways, these projects are also exciting to me because they are SWIMSUITS. I don’t know about you, but sewing swimsuits has been on a different level of sewing in my head. Something a little more intimidating than regular kids clothes, it just seemed complicated and tricky. The fabric, the elastic, the fit . . . I was nervous to try it, but since I love learning new skills, I was also really excited to try it.
I know, I know, the last thing the world needs is another Elsa dress!! But here’s one for ya anyways 😛
So a month ago, my family and I traveled across the country to Florida for a reunion. We stayed in Fort Lauderdale for the first part of the trip, but we figured we might as well hit up Disneyworld while we were all the way out there! I knew there was a good chance that we wouldn’t be going back out to Florida any time soon and we also knew that Yuki would have an absolute blast.
But I kept hearing horror stories about the Florida’s heat and humidity. So between the unavoidable heat and all the fun activities we were going to be doing, I came up with a sewing list that was ridiculously long. Then I had my very own Kids Clothes Week and though I didn’t even get through half my original list, I did make 7 pieces of clothing in about a week or so! I’ll be sharing them throughout the next couple of weeks. First up, Elsa’s summer dress.


